
Helper Light: Diffuser Techniques April 12, 2016 – Posted in: Photography – Tags: advanced diffuser techniques, diffuser techniques, diffuser tips, helper light, picture perfect lighting, roberto valenzuela
This article is an excerpt from Picture Perfect Lighting by Roberto Valenzuela
Diffusers are among the handiest of light modifiers. They are inexpensive and portable. In simple terms, diffusers break up the harsh directional rays of the sun into multiple directions, resulting in diffused light. I own a large variety of diffusers, from small ones that are 12″ in diameter to a large 6′ x 4′ diffuser called the Sun-Swatter by California Sunbouce. The size of the diffuser is not the only feature you can choose. The thickness of the diffusing material also matters considerably. Clearly, the thinner the material, the more light will pass through the diffuser toward your subjects. The most common choices offer between one stop of diffusion (the thinnest material) and three stops of diffusion (the thickest material). I recommend that you choose one-stop and two-stop diffusers, which equip you with the most options.
ADVANCED DIFFUSER TECHNIQUES FOR PORTRAITURE
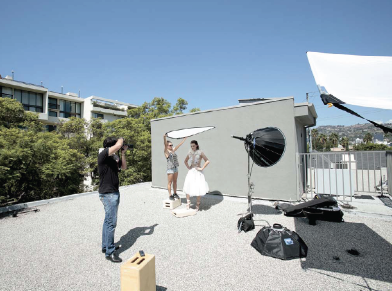
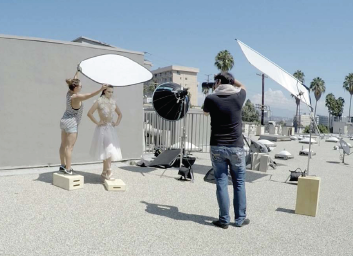
Much like using a reflector, covered in the previous chapter, using a diffuser seems self-explanatory, but it’s not. There are some ways to use a diffuser that can greatly improve your results. Let’s go through a series of photos of Caitlin that showcase a progression of different diffuser techniques until the final result is achieved.
No Diffuser Used
We begin the shoot with no diffuser at all. With the exception of high-fashion photography, this look will not be pleasing to most people. The only way to work with harsh direct sun like this is to adjust the pose to the light.
Clearly, here we did not adjust the pose. The harsh results and strong shadows on her face are the result of working under strong directional sunlight with no diffuser to distribute the light.
Diffuser Not Pointed Toward the Sun, Further Away from Subject’s Head
This photo demonstrates an ineffective way to hold a diffuser. First, the diffuser should be as close to the subject as possible in order to increase the intensity of light reaching the subject. In this photo, the diffuser is being held higher above Caitlin’s head than it needs to be. Second, the diffuser is not tilted toward the sun. This greatly reduces the amount of diffused light that reaches the subject.
This is the result of holding the diffuser further away from the subject and not tilted toward the sun. This photo—along with the rest of the photos coming up—were all taken with identical camera settings: ISO 100, f/5.6, 1/400. Therefore, the brightness level differences that you’ll see are only caused by the various methods of holding a diffuser, not by any changes in the camera settings. As you can see, the photo appears to have even light because the diffuser spread the light around. However, the light that reaches Caitlin is weak and has no vibrancy to it.
Diffuser Not Tilted Toward the Sun, Closer to Subject’s Head
Now we have the diffuser much closer to Caitlin’s head, which increases the intensity of light illuminating her. However, the diffuser is still being held in the wrong way to maximize diffused light intensity. The diffuser should be tilted toward the sun and not parallel to the ground.
Keeping the camera settings exactly the same as in Figure 9.10, we can see that moving the diffuser closer to the subject’s head made quite a difference in the brightness levels. Caitlin seems to be receiving 60–80% more light.
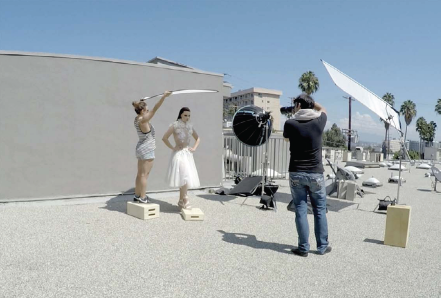
Diffuser Tilted Toward the Sun, Further Away from Subject’s Head
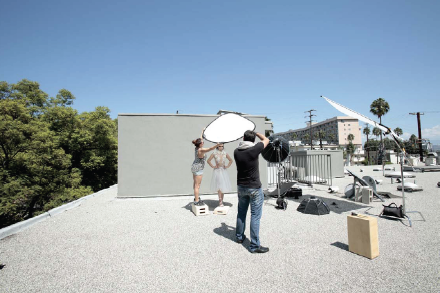
It is very important to note that when using this technique of tilting the diffuser toward the sun, the subject should also be facing the sun. Otherwise, it would be counterproductive. In this example, I positioned Caitlin to face the sun and asked my assistant, Franny, to tilt the diffuser toward the sun but as far from Caitlin’s head as her arms could reach. I did this purposely in order to demonstrate how much diffused light you lose when you hold the diffuser high over your subject’s head.
The first thing you might notice is how much warmer the light is on her body. This occurs because the light illuminating her body and face is straight diffused sunlight. Before, when the diffuser was not tilted toward the sun, part of the light illuminating Caitlin was shade fill light, which has a blue colorcast. Compare this photo with Figure 9.10. The tilt of the diffuser also increased the light intensity on Caitlin.
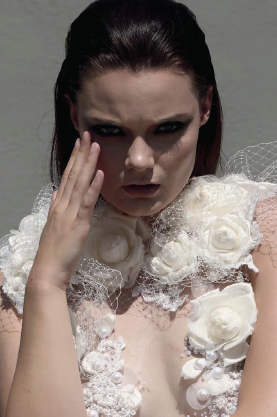
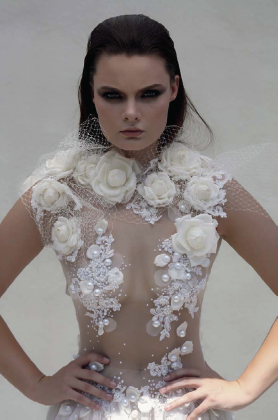
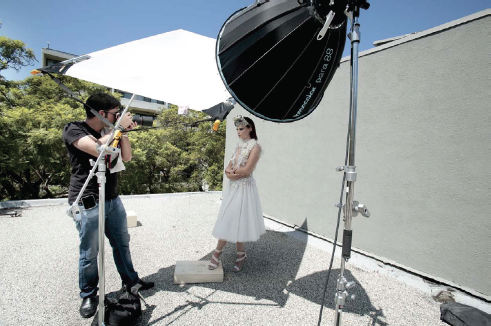
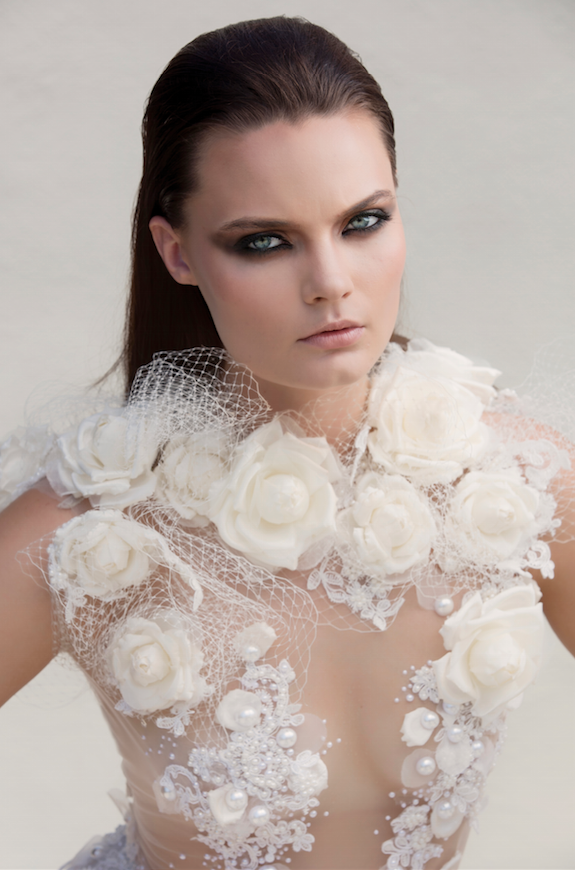
Diffuser Tilted Toward the Sun, Closer to the Subject’s Head
This is the most effective setup when using a diffuser, as it maximizes the light intensity on the subject. The subject is facing the sun. The diffuser is tilted toward the sun. Finally, the diffuser is held as closely as possible to the model’s head without being visible in the photo.
We have come a long way in our effort to increase the quality and intensity of the diffused light from Figure 9.10. The camera settings were never changed, yet this photo has more than twice the light illuminating Caitlin. All we had to do to achieve this result was have the model face the sun, tilt the diffuser toward the sun, and hold it as closely as possible to the subject’s head.
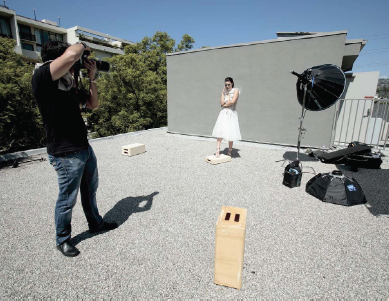
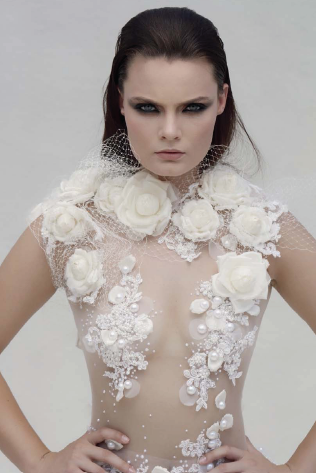
Diffuse and Light
This photo features the powerful combination of diffused light with a strobe. Even when using a diffuser correctly, often the subject’s eyes will remain dark. To take this beautiful diffused light to the next level, use a strobe to give the photo a pop and also add catchlights to the subject’s eyes. I use this diffuser/strobe combination about 80% of the time because it really gives the images a high-end magazine look. Note that the strobe must be modified to become a large-enough light source to produce soft light. In this example, I used a diffuser panel attached to a Broncolor Para 88 to further soften the light.
This article is from Picture Perfect Lighting by Roberto Valenzuela – available now!