How Do I Use Brushes in Lightroom? March 29, 2016 – Posted in: Photography – Tags: dodge and burn tips, lighten skin in lightroom, Lightroom, lightroom brushes, lightroom tips, scott kelby
We know of all the features Adobe Lightroom has to offer. The problem is that sometimes we don’t know the best ways to use them. In this post Scott Kelby helps answers all your questions involving using brushes in lightroom by sharing a few key tips from his book, How Do I Do That in Lightroom? The Quickest Way to Do The Things You Want to Do, Right Now!
How Do I…Dodge and Burn (Lighten and Darken Specific Areas)?

In the Develop module, click on the Adjustment Brush (K) in the toolbar below the histogram in the right side Panels area. Now, the standard method for dodging (brightening) is to drag just the Exposure slider to the right (with all the other sliders set to zero; double- click on the word “Effect” near the top of the tool options to reset all the sliders to zero) to brighten areas as you paint. For burning (darkening), drag that same slider to the left, darkening the exposure, and then paint over the areas you want darker.
How Do I…Resize All the Sliders to Zero?
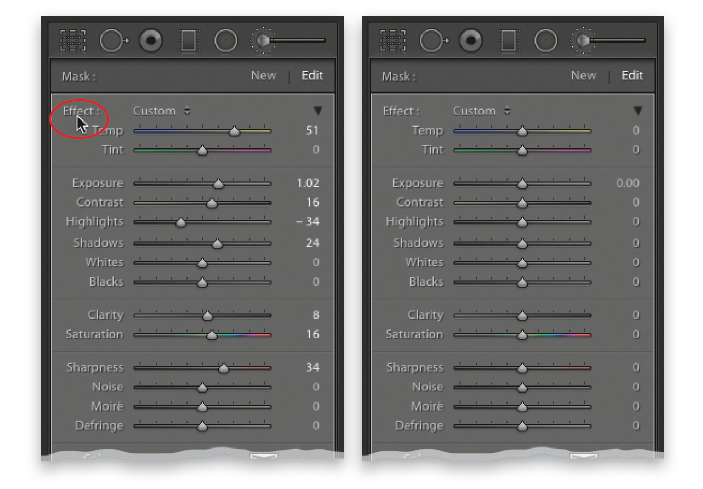
Just double-click directly on the word “Effect” near the top-left corner of the Adjustment Brush panel (in the Develop module’s right side Panels area; as shown here circled in red), and it resets all the sliders to 0 (as seen above right).
How Do I…Remove Spots or Specks?
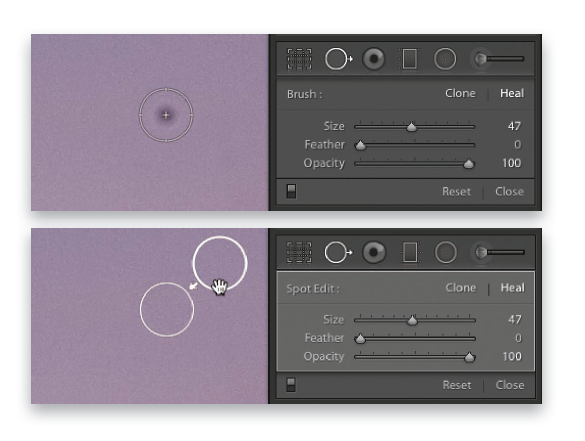
In the Develop module, click on the Spot Removal tool (Q) in the toolbar near the top of the right side Panels area. Resize your brush, so it’s a little bit larger than the speck or spot you want to remove (as seen above top), and just click once. The tool will sample a nearby area to use as a source for the removal (see the second circle on the bottom above? That’s where it’s sampling from). If for any reason the fi x looks odd (it picked a bad spot to sample from, which defi nitely happens from time to time), you can just clickand- drag that second circle—the one it’s sampling from—to a different location to get better results. Also, you can click-and-drag on the edge of the circle to resize it, and you can click-and-drag the fi rst circle (the one where you clicked—it has a thinner border) if you were a little off when you fi rst clicked over the spot you want to fi x.
How Do I…Fix Washed Out Skies?
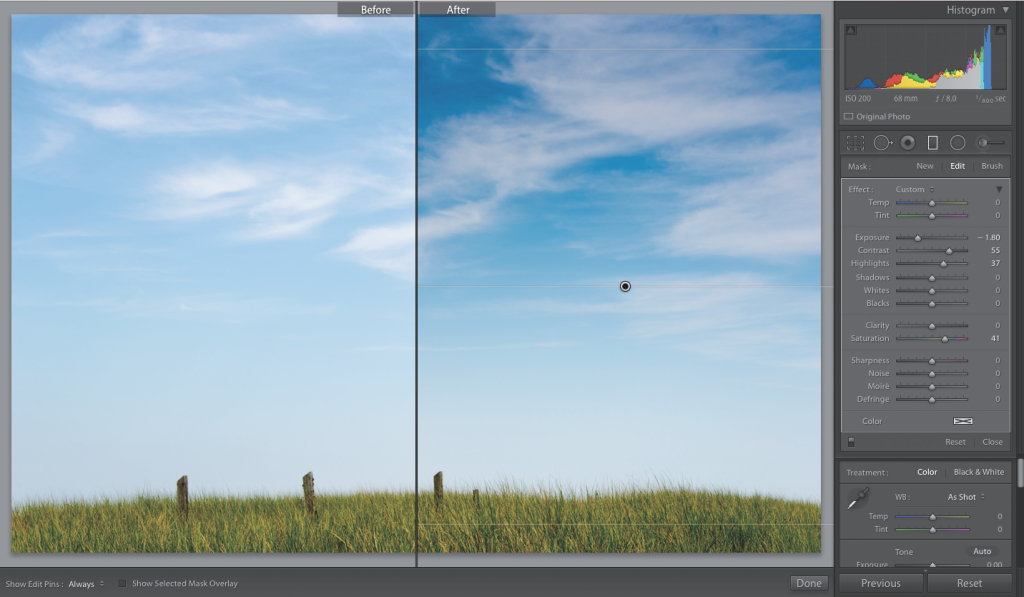
Get the Graduated Filter tool (M; it has the same basic settings as the Adjustment Brush, but it’s not actually a brush—you click–and-drag it in a direction), and start by resetting all the sliders to zero (double-click on the word “Effect,” as you just learned a couple of pages ago), and then drag your Exposure quite a bit over to the left. Now, take the tool and click-and-drag from the top of the image down to the horizon line, and it darkens the top, then gradually fades down to transparent, like a real neutral density gradient fi lter would if you put one on your lens. Of course, you can do more than just darken the sky: you can boost the contrast (drag the Contrast slider to the right), or the vibrancy of the color in that part of the sky (drag the Saturation slider over to the right), and increase (or decrease) the highlights in the sky using the Highlights slider.
How Do I…Soften Skin?
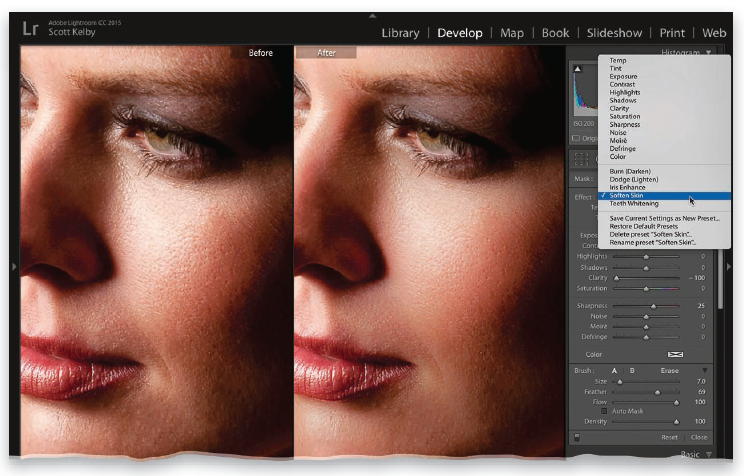
Click on the Adjustment Brush (K) in the toolbar near the top of the Develop module’s right side Panels area, and near the top of the panel, immediately to the right of the word “Effect,” you’ll see the word “Custom.” Click on it and a pop-up menu appears with a host of presets put there by Adobe with ideal settings for particular tasks. Choose Soften Skin from this menu (as shown here), and it puts in some pretty decent settings for skin softening. Now, all you have to do is take that brush and paint over your subject’s skin to soften it (while remembering to avoid detail areas, like their eyes, lips, edges of their nostrils, eyelashes, eyebrows, and hair).
How Do I…Fix the Brush When It Isn’t Working?
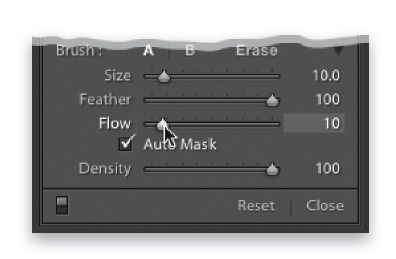
If you go to your Adjustment Brush and either it doesn’t seem to be working right, or it seems very weak, there’s a good chance that your Flow and/or Density settings are set very low, or are set to zero. Drag ’em back up and you should be up and running again.
How Do I…Keep from Painting Outside the Lines?
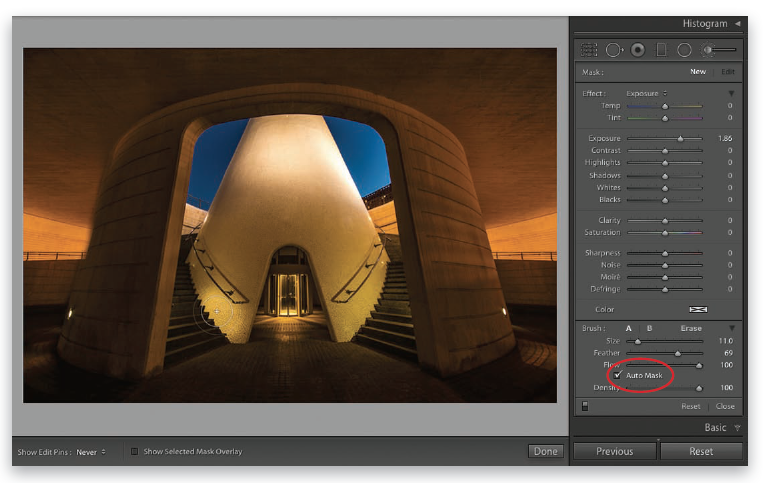
Turn on the Auto Mask checkbox (near the bottom of the Adjustment Brush options)— this helps to keep you from accidentally having your brush spill over onto areas you didn’t want affected by it. With this turned on, only the area under the little plus-sign crosshair in the center of the brush will be affected (see the image above where I’m painting on the wall to the right of the stairs on the left, and even though my brush is clearly extending over onto the stairs, it doesn’t brighten the stairs at all because the crosshair is still over on the yellow wall). Note: Having this feature on does tend to slow the brush down a bit because it’s doing a lot of math while you paint, trying to detect edges as it goes. Also, if you paint over an area and it seems to not cover the area evenly, you might turn off Auto Mask and repaint over that area. As a general rule, I leave Auto Mask turned off most of the time while I’m painting, but as soon as I get near an edge I don’t want to affect, I turn it on for just that part of the edit.
How Do I…Keep the Mask Overlay on While I’m Painting?
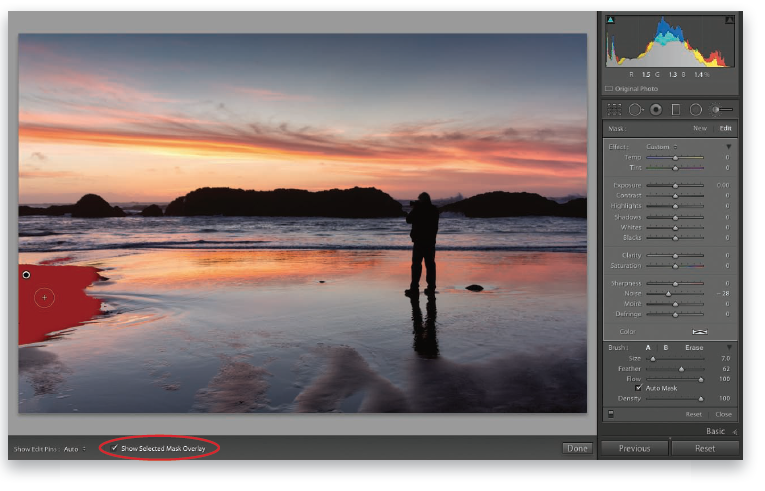
When painting with the Adjustment Brush, you can either press the letter O or you can turn on the Show Selected Mask Overlay checkbox in the toolbar below the center Preview area. Turning this feature on can be really handy to be able to see the exact area you’re affecting, and specifically to see if you missed any areas (that’s what I did here, where I saw that I missed an area and was able to quickly paint right over it with the red mask tint turned on).
Want to learn more on the brush feature as well as all other aspects of Lightroom? Well then check out How Do I Do That in Lightroom? today!