Book Categories:


The holidays are upon us. Families are gathering, children are playing, and grandparents are napping; all while mom and dad are calling their local family photographer (YOU) to capture the moment.
Working with children of all ages can be notoriously chaotic, so how do you create order out of chaos? You must get ahead of the chaos by developing a consistent predictable routine for your session flow.
In this article, esteemed family and portrait photographer, Sandra Coan, walks us through how to develop a consistent predictable routine to create order out of chaos, when photographing families. Once you have your CPR down, you can then develop a posing flow for each member of the family, from newborn, infant, toddler, and beyond.
This is a direct excerpt from The Complete Guide to Family Photography, by Sandra Coan. To read the complete guide posing flow, lighting and composition for families, you can purchase the book here.
Chapter 7: Posing Flow
Remember, as a photographer, you are also a director. And as the director, it’s your responsibility to have a clear vision for the scene you’re creating. Setting expectations for your work and creating a plan to meet those expectations are essential steps in bringing your vision to life. Establishing a posing flow that includes a set of go-to poses used in the same order at every session will help you achieve this goal.
A consistent posing routine removes the stress of trying to create flattering poses on the fly. It gives you a structured plan to follow, so you never have to worry about what to do next. And that ensures that you can create a well-rounded, robust gallery for your clients while also maintaining order during busy family photo sessions. Your photoshoots will run smoothly and efficiently, and your clients will be thrilled with the results.
In this chapter, I’ll share why creating consistent, predictable routines for your posing is so beneficial to your work as a family photographer. I’ll share the posing flows I use in my work, and I’ll teach you how to create a system for yourself. For the sake of explanation, I use the terms “mother” and “father” in my descriptions, but these flows work beautifully with all kinds of families.
Consistent, Predictable Routines
Consistent, predictable routines (CPRs for short) are something I learned about in graduate school while earning my teacher accreditation. The concept is simple but powerful: CPRs are routines we create for ourselves to intentionally form habits.
Creating Order out of Chaos
Despite my background as a kindergarten teacher, I didn’t use CPRs in my photo sessions at the beginning of my career. Like many photographers, I believed that relying on the same poses in the same order at every session would stifle my creativity. Instead, I would show up to my photo shoots without a clear plan, hoping the family I was photographing would inspire me and the magic of the moment would just happen.
Sadly, that was rarely the case. Instead of feeling inspired and creative, I felt stressed. Without a plan, I had no idea how to start or what to do next, which made every session feel chaotic. I was working without direction, desperately trying to capture every interaction, every laugh, every little moment, while simultaneously worrying that I was missing something important. I didn’t know how or when to end the session either, and so I would just shoot and shoot and shoot. It was exhausting for me and my clients. My sessions were a disorganized mess, a far cry from the professional experience I wanted to create for my clients.
Establishing CPRs for my posing flow changed everything. Instead of walking into a photoshoot hoping for inspiration to strike, I started with a plan. That plan gave me confidence. I knew exactly what I was going to do, how I was going to do it, and when I was done. The structure allowed me to focus on my clients rather than scrambling to come up with poses on the fly. I could slow down, connect with the families I was working with, and think about how to make them look and feel their best.
Once I implemented CPRs, my stress levels plummeted, and my creativity went through the roof. With the foundation of the predictable flow, I was free to focus on other things, like compositions, connection, and all the small details that take a photo from good to great. And that boosted my confidence—an unexpected but welcome outcome.
How to Create Your Own CPRs
To set up your CPRs, start by making a list of the types of sessions you do. For me, that includes newborn, family, and maternity sessions.
Start with Your “Must Haves”
Outline the images you want to capture at each session. This step is about identifying the must-have photos that will form the foundation of your gallery. Don’t worry about what poses you will use, yet. That will come later. For now, it’s important to just have a firm idea of the kinds of photos you want to create for each type of session you do.
For example, at a newborn session, I always aim to capture:
• The baby alone
• The baby with each parent
• The baby with siblings (when applicable)
• The baby with the entire family
For a family session, I want to make sure I get:
• The child(ren) alone
• The children together, if there is more than one child
• The child(ren) with each parent
• The entire family
For maternity sessions, my foundational images include:
• Profile images to the left and to the right
• Straight-to-camera photos
• Cropped images of just the belly
• Photos with the partner or other children, if present
Establish an Order
Once your shot list is established, decide on the order in which you’ll take your photos. Take the time to think through the entire session when doing this. Knowing what you know about your clients, where is the best place to start? How would you like the session to end? What flow makes the most sense for efficiency?
Start with an “Anchor”
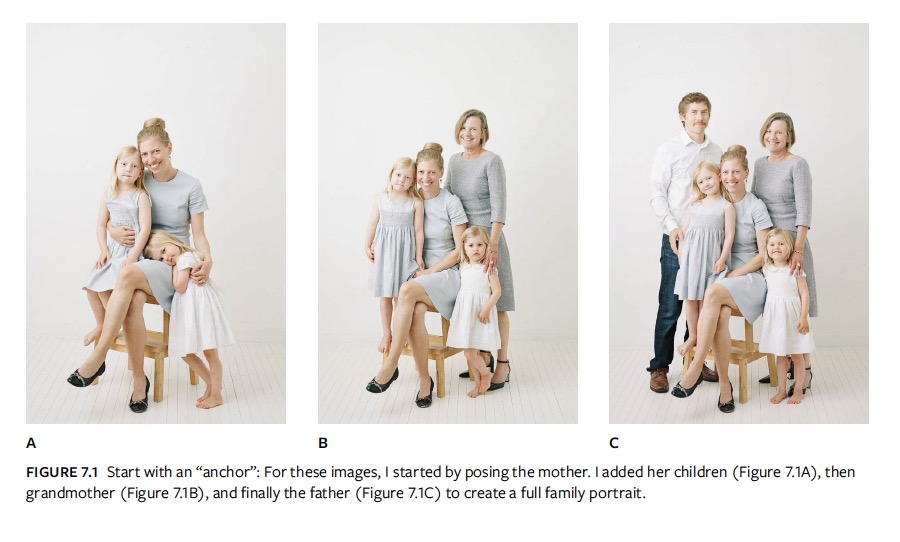
When photographing families or groups of people, I recommend starting with one person as your anchor. Pose that person first, then bring others into the frame until you have all, or most, of your must-have images.
See FIGURE 7.1, I started with the mom as my anchor. Once she was seated and posed, I brought her children to her for a photo (FIGURE 7.1A). Then I added her mother into the frame to get an image of the mother, daughters, and grandmother (FIGURE 7.1B). From there, I included her husband and captured the full family photo she requested (FIGURE 7.1C). Starting with an anchor and building from there is quick and efficient, and it gives you the time to construct your groupings, building triangles as you go. As you learned in Chapter 6, constructing triangles and being aware of composition in your poses helps add visual interest to your photos.
Posing Flow: Newborns and Family
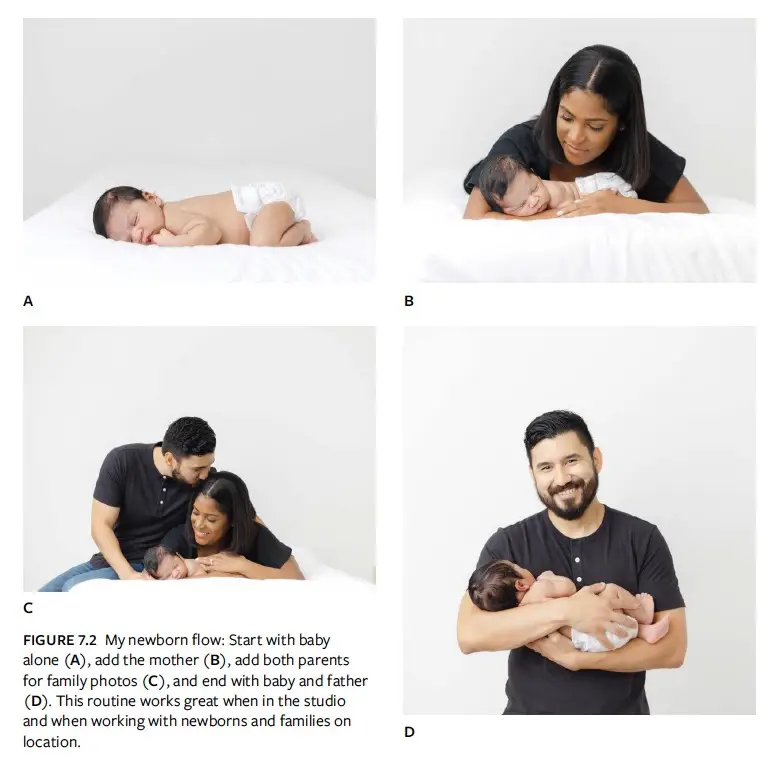
When working with newborns, my goal is to keep the baby I’m working with relaxed, calm, and happy, and so I start my newborns sessions with photos of the baby alone. Starting with the newborn gives me the time I need to soothe the baby and ease them into a comfortable pose.
After the baby has been photographed (FIGURE 7.2A), I move on to capture photos with their mother (FIGURE 7.2B). From there, I’ll bring the father in and get some family portraits (FIGURE 7.2C). I end with photos of father and baby (FIGURE 7.2D)
This flow allows me to get the majority of my must-have photos without having to disturb the baby. In fact, once the baby is posed, I don’t pick the baby up until the very end of the session, when I hand them to their father for some standing poses.
Pro Tip: Moving a sleeping baby too much may wake them up. To keep your little client content, comfortable, and happy throughout the session, build a posing flow that minimizes handling and allows the baby to rest comfortably as you work.
Posing Flow: New Borns and Family with Older Kids
If the family I’m photographing has older children, I can easily adjust my newborn flow to include images of the baby with their sibling(s) just after photos of the baby alone, but before images with the newborn and their mother. The framework, however, stays the same. Our newborn is the anchor, and I bring everyone else to them until the very end when I pick them up and place them in their father’s arms. FIGURE 7.3 shows this flow in action.
Posing Flow: Older Children and Family
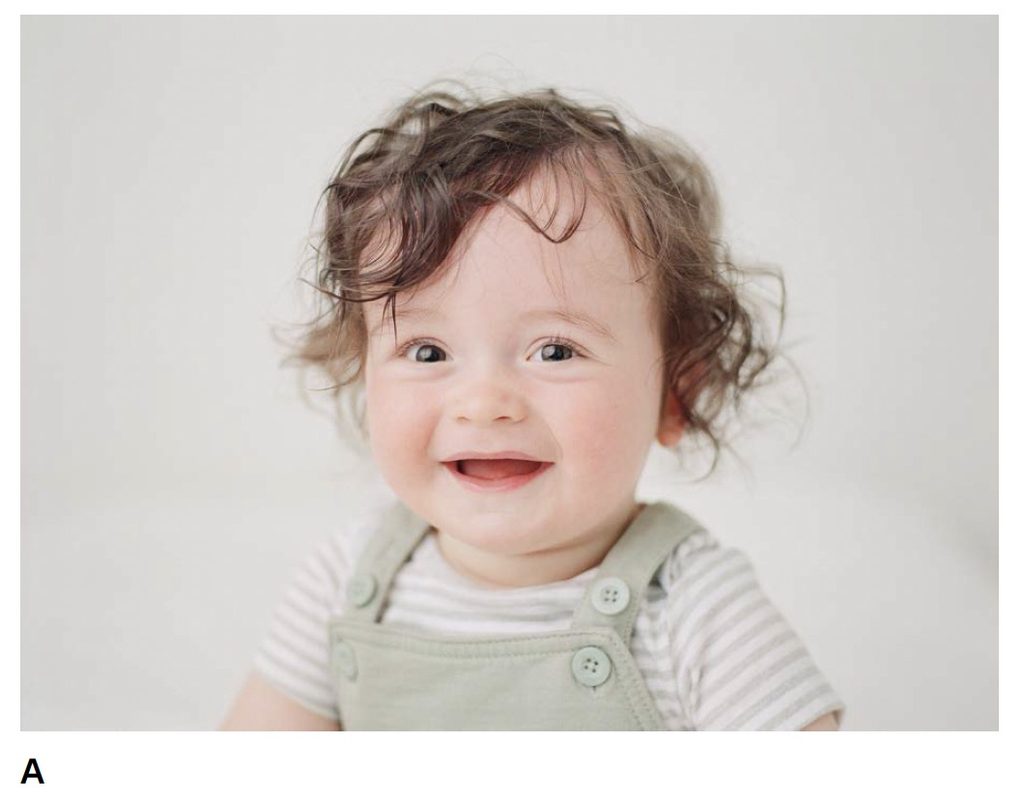
My CPR for working with older children and their family is exactly the same. I start with individual photos of the child, using the child as my anchor (FIGURE 7.4A). After capturing images of the child alone, I’ll photograph them with their mother (FIGURE 7.4B), then with both parents for a nice family photo (FIGURE 7.4C) end with the child and their father (FIGURE 7.4D).
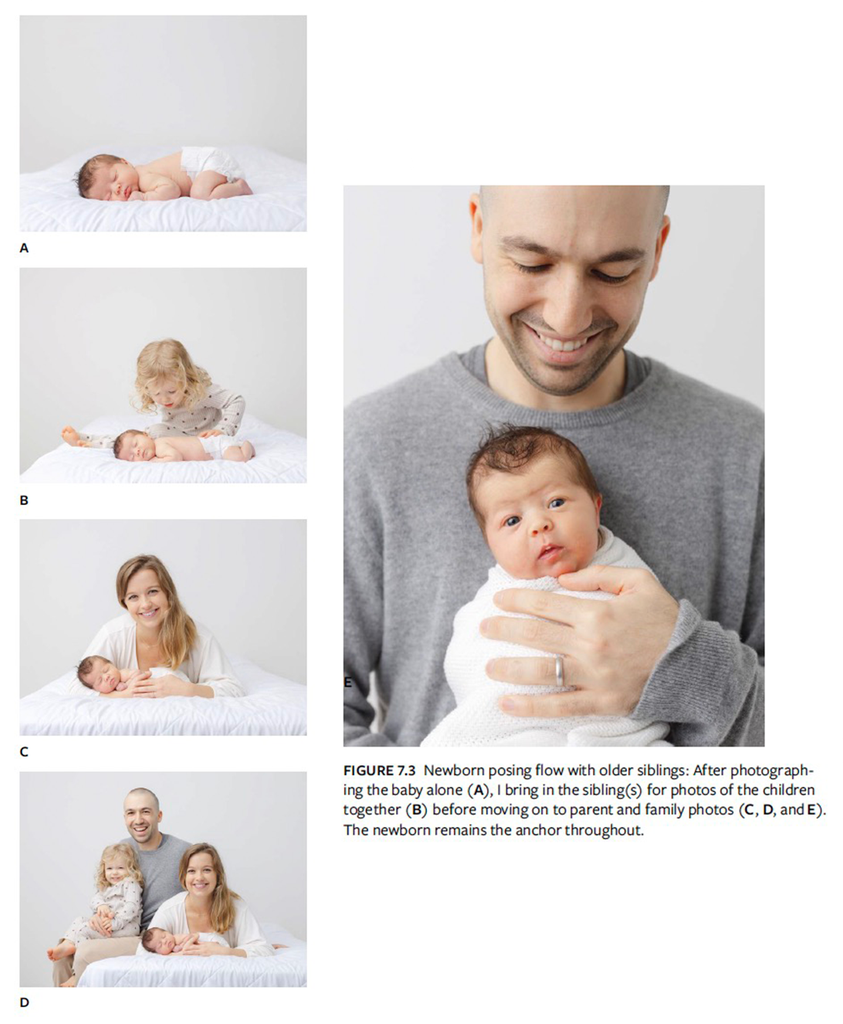
FIGURE 7.4 My posing flow with older children is the same as when working with newborns. I start with individual portraits of the child, then bring in the mother, add both parents for a full family photo, and finish with the child and father.
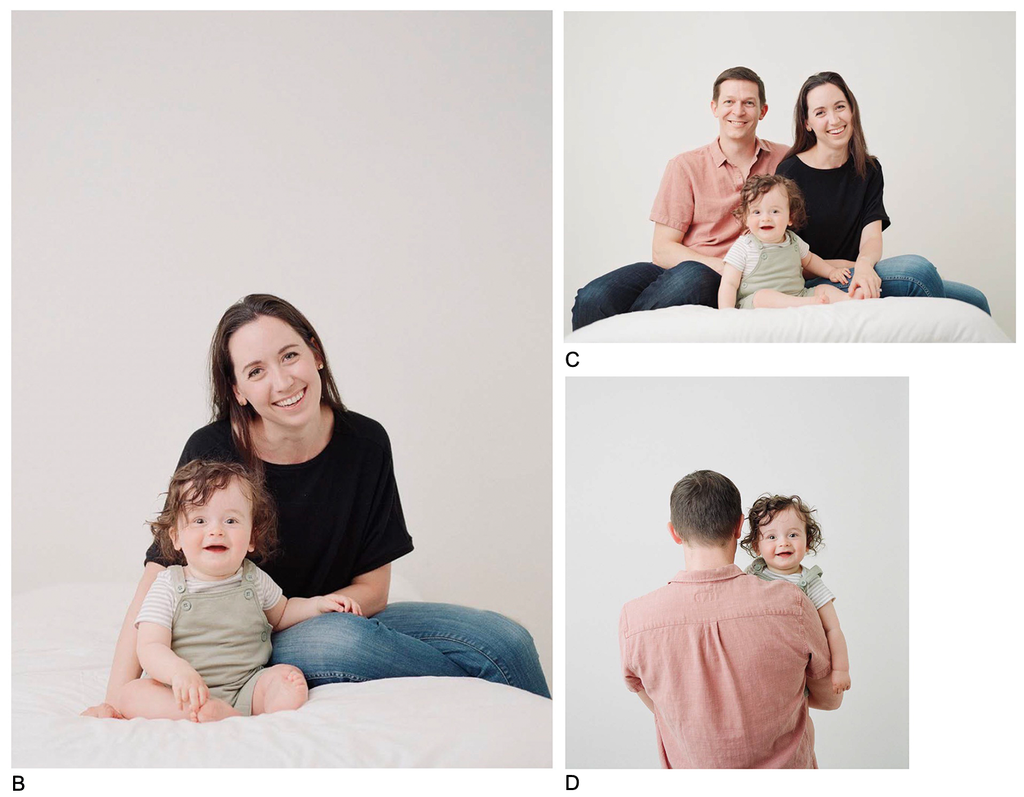
Pro Tip: When working with multiple children, I like to start with the youngest. Older kids usually have more patience and can handle waiting their turn. That said, if the youngest isn’t quite ready, it’s easy to adjust the flow and rearrange the order as needed.
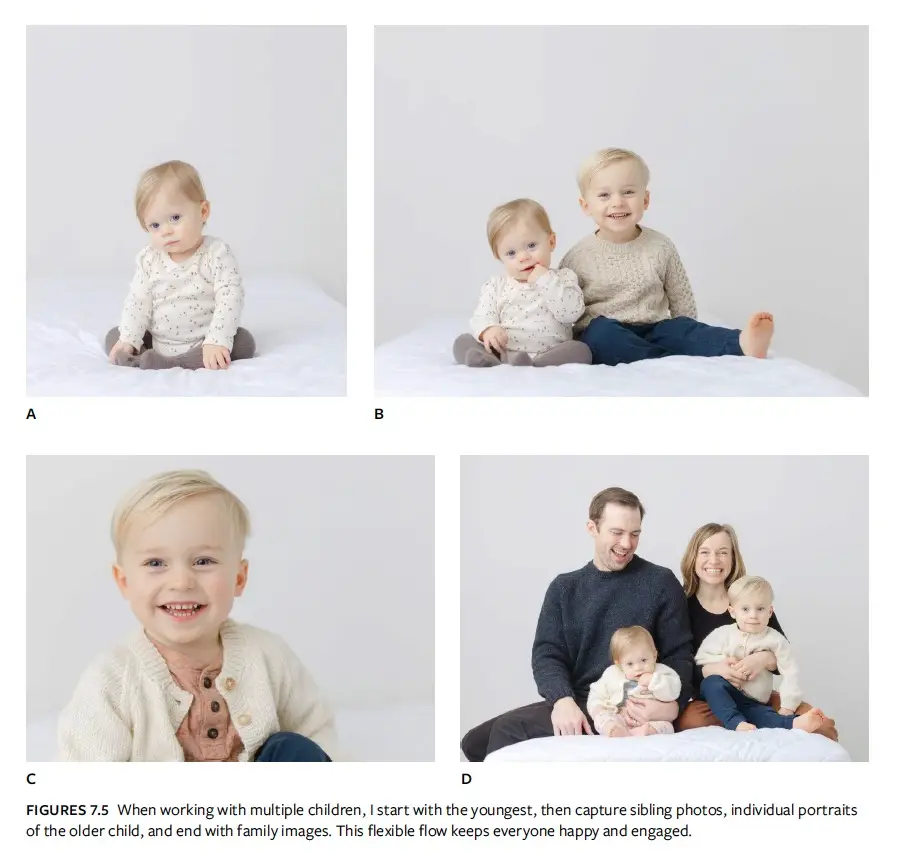
If there is more than one child, I’ll start with the youngest one first, then get photos of the children together, and then the older child before moving on to photos of the family together (FIGURE 7.5).
Flexibility within CPRS
Even though CPRs might seem rigid at first glance, they actually offer a great deal of flexibility—which is essential. Every session is unique, after all, and being able to adapt to different family dynamics is a must.
For example, if a family brings grandparents to the session, my CPR makes it easy to incorporate them seamlessly. I start with the child(ren), then bring in the mother, followed by the father, and then the grandparents. From there, I’ll ask the parents to step aside for a moment so I can capture a few images of the grandparents with the child(ren) alone. Then wrap up the session the way I always do—with some final images of father and child(ren).
If I’m working with a shy toddler, I can start with images of the toddler and their mother to help the child feel more secure. From there, I continue with my flow. After capturing images of the toddler and their mother, I’ll bring in the father for family photos. Then I take some images of the toddler with just their father, and finally, end the session with images of the toddler alone—once they feel more comfortable.
That’s the beauty of an established CPR: it provides a dependable structure while leaving room for creativity and adaptation.
Over time, your consistent, predictable routine will become second nature, giving you the flexibility to drop into the sequence wherever it makes the most sense for the situation. Once the sequence is memorized, you can start at any point, because you’ll know exactly what to do next! When your flow is muscle memory, you can easily make accommodations with little stress or worry, knowing how to pick up where you left off.
From Chapter 7 of the book The Complete Guide to Family Photography by Sandra Coan