The following is an excerpt from Rosl Rössner’s The Beginner’s Guide to Photographing Birds
There are many opportunities to photograph birds: You can focus on taking pictures of wildlife or photographing birds wherever you find them. You can take photos at your own feeding site, visit zoos and bird parks, or put your skills to the test at falconry displays.
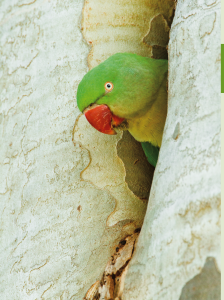
Alexandrine parakeet | Germany | If you know where to find certain birds and have a bit of patience, you’ll fi nd success in taking interesting pictures! | 700mm (500mm + 1.4x converter), aperture 8.0, 1/4000 s, ISO 800, +1/3 exposure compensation
3.1 Wildlife
Photographing birds in their natural habitat is the most difficult option. Most birds are quite shy and it takes a lot of patience to get attractive pictures. And the better you get, the higher your standards will be! Initially, you might already be happy if a bird is just sharp. But after some years, you’ll only be satisfied if the foreground, background, and composition work, too. You’ll find many tips in this book on how to analyze your wildlife photos, which will help you improve them.
So how do you go about finding find wild birds? Start by going to the right kind of place. If you live in a city, this may be a park where you’ll often find a surprising number of wild birds that are relatively tolerant of humans. Walk through the park with your eyes open and listen for bird calls. It’s helpful if you have some practice in recognizing the calls of certain species so that you can go and look for them. If you hear a woodpecker, search the trunks of trees and you might spot it. Should you hear the pretty melody of a robin, on the other hand, it’s worth checking the treetops around you as that’s where it might perch.
Parks that have a small lake or pond are often particularly rewarding. Its water birds are accustomed to people, which means that you can get quite close to them.
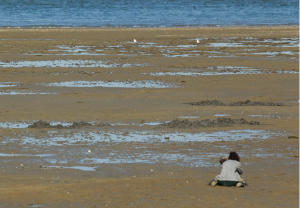
Approaching bar-tailed godwits | Texel, The Netherlands | Of course, photographing animals in the wild is a highlight in bird photography! | 300mm, aperture 7.1, 1/5000 s, ISO 1000
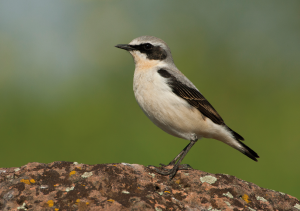
Northern wheatear | Germany | This pretty wheatear was photographed from the car. These days, cars make for excellent camouflage. | 500mm, aperture 6.3, 1/1250 s, ISO 500, -1 exposure compensation
If that’s not enough wildlife for you, head to the countryside. Unfortunately, the birds there often flee while you’re still quite a distance away and you may need to use some sort of camouflage. These days, cars make for excellent camouflage. If you spot a bird at its singing perch, park nearby (make sure it’s allowed) and wait. If you have enough patience, it’ll most likely come back and get used to your car. But avoid quick movements or loud noises anyway so you don’t scare it off. Many of my pictures have been taken from the car. I put a small bean bag on the rolled-down window, rest my lens and camera on it, and wait to see what happens. With a shy bird, it can be worthwhile to cover the passenger side window with a piece of fabric to hide your silhouette. Once you’ve found a convenient spot for your car, for example on a public road through a wild orchard, you might get to see quite a few birds that call that orchard home. Often, you start out watching one particular bird and unexpectedly get beautiful shots of a completely different species in the process. But it’s important to have patience and not give up too soon or keep changing locations.
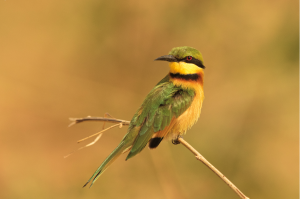
Little bee-eater | Gambia | In the case of this little bee-eater, I managed to approach on foot but had to use the large, heavy telephoto lens. | 740mm (600mm + 1.4x converter), aperture 7.1, 1/3200 s, ISO 800
If you prefer to roam through nature on foot, protected areas are easy to find and are a good option. Unfortunately, it’s often hard to get close enough to the birds for a good shot. In most wildlife refuges, you’ll need a telephoto lens with a long focal length. Of course, that means that you have to carry around quite a bit of weight, especially if you’re photographing with a tripod.
Useful Tools
There are various bird guides and identification apps that are almost indispensable. Not only do they describe the bird’s appearance but they also give information about its distribution and habitat. On top of that, apps usually include the audio of bird calls, which you can compare to what you hear in nature. The Collins Bird Guide: The Most Complete Guide to the Birds of Britain and Europe is particularly commendable (as the book or app).
3.2 Photographing in Zoos
Most zoos are home to many different species and will offer excellent opportunities to photograph birds in a controlled setting. Getting close enough to the birds without having them fly off won’t be a problem since they are used to people and cameras. Photographing in zoos also has the great advantage that you can take your time with each bird. You can freely move around to different backgrounds and, should a bird sit in a slightly awkward spot, you can easily wait until it has moved to a better one. I recommend focusing on a few animals and taking your time until you’ve captured some really good photos. If you just rush through the zoo trying to photograph as many animals as possible, you’ll achieve little more than snapshots. Many zoos have walk-through aviaries where you can take pictures without any distracting barriers. Find a spot with a nice background and wait until a bird moves there. Observe how the birds behave. Many are faithful to their routines and keep frequenting the same locations. Find a spot nearby and move around until you’ve found the optimal frame.
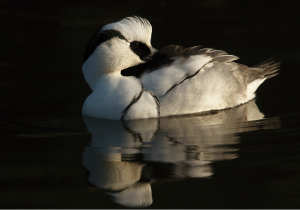
Smew | Cologne Zoo, Germany | You can find beautiful subjects in the zoo, too! |700mm (500mm + 1.4x converter), aperture 7.1, 1/3200 s, ISO 1250, -1 1/3 exposure compensation
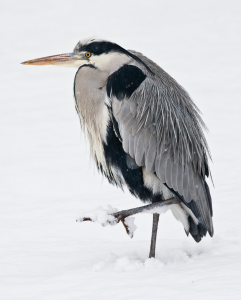
Gray heron | Karlsruhe Zoo, Germany | Very often you’ll find wild birds at the zoo as well. They are used to people and can be photographed at one’s leisure. That’s how I took this picture of a gray heron in the snow with a 300mm lens. | 300mm, aperture 7.1, 1/400 s, ISO 640, +1 exposure compensation
Zoos are also great for really focused detail shots, such as close-ups of an eye or the plumage. You can get close enough to the animal to experiment with motifs of this kind.
Keep an eye out for wild birds at the zoo. There may be a few gray herons hanging around the penguin enclosure, for example. Or you may come across some crows near the food court. These birds tend to be markedly less shy than their counterparts in the wild, and you can get much closer to them.
If you want to photograph into an enclosure, here are a few tricks: Take off the hood of your lens—which should normally always stay on!—and carefully place the lens right against the wire of the fence. It will show up in the viewfinder as a bright, very blurry stripe. Move the camera around until you see as little of the wire as possible. Depending on the mesh size, you might not even see the fence at all later in the photos. Another good trick is to shoot with a wide-open aperture. This will make any mesh disappear almost entirely. And, if you’re photographing through a pane of glass, it’s best to put the lens (hood attached in this case) right against the glass to avoid reflections.
Yet another advantage of doing a day-long photo shoot at the zoo is that you can avoid the harsh midday light by spending that time in the comfort of the food court, enjoying a snack….
If you plan to publish any photos you’ve taken at a zoo or park, please note that some have rules about that, so make sure to contact the zoo management or press office beforehand!
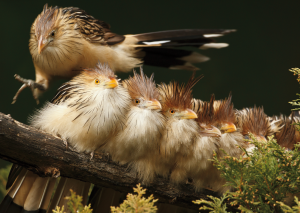
Guira cuckoo | Heidelberg Zoo, Germany | I managed to snap this hilarious action shot of some cuckoos at the zoo. Unfortunately, these pretty birds are no longer housed there. | 500mm, aperture 8.0, 1/250 s, ISO 1250, -1/3 exposure compensation
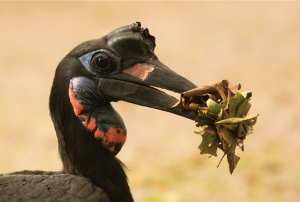
Ground hornbill | Hagenbeck Zoo, Germany | In bird parks, you often get to photograph interesting behavior up-close. This ground hornbill was gathering nesting material. | 400mm, aperture 5.6, 1/400 s, ISO 1600
3.3 Visiting a Bird Park
If you want to take photographs in a bird park, follow the same guidelines that apply to a zoo. If the park is large, you can ask at the ticket office about walk-in aviaries and head there right away to catch the best morning light. Or, you can focus on your favorite birds. Again, don’t try to photograph all the birds in the park; instead, take your time at your individual stops until there are some really great pictures stored on your memory card.
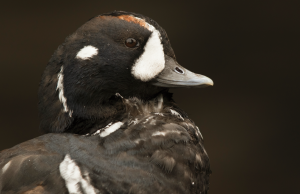
Ruffed duck | Hagenbeck Zoo, Germany | Bird parks also give you the chance to portray rare bird species from a close distance. | 840mm (600mm + 1.4x converter), aperture 5.6, 1/500 s, ISO 800, -2/3 exposure compensation
Be sure to visit the waterfowl pond. Usually, there will be something happening there and you can play around with your camera settings. The birds are swimming and bathing, and there might be scuffles or interesting courtship and mating behavior. You might also find some young birds that will be great to photograph.
If an aviary turns out to be a bad choice for taking pictures, for example, because of an unattractive background or too many distracting elements, I tend to move on and look for other motifs. Evaluate your subjects and their surroundings carefully and don’t waste too much time before deciding whether it is worth taking pictures of them.
Ask whether the park offers scheduled feedings or flying displays. If so, show up early and try to find a spot that will give you the most uncluttered background possible. If a flying display is scheduled twice a day, it is worth attending both. You’ll get to see what is happening when at the first show and might be able to find a better spot for the afternoon one.
3.4 A Day at the Falconry
If you have the chance, make sure to visit your local falconry. This is probably the only place where you can get this close to majestic eagles, speedy falcons, and mysterious owls. At least during the day, many birds will be outside and away from their enclosures with their intrusive bars, allowing you to get wonderful portraits of these elegant birds.
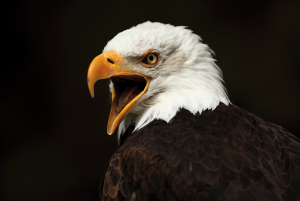
Bald eagle | German Raptor Research Center at Guttenberg Castle, Germany | The shadowy background contrasts starkly with the bald eagle’s bright head plumage. | 300mm, aperture 2.8, 1/2500 s, ISO 320, -1 exposure compensation
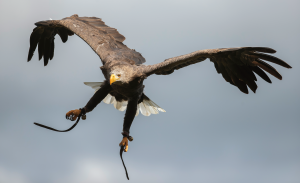
White-tailed eagle | German Raptor Research Center at Guttenberg Castle, Germany | Flying displays at a falconry offer wonderful opportunities to practice photographing birds in-flight so you’ll be perfectly prepared for taking pictures of them in the wild! | 300mm, aperture 3.2, 1/8000 s, ISO 800
Visit the flying displays that are being offered and practice photographing these fast and agile birds in the air. Most of these shows will also teach you a lot about birds of prey, which will be a great help when you encounter them in the wild.
3.5 At the Feeding Station
If you have your own yard or even just a balcony, it is definitely worthwhile to set up your own feeding station. It offers many great opportunities! You get to know the birds in your area, can observe them closely, and experiment with different perches that will result in very different photos. Even if no rare birds show up at your feeding station—it never gets boring to take pictures of common birds that do!
Offer various types of food for the different species and make sure there’s always fresh water available at an easy distance. It’s best to set up a small stand or camouflage tent close to the feeder. This will allow you to photograph the birds up-close without disturbing them. With some long-term planning, you might even be able to put in your favorite plants for the background.
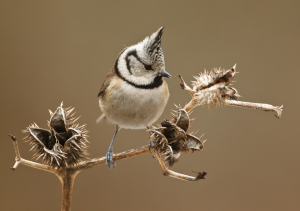
Crested tit | Germany | You can always rearrange the perches at your feeding station, creating very different pictures. | 700mm (500mm + 1.4x converter), aperture 6.3, 1/500 s, ISO 1600
3.6 Workshops and Trips
You can find countless workshops and trips specifically for bird photography. But keep in mind that you’ll need to book a real photography trip and not just a birdwatching trip. Most likely, a pure birdwatching trip will not get you close enough to the birds, and most birdwatchers don’t spend as much time watching as you will need to photograph birds.
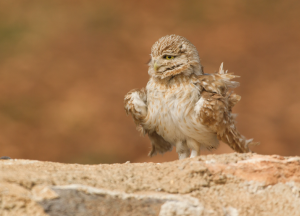
Little owl (Lilith) | Turkey | I was able to shoot the rare little owl (Lilith) in Turkey after I had convinced the
guide and driver of my car to stop. | 500mm, aperture 6.3, 1/1600 s, ISO 1000
I have taken many trips abroad and, after some research, have always found an experienced local guide who could take me around for a few days to find particular bird species. But even then, the guide must understand and accommodate the needs of a photographer. I’ve had a guide drive me past countless little owls, saying, “We’re going to see lots more of those!” I simply couldn’t make him understand that I would like to grab every opportunity to photograph a little owl. It took some considerable effort to get him to pretty please stop at the next little owl, come what may….
It’s best to check online for what’s being offered. You’ll find workshops with many different focuses.
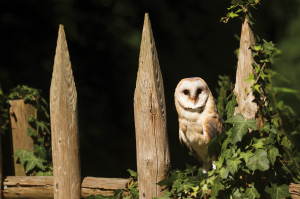
Barn owl | German Raptor Research Center at Guttenberg Castle, Germany | This picture was taken during one of my workshops on “Owl and Bird of Prey Photography.” | 158mm, aperture 5.0, 1/4000 s, ISO 640, -1 1/3 exposure compensation
