How to Embroider the Whipped Back Stitch
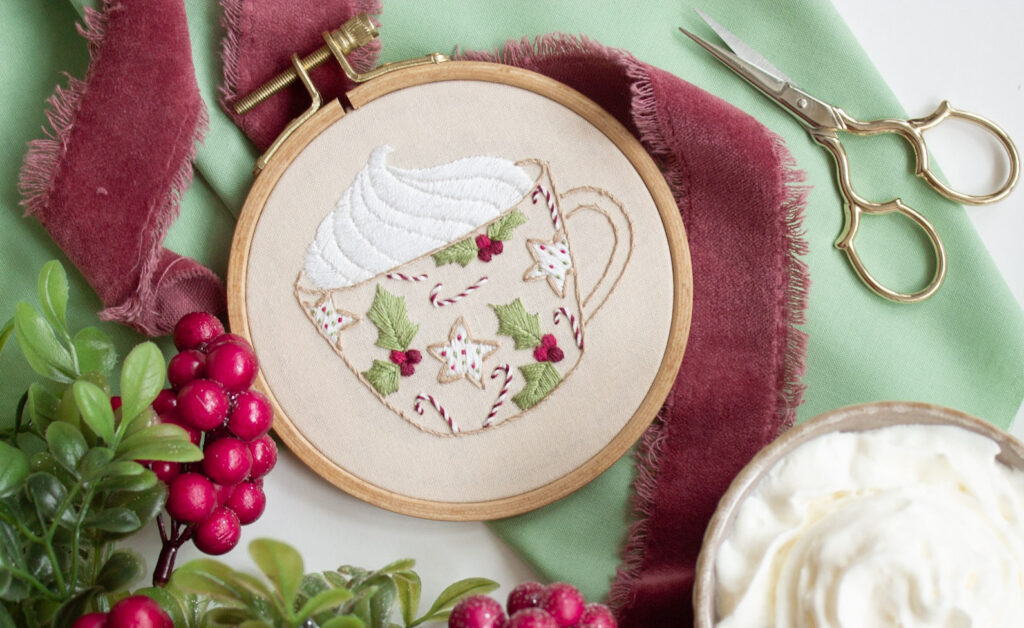
“Whipped Back Stitch” is an excerpt from the embroidery book Handmade Holiday by Aly Ploof
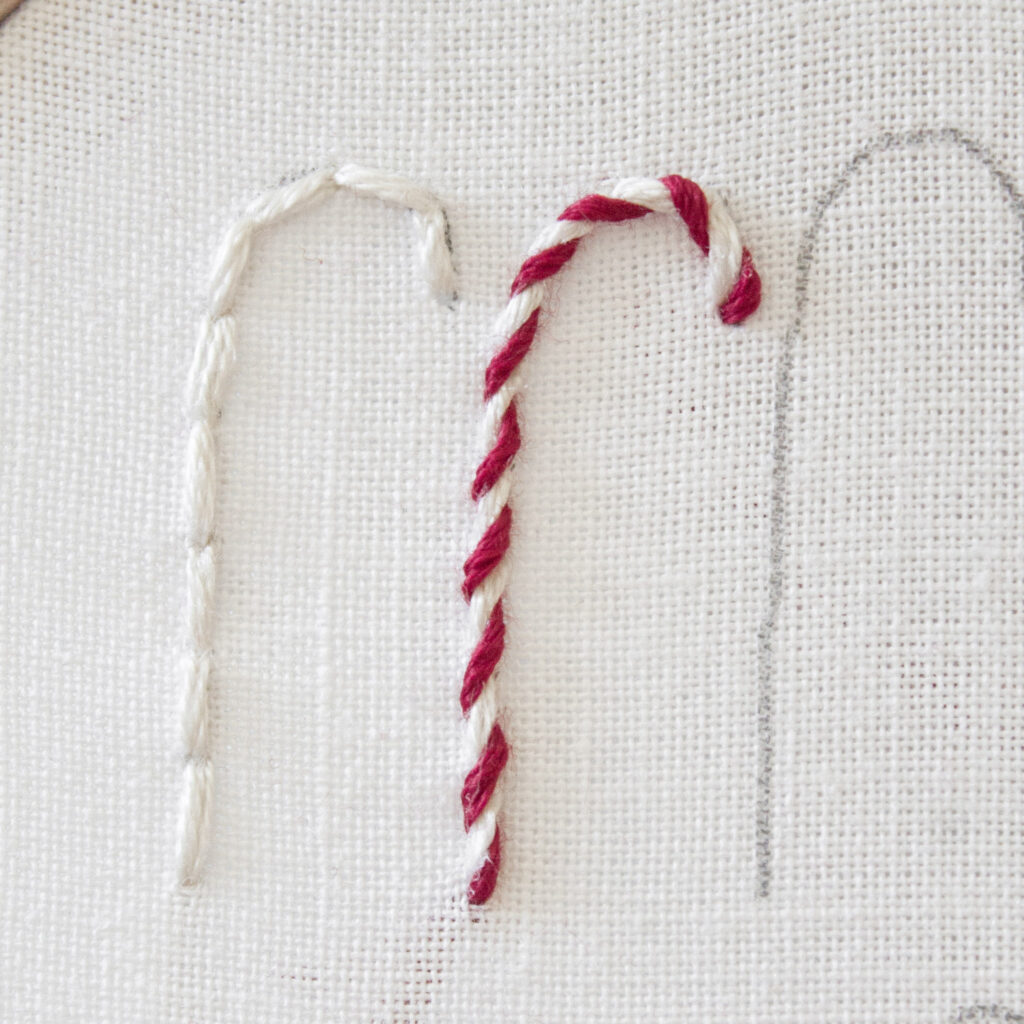
The whipped back stitch is a back stitch with a twisted effect. It’s perfect for stems, outlines, and a clean and textured look when stitching words. It’s also really handy for stitching easy candy canes.
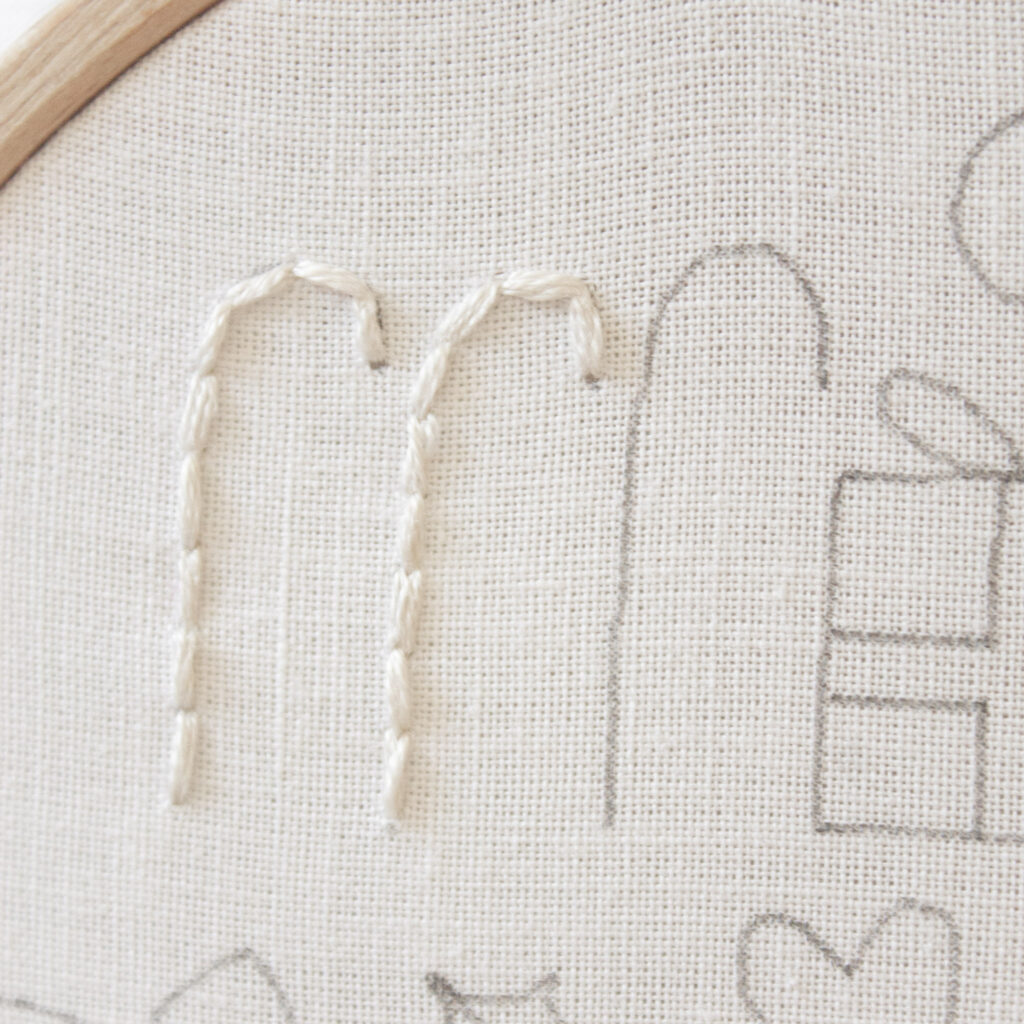
1. Start by stitching your desired line with a basic back stitch, making each stitch at about a cm (the size of a pinkie).
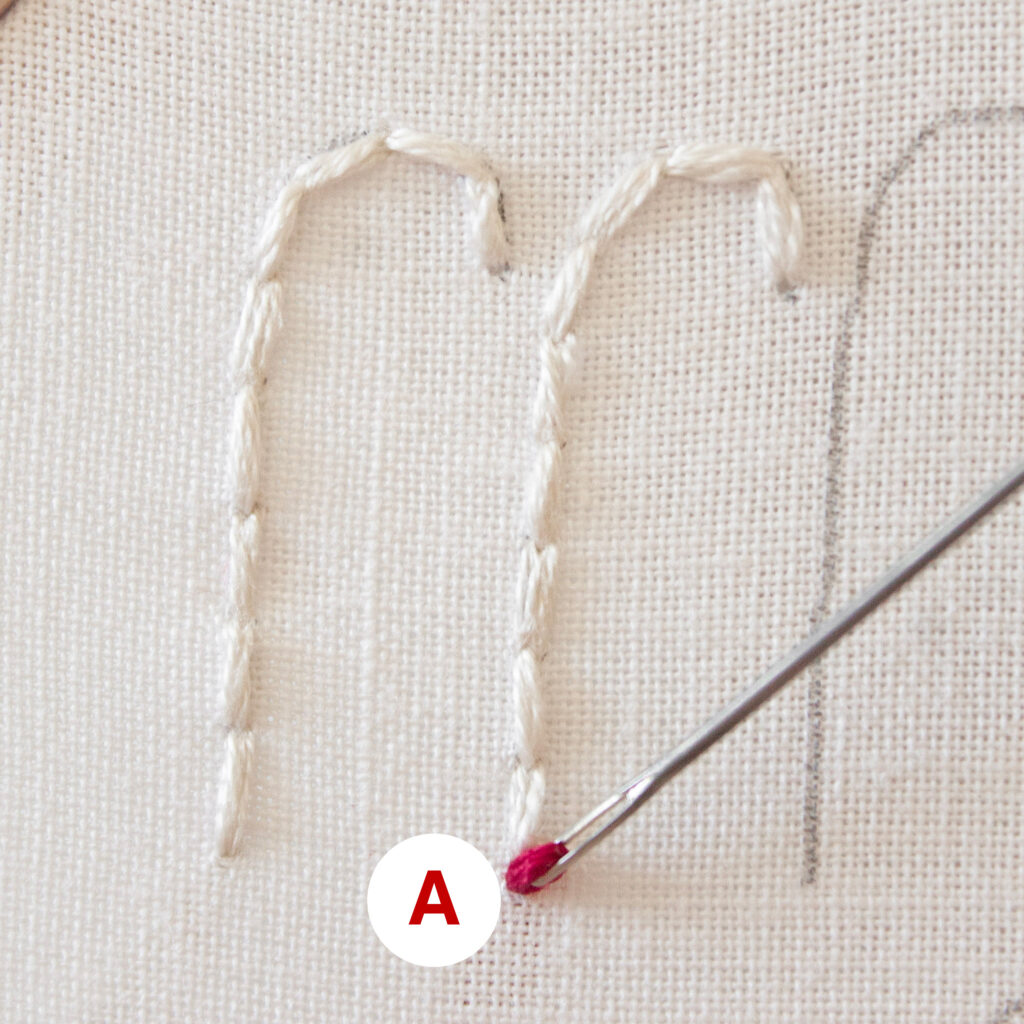
2. To start bring your red floss and needle up near the base of your candy cane (A).
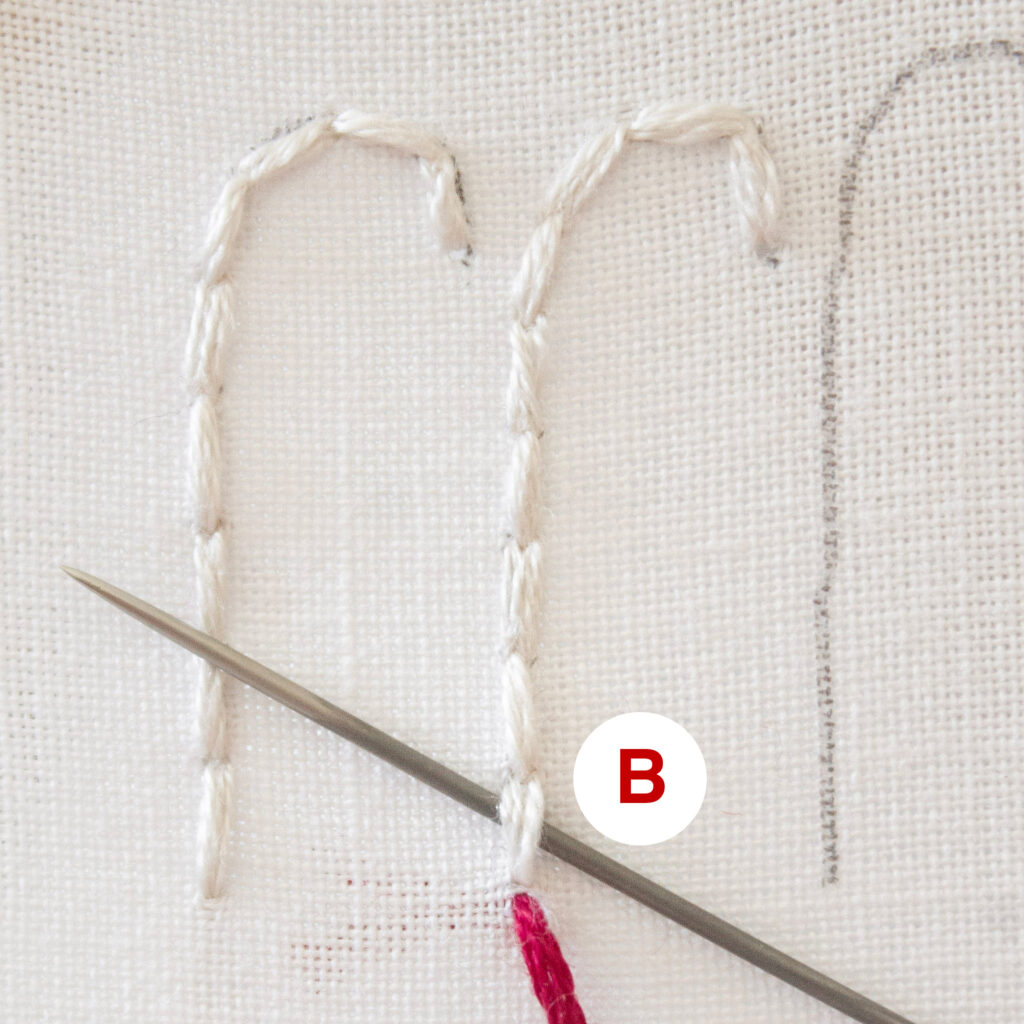
3. Bring your needle underneath the first stitch from one direction and gently pull through (B).

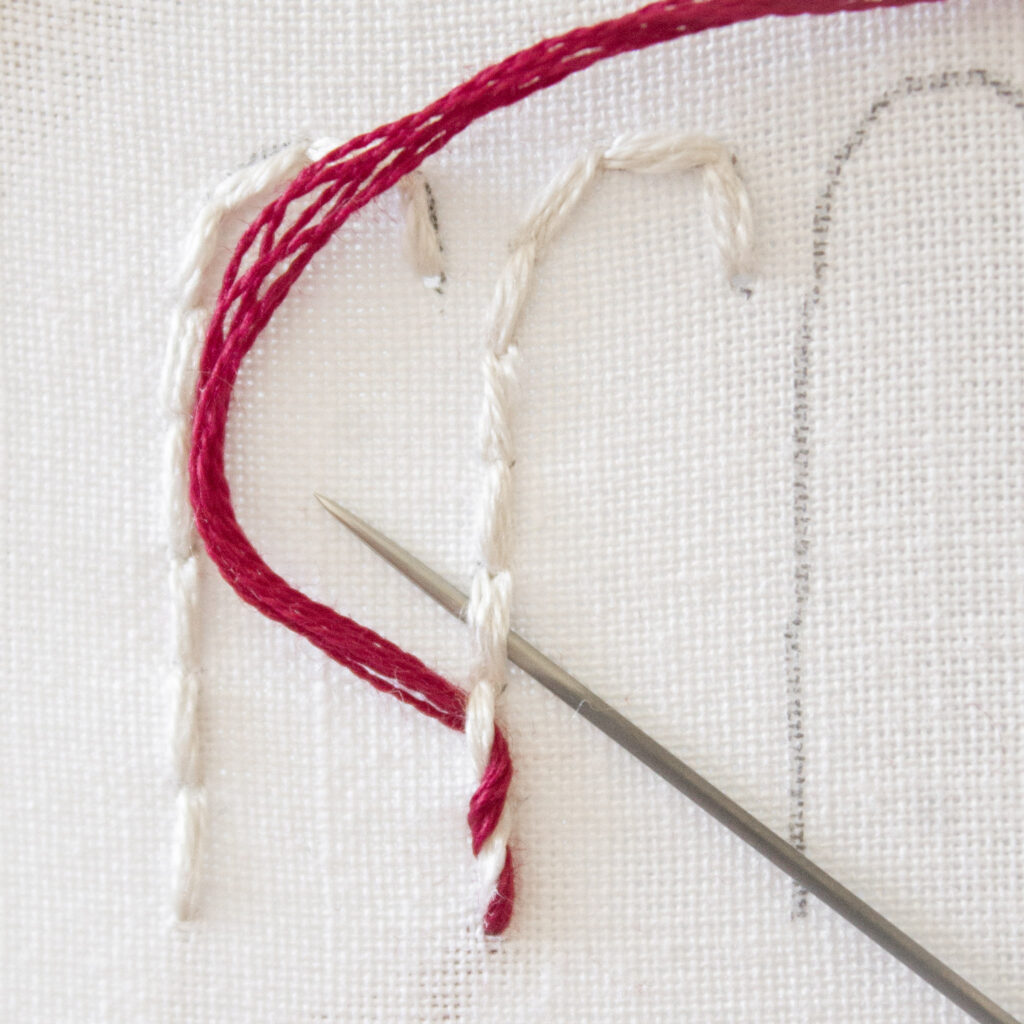
4. Bring your needle up to the next stitch, and underneath again from the same direction (C).
5. Continue bringing your needle underneath each stitch from the right side until you’ve reached the end of your back-stitched line.
6. Finish your whipped back stitch by tying off the thread in the back.
TIP for Whipped Back Stitching. I’ve found that whipped back stitches always come together smoother when you bring your needle under the stitches from the right. This means you may need to turn your work as you’re stitching. If you stitch with your left hand, try stitching the back-stitched portion upside down so you’re still technically coming from the “right” side.
If you decide to use a metallic floss for a back stitch (such as in the Rainbow Snow Globe Pattern), my recommendation is to only use one piece of thread for the back stitch and one piece for the whipping.
Handmade Holiday includes a full embroidery stitch library each with step-by-step visuals and 16 scale holiday themed embroidery patterns. Purchase the printed and ebook here. Follow Aly Ploof @byalyploof on Instagram.