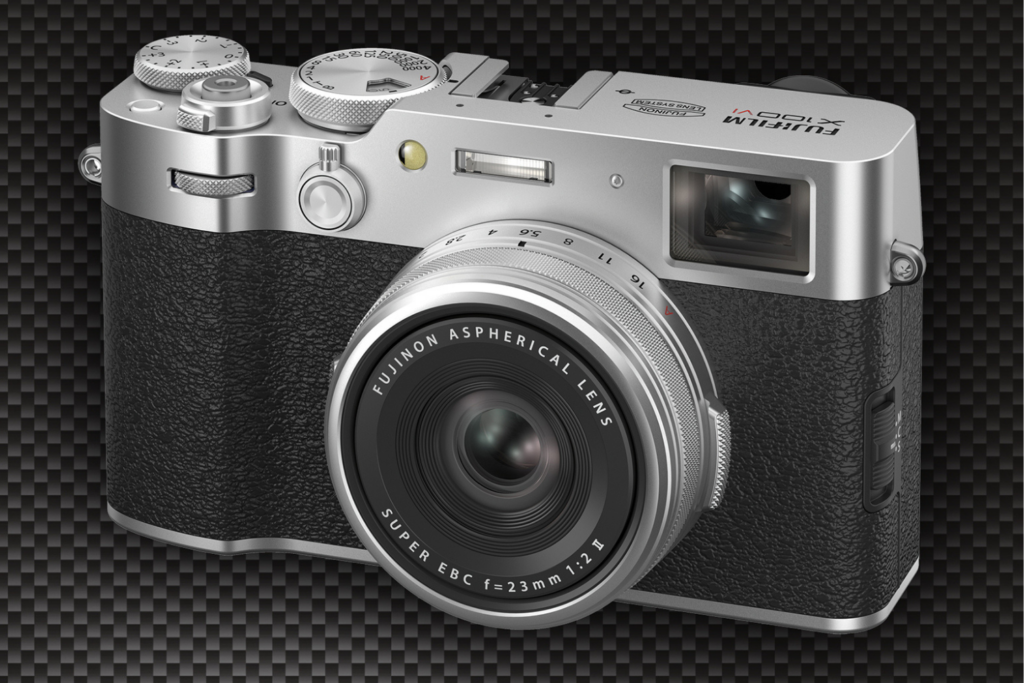
This is an excerpt from the book The Fujifilm X100VI, 130 X-Pert Tips to Get the Most Out of Your Camera. To read more, the e-book and paperback versions can be found here.
1. Exposing Right
This is an excerpt from Chapter 2.3
It’s not the job of the camera to find and set the correct exposure; it’s the job of the photographer. That said, the Fujifulm X100VI features the usual set of AE (auto exposure) modes: aperture priority , shutter priority
, and program AE
.
■ Aperture priority automatically sets a suitable shutter speed to match a preset aperture based on your exposure.
■ Shutter priority automatically sets a suitable aperture to match a preset shutter speed based on your exposure.
■ Program AE automatically sets a suitable aperture and shutter speed combination based on your exposure.
■ Auto-ISO can contribute a suitable ISO setting (within predefined limits). In digital cameras, ISO is the level of signal amplification applied to an image that has been recorded by the camera’s sensor. ISO impacts the brightness of the final image (JPEG/HEIF/TIFF and the camera’s WYSIWYG live view).
Auto exposure (AE) modes are typically set with the aperture ring on the lens and the shutter speed dial on the camera body: Pre-selecting an aperture and setting the shutter speed dial to “A” activates aperture priority mode. Selecting “A” on the aperture ring in concert with a specific shutter speed activates shutter priority mode. Finally, selecting “A” on both the lens and the shutter speed dial selects program AE
It is important to understand that these auto exposure (AE) modes (including Auto-ISO) are not responsible for correctly exposing images: exposure is always the responsibility of the photographer. AE modes automatically fill variables (such as the shutter speed in aperture priority ) in a way that matches the exposure you have set. Auto exposure will only deliver good results if the photographer is exposing correctly.
Exposing correctly—how does this work?
Don’t panic! Unlike conventional DSLR cameras, your mirrorless X100VI makes things easy. Four different metering modes (multi, spot, center-weighted, and average), the WYSIWYG live view, and the live (RGB) histogram help you determine the correct exposure for any given scene. If you shoot in one of the three AE modes, the most important tool is the exposure compensation dial, which allows you to correct the metered exposure up to Å}3 EV in convenient steps of 1/3 EV. EV means Exposure Value, and 1 EV is equivalent to one full aperture stop. The correct exposure isn’t what the camera is metering, it’s what you make of the metering by adjusting the exposure compensation dial or with manual exposure settings.
Tip 2 Long Exposures
This is an excerpt from Chapter 2.3
Long exposures can lead to impressive results. Fireworks, night shots, water surfaces, stars, or clouds: exposure times of several seconds or minutes capture the course of time in a single photograph. Of course, this only works if you put the camera on a tripod or a solid surface.
You have two basic options:
■ Set the shutter-speed dial to T (Time) and then use the rear command dial to set the shutter speed. To avoid camera shake, use a remote shutter release or the self-timer to take the shot.
■ Set the shutter speed dial to B (Bulb), then press and hold the shutter for as long as you want the camera to expose. Obviously, it makes sense to use a (tethered or wireless) remote shutter release that can be locked for the duration of the shot.
For good-quality results, make sure to set IMAGE QUALITY SETTING > LONG EXPOSURE NR > ON. By doing so, the camera will perform a dark-frame subtraction [38] depending on what ISO and exposure time you used. Dark-frame subtraction doubles the effective exposure duration, so be patient.
Tip 3 Focus Bracketing
This is an excerpt from Chapter 2.4
The need for greater depth of field (DOF) is a common issue for macro and landscape photographers. With increasing sensor resolution, diffraction blur [53] becomes a serious limitation. To avoid visible diffraction with your 40 MP APS-C sensor, you should avoid stopping down much beyond f/8.
For macro and landscape photographers, stopping down the lens to f/16 often isn’t an option due to quality considerations. Not to mention that even at f/16, the depth of field would still not be sufficient in many macro situations.
What to do? There is a popular solution among ambitious photographers called focus bracketing, where multiple images are taken at various focus distances. The shots are later merged (i.e., stacked) into a single image that displays increased depth of field. The series of individual source images can be merged in Photoshop or in other specialized software such as Helicon Focus [54]. This technique is referred to as focus stacking [55].
Focus bracketing helps you automate the generation of the source material you need for focus stacking. To configure focus bracketing in your X100VI, select SHOOTING SETTING > FOCUS BKT SETTING and choose MANUAL or AUTO.
Fig. 87: The manual focus bracketing configuration screen allows you to set the number of frames the camera should automatically take (FRAMES), the relative focus distance difference between individual shots (STEP), and the pause between individual shots (INTERVAL). The latter is useful so that the camera can settle down after each shot to avoid shutter-induced vibration—which is hardly an issue considering the X100VI has a tiny, quiet leaf shutter. However, you may need a longer interval in concert with flash light to give the flash sufficient time to recharge between shots. To eliminate any possible shutter vibration, you can also select electronic shutter (ES).
To initiate manual focus bracketing, it’s best to select MF and manually focus on the nearest point of the subject you want to have in perfect focus. It’s also recommended to stop down the lens to its sweet spot. For the X100VI, an aperture setting between f/4.5 and f/6.4 appears to be quite optimal.
Depending on your needs and time restraints, you can experiment with various step settings. Make sure the camera is in FOCUS BKT mode (FOCUS BKT must be selected in the DRIVE button menu). To start the sequence, press the shutter button. The camera will take the set number of images or stop when it reaches infinity—whatever occurs first.
When the camera has finished recording the source images, you can merge them in Photoshop or in specialized focus-stacking software like Helicon Focus.
Sounds cumbersome? It is! Luckily, your X00VI also features an automatic focus bracketing mode, where you can manually set a starting point (the closest focus distance) and an end point (the furthest focus distance) for a given scene or subject. The camera will then automatically take the required number of shots at varying distance settings to cover the area between the start point and the end point. All that’s left for you to do is specify the shooting interval between consecutive bracketing shots. With the leaf shutter of the X100VI, you can safely pick a shooting interval of zero without suffering shutter shock vibration.
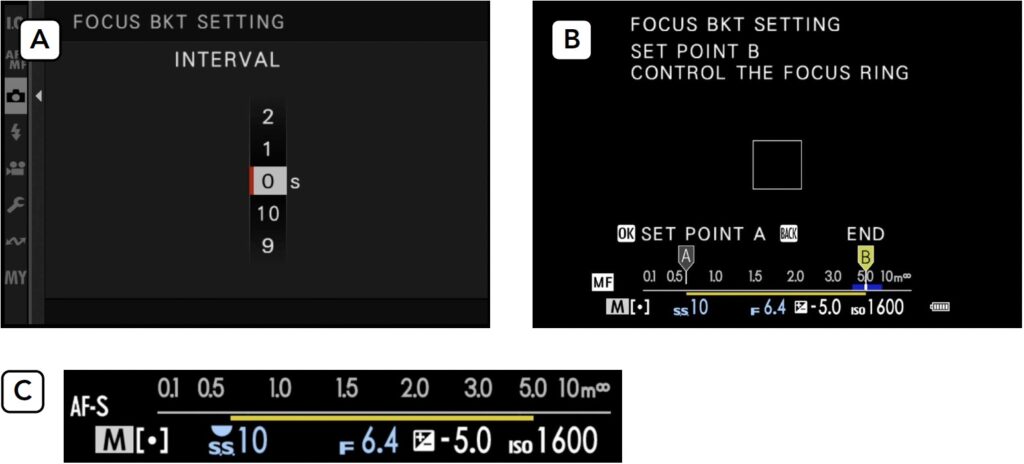
Fig. 88: Focus Auto Bracketing facilitates the image acquisition process and automatically captures the number of shots that are required to cover a user-defined distance range. In your X100VI, the focus bracketing settings menu is hidden under SHOOTING SETTING > FOCUS BKT SETTING > AUTO, followed by different settings pages.

After selecting AUTO as your focus bracketing mode, the camera opens the next settings page where you can specify the INTERVAL. This is the time lag between consecutive acquisition shots. Your options range from 0 to 10 seconds. Ideally, you should select a zero interval to mitigate the risk of subject motion blur (A). If you are using a flash, make sure that the interval is long enough to give your flash sufficient time to recycle between shots.
After setting and confirming the INTERVAL time, the next FOCUS BKT SETTING screen (B) prompts you to manually set the focus bracketing range and asks you to enter corresponding “A” (near) and “B” (far) points. This is performed by turning the manual focus ring of your attached lens. Sadly, this process is not very intuitive: The camera asks you to toggle between the “A” and “B” points with the OK button and to confirm your finished range setting with the BACK button. To facilitate the range setting process, you can use a manual focus assistant like focus peaking, so make sure to enable it in the AF/MF SETTING > MF ASSIST menu before entering the FOCUS BKT SETTING process. You can also use the magnifier tool to zoom in and out.
Having set and confirmed your focus bracketing range, the camera will now display a yellow line below the live view’s distance scale that indicates the bracketing distance range (C).
Once everything is set up properly, you can just press the shutter release button and the camera will automatically record the required number of shots that cover the preset focus distance range based on the current aperture setting.
Fig. 89: I used AUTO focus bracketing for this landscape shot. Image A shows the near point, image B the far point of my focus bracketing series. Image C shows the result after merging (stacking) the 35 acquired RAF files with Helicon Focus software and exporting a linear DNG file that I could process in Lightroom with the same RAW development settings that I used for individual shots out of the bracketing series. 23 mm, ISO 125, f/5.6, 1/250 sec., tripod, auto focus bracketing, zero interval, mechanical shutter
Thanks for reading! If you enjoyed this sample there are 127 more X-Pert tips waiting to be discovered in The Fujifilm X100VI. You can purchase the complete version here.

