The following is an excerpt from Ashlee Elle’s Retro Crochet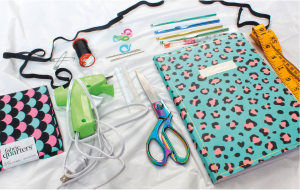
MATERIALS & TOOLS
Before getting started on your crafty adventure throughout the crochet decades, making sure you have the right creative ingredients to accompany your crochet hooks and yarn through the projects will assist in making these handmade designs!
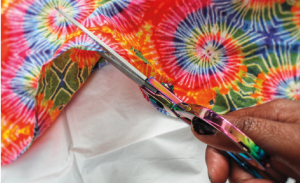
SCISSORS
Always a crafty tool to have by your side, especially when it comes to cutting off strands of yarn!
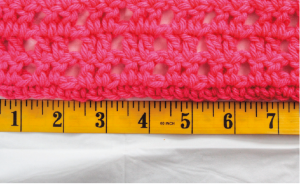
MEASURING TAPE
Measuring and focusing on gauge, along with personal measurements, truly helps with each crochet project. It also helps with guiding through a project with your customized details.
CRAFT JOURNAL
A journal helps with keeping track of your projects. It’s great for pops of inspiration, especially if you want to personalize a design by implementing unique and additional attributes.
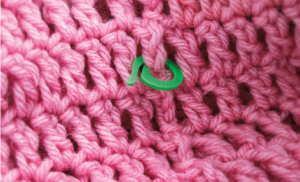 STITCH MARKERS
Markers assist in keeping your place when working in rounds to create crochet pieces, such as skirts and sleeves for your tops!
SEWING NEEDLE & THREAD
Use for sewing the elastic bands together when creating the skirts and sewing notions directly to your crocheted pieces.
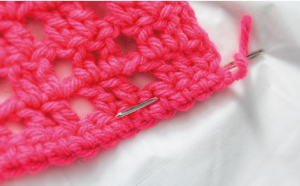 YARN NEEDLE
Use to sew your crochet designs together and weave in ends (the leftover yarn tail) right into the stitches to conceal and clean the edges after and during the project.
FABRIC FAT SQUARES
Implement lining for your crochet bags as well as accessories. Have fun selecting colorful prints to add a bit of personality to your handmade projects.
ELASTIC BAND
Elastic bands create stretch at the waist when constructing waistbands for the skirts.
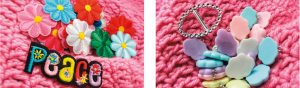
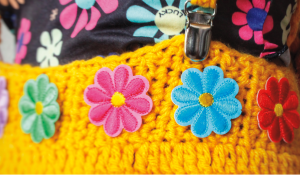
APPLIQUES, CHARMS & ACCESSORIES
Add a bit of personalization throughout a design by selecting fun charms and accessories for your handmade creations.
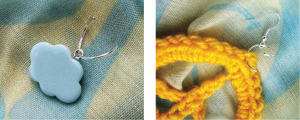
METAL JUMP RINGS, METAL EARRINGS
Adjustable connectors are vital for assistance with constructing crochet jewelry and implementing notions to projects in personalizing a design!
 METAL SUSPENDER CLIPS
To guide the crochet straps through the metal clip openings and attach them to your handmade crochet skirt.
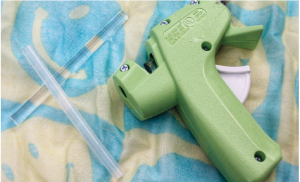 HOT GLUE GUN & HOT GLUE STICKS
A hot glue gun goes a long way when crafting! Assists in implementing appliques directly to your crochet projects, especially if sewing isn’t your thing!
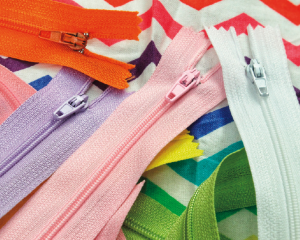
ZIPPERS
Add a finished look to your crochet design, either by sewing or gluing the side of the zipper band onto your crochet accessory.
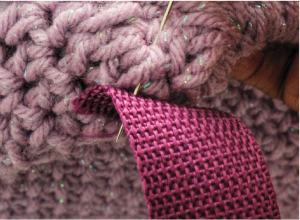
NYLON WEBBING STRAPS [BUCKLE NON-ELASTIC STRAP]
To add and sew the notion of the backpack straps to the very back of your crochet project.
CRAFTY TIPS & TECHNIQUES
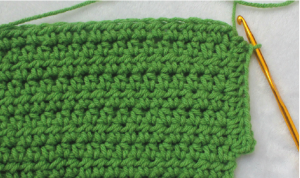
Throughout, the projects feature common and basic crochet techniques which will guide you in creating numerous designs and more!
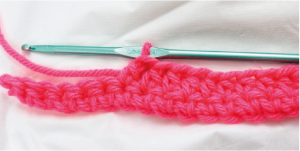
THE BASIC STITCHES UTILIZED THROUGHOUT
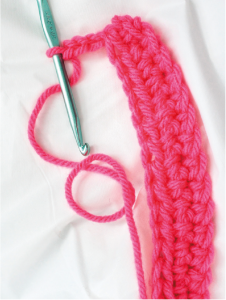 Turning Chain
Turning chains assist in the height, as well as keeping your edges straight for your project. You will utilize the turning chain at the very beginning of each row.
✜ Single Crochet = 1TCH
✜ Half Double Crochet = 2TCHS
✜ Double Crochet = 3TCHS
✜ Treble Crochet = 4TCHS
COMMON CROCHET TECHNIQUES USED
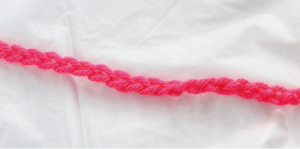
STARTING CHAIN
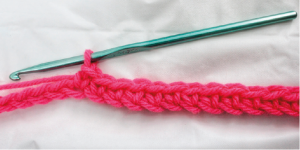
SINGLE CROCHET
HALF DOUBLE CROCHET
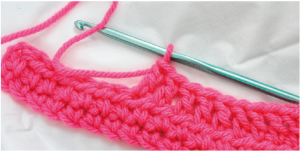
DOUBLE CROCHET
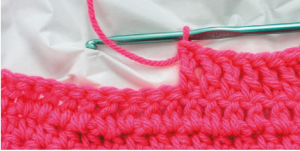
TREBLE CROCHET
ABBREVIATIONS
✜ Chain(s) = CH(S)
✜ Double Crochet = DC
✜ Half Double Crochet = HDC
✜ Row = R
✜ RND= Round
✜ Single Crochet = SC
✜ Skip = SK
✜ Slip = SL
✜ Stitch(es) = ST(S)
✜ Turning chain(s) = TCH(S)
✜ Treble Crochet = TRC
✜ ( ) work the instructions inside of the
parentheses into the indicated stitch
✜ * repeat the instructions following an
asterisk as many times as indicated
ADDING THE DETAILS
ADDING THE JEWELRY
Using the metal jump rings, you will separate them, guiding your crocheted projects, charms, or metal earrings through the jump rings to secure them in place to the crocheted project.
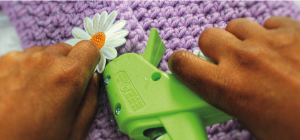
HOT GLUE GUN
Apply the hot glue to the back of the applique first, then set it upon the crocheted piece, holding it down for a few seconds to allow the glue to cool and secure in place.
FABRIC LINING A PROJECT
Measure out the fabric, aligning with the finished crochet project, allowing a decrease within a few centimeters to cut the fabric. Align the crochet edges with the fabric. Use a hot glue gun or needle and matching thread to sew the fabric to the inside of the crochet project.
 SEWING
Thread your sewing needle. Work from the inside of your project and through the crochet stitches to attach the band. Secure in place by sewing the two notions together.
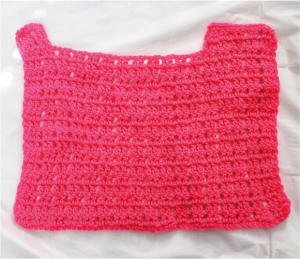
CROCHET CLOTHING CONSTRUCTION
WORKING IN PANELS
When constructing crochet tops, they will be formed with two main panels [front and back].
CREATING THE SHOULDERS
The shoulders are formed at the very last row. At the top of the crocheted panel, leave the
middle stitches free for the neckline. Reinsert your hook into the same row [opposite side]
once one set of shoulder rows is complete.
CUSTOMIZATIONS
The best part of creating your own clothing is the opportunity to customize and construct the handmade project in the way you would like it. The designs are easily adjustable; freely open to add or alter the way you would truly love to see it.
CREATING ARMHOLE/SLEEVE OPENINGS
METHOD #1
Construct the sleeves by skipping 2 STS and reinserting your hook into the third stitch, crocheting the rest of the row until you reach the third last stitch. Turn piece to continue work. Omit 4 TOTAL stitches (2 stitches at each end) to construct the sleeve openings.

METHOD #2
Constructing the sleeves, insert your hook into the top side of the crocheted piece, working vertically along the edge to create your sleeve openings.
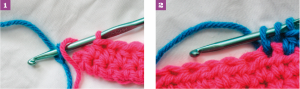
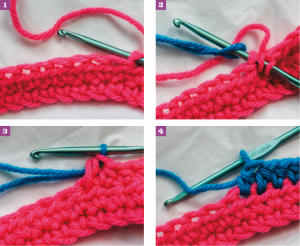
CHANGING COLORS
METHOD #1
Working primarily at the end of the completed row, when you’re changing colors (example: creating stripes), you will keep the first color you have on your hook and place the new color onto the crochet hook. Pull the secondary/new color through the first/old color’s two loops, then you’ll turn your project at the end of the row. Utilizing the turning chain method, apply the appropriate chains and continue work.
METHOD #2
When working with graphs, switch colors as you follow each color square as they appear. Each color change can be created within the same row more than once to create the graphic. Before approaching the last stitch before a color change, following METHOD ONE, place the new color onto the crochet hook and work the appropriate technique into that last stitch, pull through the new color from the two loops to create the color change.
IMPLEMENTING SUSPENDER CLIPS
Guide the crocheted strap through the band using the tapestry yarn sewing needle and threading a strand of yarn. Overlap the crochet strap and sew, securing the strap and suspender clip in place.
CROCHET BLOCKING
Blocking your crochet is a process used to form and shape your work. Block the designated pieces right before proceeding to the seaming together step to construct the specific measurements.
METHOD #1
Lay the piece on a foam core board or blocking board. Following the specific measurements, use rust proof T-pins to pin the piece to the board. Spray the piece lightly with a water bottle or fully immerse it in water. Allow piece to air dry.
METHOD #2
Lay the piece on a foam core board or blocking board. Following the specific measurements, use rust-proof T-pins to pin the piece to the board. Gently apply heat or steam lightly to shape your work. Depending on the fiber content of the yarn, place a protective barrier such as a towel on the piece to protect it from scorching.