These excerpts are from the book: The Practical Guide to Using Generative AI in Photoshop by Colin Smith of Photoshop Cafe. Utilize the biggest updated in Photoshop history! With the power of AI photo editing, you can now remove, expand, generate, change, or combine almost anything you need to in order create the images you want. Colin walks you through generative AI in Photoshop and teaches you how to incorporate these new tools into your workflow in an easily understandable way. Learn how to remove reflections from someones glasses and remove people from a background of your photo with this simple guide.
How to Remove Reflections from Glasses Using Generative AI in Photoshop
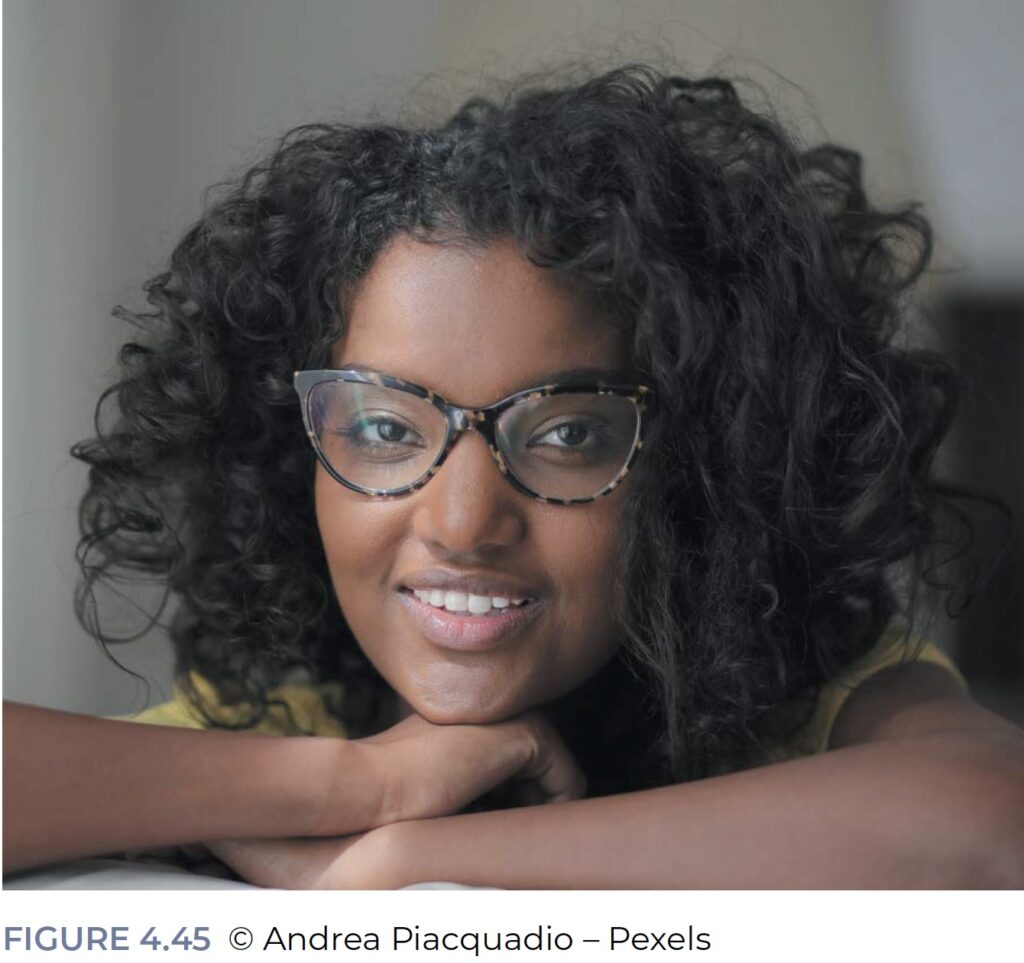
Removing Reflections from Glasses: Many of us are going to face reflections on glasses at some point. Let’s use Generative Fill to fix the reflections in this example image (FIGURE 4.45).
We’ll start with the Selection Brush Tool (Quick Mask or the Lasso Tool would work well too):
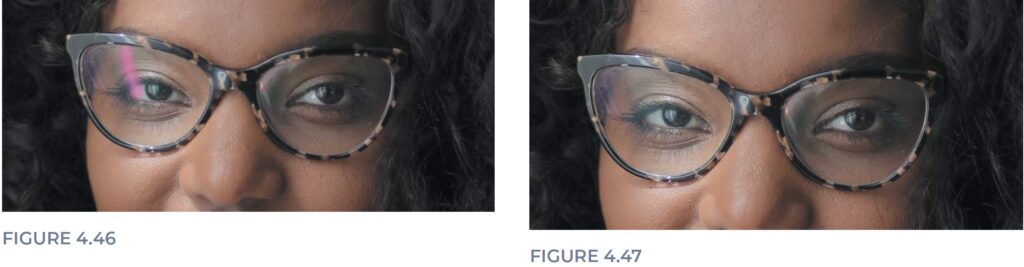
1. Paint over the first reflection (FIGURE 4.46). It’s best to tackle them one at a time, rather than trying to remove all the reflections at once.
2. Click Generative Fill in the Contextual Task Bar.
3. Leave the text prompt field empty and click Generate.
4. Choose the best variation in the Properties panel.
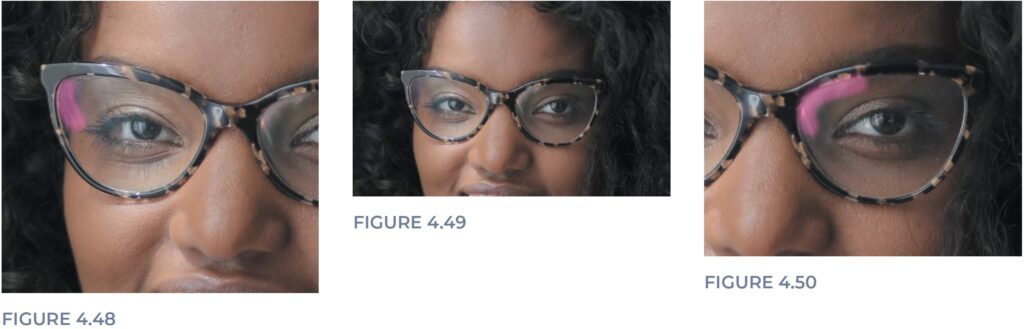
The worst reflection is now gone (FIGURE 4.47).
5. Paint over the next reflection (FIGURE 4.48). We started with the worst reflection, and we’ll work your way through them from worst to least.
6. Click Generative Fill in the Task Bar.
7. Leave the text prompt field empty and click Generate.
8. Choose the best variation in the Properties panel (FIGURE 4.49). Let’s work on the other lens. 9. Paint over the top reflection (FIGURE 4.50). Be careful to select the entire reflection, but avoid selecting the frames from the glasses.
Click Generate and see how much better the glasses look (FIGURE 4.51).
You don’t have to remove all the glare and make it look like there is no glass in the frames, but you do want to remove the distracting reflections.
How to Remove People from a Photograph Background
Removing People from a Photo: As travel hot spots get more and more crowded, I imagine a lot of people will be using AI tools to remove crowds. Let’s do a basic crowd removal right now.
Here I am at the famed (and ever crowded) Brooklyn Bridge (FIGURE 4.8). Let’s remove all the people for a clean shot of the bridge.
There are two methods to remove the people. There is an automated method using the AI-powered Remove Tool, and a second method that involves using selections and Generative Fill. We’ll walk through both methods here.
Method 1: The Remove Tool with Find Distractions
1. Best practice is to create a new layer first and work on this layer (FIGURE 4.9). This will allow us to modify the results with masks.

2. Choose the Remove Tool from the Tools panel (FIGURE 4.10). It is nested under the Spot Healing Brush Tool.
3. Turn on Sample All Layers in the Options Bar at the top of the interface (FIGURE 4.11); otherwise, the tool won’t see anything on the blank layer.
4. Click on Find Distractions in the Options Bar and choose People (FIGURE 4.12). Photoshop will look for people and highlight them. Usually, any people in the background will be highlighted, and the primary subject will be left alone (FIGURE 4.13). We can also add to or remove from the selection. We will come back to that soon.


5. Press Enter or click the check mark in the Options Bar to apply the removal. The selected people will vanish, as if by magic (FIGURE 4.14).
This removed all the background people and kept the main subject (me). What if you want to remove all of the people?
6. Repeat steps 1–4.
Now we will guide the selection process.
7. Make sure the plus is selected in the Options Bar (FIGURE 4.15).
8. Paint over the other people or objects that you want to remove (FIGURE 4.16). If there are areas highlighted that you don’t want to remove, hold down Alt/option and paint to remove the highlight.
9. Press Enter to apply the removal to the selection, and all the people are now gone (FIGURE 4.17).

Method 2: Generative Fill with Selections
Now let’s have a look at making the selections manually and using Generative Fill to remove the people. It’s good to know multiple methods because sometimes automated things don’t work as you’d like them to and you should know how to do it (somewhat) manually. This method also has the advantage of allowing us to choose from different variations.
1. Choose the Lasso Tool from the Tools panel.
2. Make a selection around all the people (FIGURE 4.18).
3. Click on Generative Fill in the Contextual Task Bar.
4. Leave the text prompt blank.
5. Click Generate.

Notice all the people are removed and it looks great (FIGURE 4.19).
If the result isn’t what you want, click through the different variations in the Properties panel (FIGURE 4.20). If you don’t like any of the variations, click Generate to make three more.

Remove a Crowd and Keep a Person
Okay, we know we can remove the crowd. What if we want to remove the crowd, but keep the main person in the shot? We need to do a sandwich move here.
Let’s perform these steps with that photo of me on the Brooklyn Bridge in New York City (FIGURE 4.8).
1. Choose one of the magic tools: either the Magic Wand, the Quick Selection Tool, or the Object Selection Tool (FIGURE 4.21).
Once one of these tools is selected, the context-sensitive Options Bar at the top will show Select Subject.
2. Open the Select Subject menu and choose the Cloud option, if you’re connected to the internet (FIGURE 4.22). The Cloud option will always do a better job because it uses a more advanced algorithm on Adobe’s data center (versus being limited to your computer).


You will see a selection around the person (me) now (FIGURE 4.23).
3. Use the Quick Selection and Lasso Tools to fix the selection if you need to.
4. Press Ctrl+J/command+J (Windows/Mac) to copy the selection to a new layer. Now you have preserved the person and you can apply Generative Fill underneath.
5. Choose the Background layer (FIGURE 4.24).
6. Make a selection around the people (FIGURE 4.25). Don’t worry if you go over the main person, as they are nice and safe on the top layer now.

7. Choose Generative Fill in the Contextual Task Bar.
8. Leave the text prompt field empty.
9. Click Generate.
10. Choose the best variation in the Properties panel, or click Generate again if you don’t like any of the variations.

Now we have achieved our goal (FIGURE 4.26).
If you look at the Layer’s panel, you will see the Generative Fill sandwiched between the two layers (FIGURE 4.27). Use the layer mask to refine the image if you need to.

Thanks for reading! To view the full chapter and learn even more tips for using generative ai in Photoshop, check out the book: The Practical Guide to Using Generative AI in Photoshop, by Colin Smith.