The following article is an excerpt from Glenn Randall’s book Dusk to Dawn.
A moonlit walk in the wilderness is an enchanting experience. The world is familiar, yet transformed. The light seems to have a silvery, bluish quality. Shadows are inky black. When the moon is full, the beam of your headlamp becomes a barrier between you and the magic of moonlight. Turn your headlamp off, and pause for a few minutes. Once your eyes have dark-adapted, a headlamp is only necessary if you’re hiking through a forest or through deep shade in the depths of a canyon. Learning to make evocative images by the light of the moon opens up yet another realm of nighttime landscape photography.
In this chapter I’ll concentrate on techniques for creating images where the stars are rendered as points rather than long streaks or trails. See chapter 8 for a full discussion of shooting star trails, which can be shot regardless of the phase of the moon.
As always, good planning will help ensure a successful shoot. The Photographer’s Ephemeris, Sun Surveyor, and any number of internet sites can provide information on moonrise and moonset times. The Photographer’s Ephemeris and Sun Surveyor go beyond such basic information by giving you the azimuth and altitude of the moon at any time or place. They also provide information on the phase of the moon, usually expressed as the percentage of the moon’s disk that is illuminated.
The day-to-day change in the time of moonrise and moonset is very different from the day-to-day change in the time of sunrise and sunset. In the spring, in the northern hemisphere, the sun rises earlier and sets later on successive days. In the fall, the sun rises later and sets earlier on successive days. The change in the time of sunrise and sunset is small, only a minute or two per day.
The moon, by contrast, always rises and sets later on successive days. The change in the time of moonrise and moonset is much larger and more variable than it is for sunrise and sunset. For example, in the northern part of the United States, the delay in moonrise from one day to the next ranges from a few minutes to well over an hour. To make things still more confusing, the difference between moonrise times on successive days is not necessarily the same as the difference between moonset times on those same successive days. If you need the moon to be in a very specific location (shining through an arch, for example), there may be only a few days in an entire year when the shot works. Use the position search capabilities in Sun Surveyor to identify those days

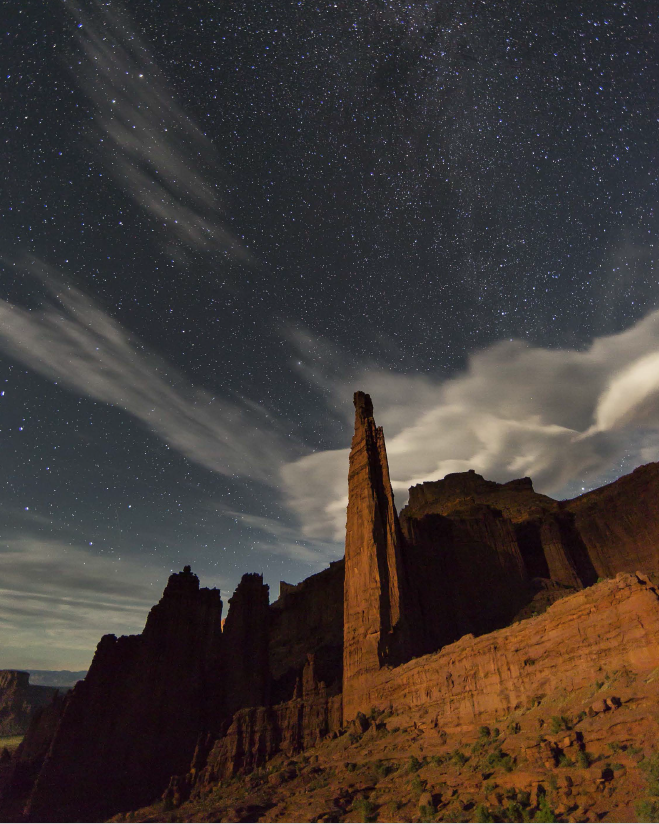
Milky Way and lenticular clouds over the Titan, Fisher Towers, Utah. August 10, 2016, 11:54 p.m. Canon EOS 5D Mark III, Canon EF 14mm f/2.8L II USM, 30 seconds, f/2.8, ISO 6400. A waxing gibbous moon provided the light on the land.
The azimuth of moonrise and moonset varies tremendously throughout the year. At the latitude of Denver, in the summer, when the sun rises well to the north of east and sets well to the north of west, the full moon rises well to the south of east and sets well to the south of west. Conversely, in the winter, when the sun rises well to the south of east and sets well to the south of west, the full moon rises well to the north of east and sets well to the north of west. This makes sense when you consider that the moon is full when it is directly opposite the sun as seen from Earth. If the sun rises to the southeast, the full moon will set to the northwest. If the ideal sunrise light on your subject occurs at summer solstice, the ideal moonrise light on your subject occurs at winter solstice.
The angle of moonlight as it illuminates your subject at night is just as important as the angle of sunlight during the day. The best angles during the day are generally those that produce sidelight, which creates texture, form, and volume; and backlight, which often adds drama, particularly if the sun is in the frame and right on the horizon. Front light, which occurs when the sun is directly behind you, is usually the least interesting direction of light unless the light itself is strongly colored at sunrise or sunset.
The best angles for moonlight are a bit different. During the day we easily see detail in most shadows; at night, even well-adapted human eyes can rarely penetrate dense shadows, and our cameras struggle to record much detail there if the exposure is correct for the highlights. Try to compose with the moon roughly 30 to 60 degrees right or left of a straight-behind-you position. A scene that is perfectly front-lit (moon straight behind you) looks flat, just like it does in daytime. Front-lit scenes can also create problems with your own shadow intruding into your composition. Perfect sidelight, however, with the moon at exactly 90 degrees left or right of the camera axis, can create too large an area of black shadow to be pleasing. Backlight exacerbates the excessive-shadow problem. Backlight can also create unmanageable flare, particularly if the moon is in the frame and high in the sky. Backlit daylight scenes seem acceptable if the sun burns out to blank white. After all, we can’t look directly at the sun. But a blank-white, irregularly shaped region of flare where a perfectly round and detailed moon should be seems unnatural.
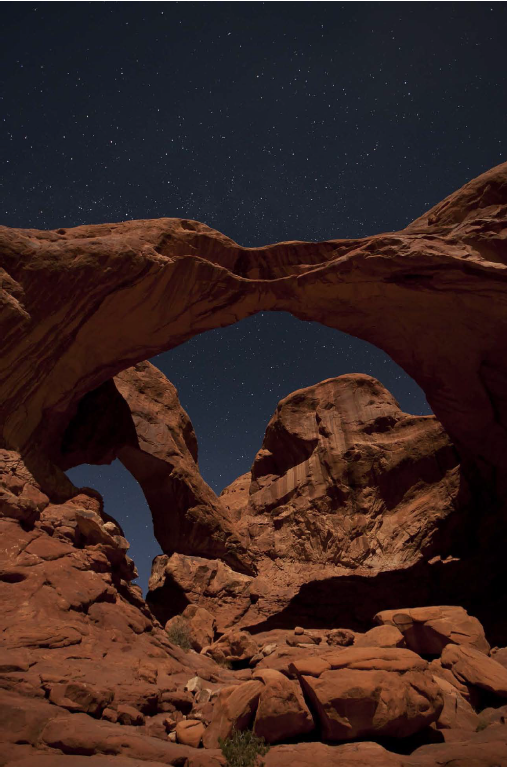
Once you’re in the field, try to find compositions that require you to look up steeply. On moonlit nights, the sky near the horizon may be so bright that you see only a few stars. If the horizon is at the same elevation as you, and your composition includes only a narrow strip of sky, the photo may look like you shot it in daylight, then forgot to retouch those last few pesky white dots in the sky. The sky well above the horizon is much darker, which means you see more stars. As a rule, it doesn’t work well just to include lots of sky because the sky, all by itself, is not interesting enough to carry the shot without the Milky Way, which is invisible on nights with a full moon. Try to fill part of the sky with something interesting. Arches, sandstone towers or other kinds of rock spires, interesting trees, and very dramatic peaks can all make good subjects.

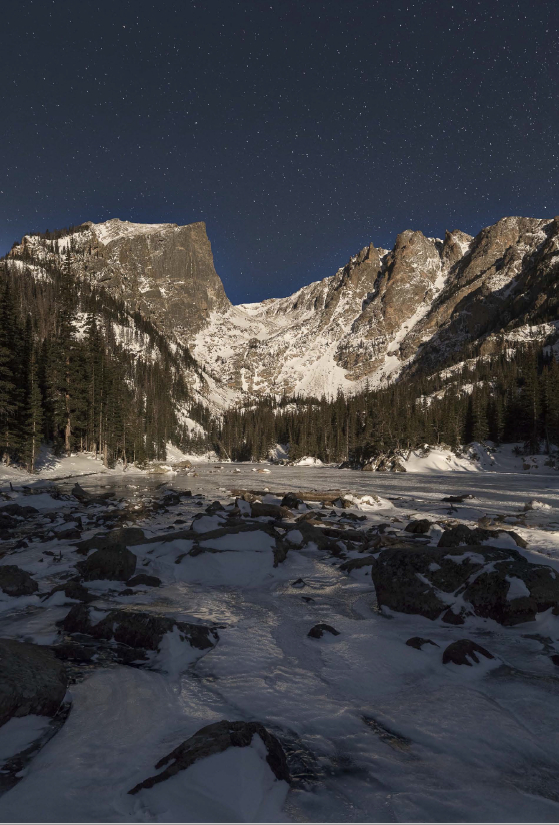
Hallett Peak and Dream Lake by moonlight, Rocky Mountain National Park, Colorado. December 5, 2017, 8:17 p.m. Canon EOS 5D Mark IV, Canon EF 16-35mm f/2.8L III USM. Land: two focus positions, four frames per focus position, images stacked in Photoshop, noise reduced with Stack Mode>Median, 30 seconds, f/5.6, ISO 3200. Sky: 15 seconds, f/4, ISO 3200. A waning gibbous moon provided the light on the land.

Double Arch by moonlight, Arches National Park, Utah. November 8, 2008, 7:28 p.m. Canon EOS 1Ds Mark III, Canon EF 16-35mm f/2.8L II USM, 20 seconds, f/2.8, ISO 1600. A waxing gibbous moon provided the light on the land.
