Don’t Forget the Polarizer January 27, 2015 – Posted in: Photography – Tags: image editing, post production, travel
If an enthusiast photographer is going to forget anything, my bet would be it’s the polarizing filter. (Tripods don’t count because we “forget” those on purpose.) How do I know this? Because at the start of every warm weather workshop, I have a checklist that I review for my crew. And guess what’s usually missing?
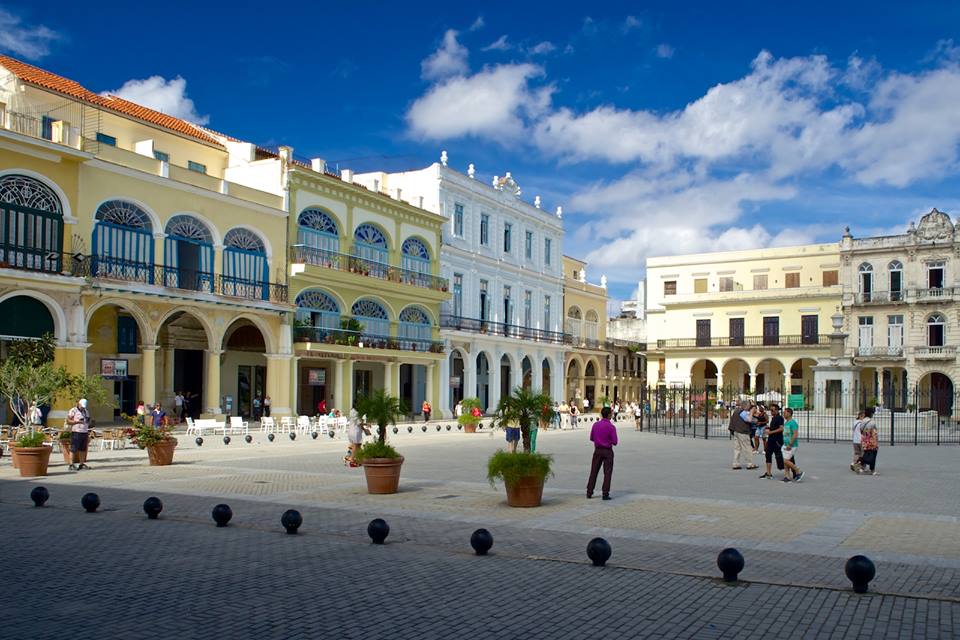
Last week in Havana was a perfect example. A handful of us were exploring a plaza in Old Town (pictured above). Part of the time we were just standing around, taking in the beauty of the location. I find these are good opportunities to talk shop. We can point to this or that and ask, “How would you shoot it?”
On this particular day, I asked if anyone was using a polarizer. No one had packed one. A typical comment would be, “My skies are already incredibly blue. I don’t need it.”
That’s a great point. Our cameras today have the capability to capture an amazing amount of detail and color. Why would you add a polarizer on top of that?
The reason goes beyond just blue skies. In fact, in certain conditions you have to back off the intensity of polarization to prevent uneven blue in the sky. (More on this in a bit.)
I find polarizers most useful for combating reflected light. When it’s bright, such as in the example photo at the top of the article, light is bouncing everywhere. This reflected light is almost like subtle lens flare that you don’t detect. What it’s doing is slightly desaturating your colors. You’re not able to capture the crisp contrast that your camera is capable of.
By using a polarizing filter and positioning the sun over one shoulder or the other, you can minimize these reflections and record spectacular color. I know some photographers consider this an enhancement, but I think it’s allowing us to photograph what’s really there.
The way I like to use the polarizing filter to rotate the front element while composing the image in the viewfinder. I typically don’t go for full effect, rather, I use a midrange setting. It’s not so much that I want to juice the photo, I just want to mitigate some of that reflected light.
Since polarizing filters are expensive, here are a few tips to maximize your investment.
- Buy a size that fits the lens you most commonly use for landscape, architecture, and travel. If that comes down to a decision between a couple lenses, buy for the largest diameter filter ring, then get an inexpensive step-down ring to adapt the filter to the other lenses.
- Invest a little extra for a multicoated filter. Since the name of the game is light transmission, a multicoated filter will improve the quality of your images, especially in bright conditions.
- Shade the front of the filter when the sun is reflecting off your optics. The performance of the best filter will be compromised if the sun is shining directly on the glass. I usually shade the lens with my non-shooting hand.
- Keep an eye on the sky when using a polarizer. If you seen uneven blue in the viewfinder, especially in the corners, back off the intensity by rotating the front element.
- Bring it with you.
When on location, I usually don’t see the improvement from the pola filter when reviewing pictures on the camera’s LCD. But once I start working with them on the computer, the effect can be magical.
Derrick Story is the photography evangelist for Rocky Nook Publishing. Want to keep learning? Check out our free downloads and articles.

