A First Look at the Fujifilm X-Pro2 July 27, 2016 – Posted in: Photography
Rocky Nook author and Fuji X-Pert Rico Pfirstinger breaks down The Fujifilm X-Pro2 in this comprehensive article. To learn more you can also purchase his book, The Fujifilm X-Pro2: 115 X-Pert Tips to Get the Most Out of Your Camera today!
First Look Review: The retro-styled X-Pro2 kicks off Fujifilm’s next generation of enthusiast X-series cameras, based on a state-of-the-art 24.3 MP X-Trans sensor and a much more powerful processor. At first, everything seems strikingly familiar, but a closer look reveals that quite a lot has changed.
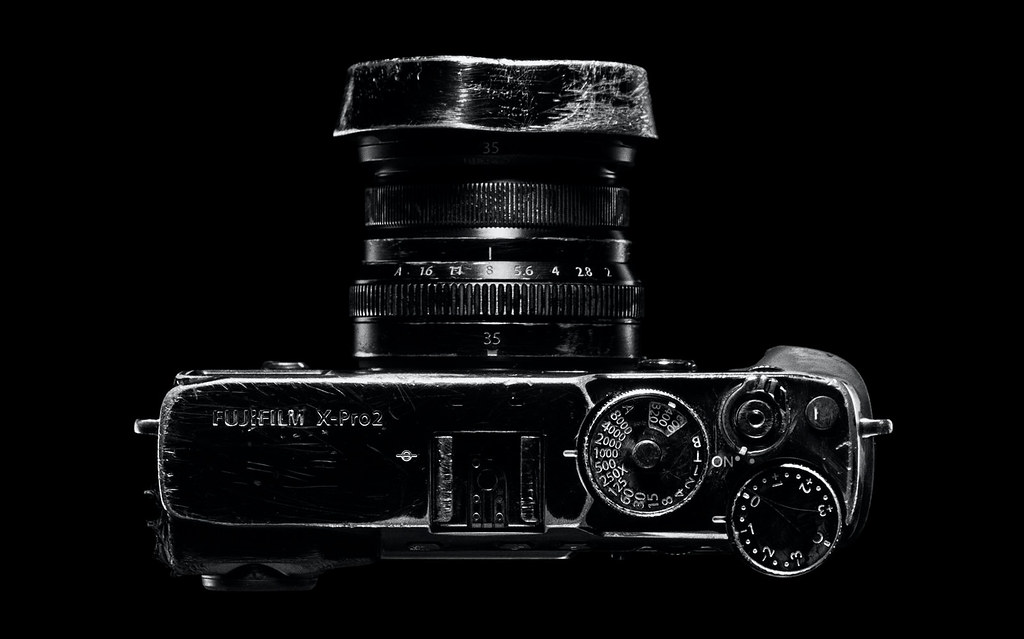
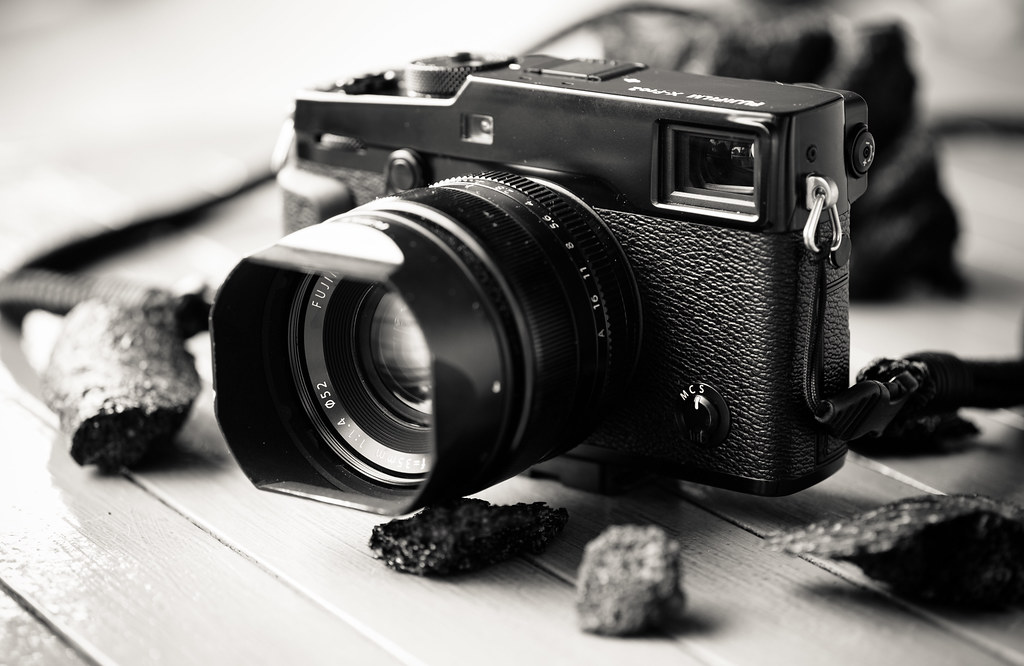
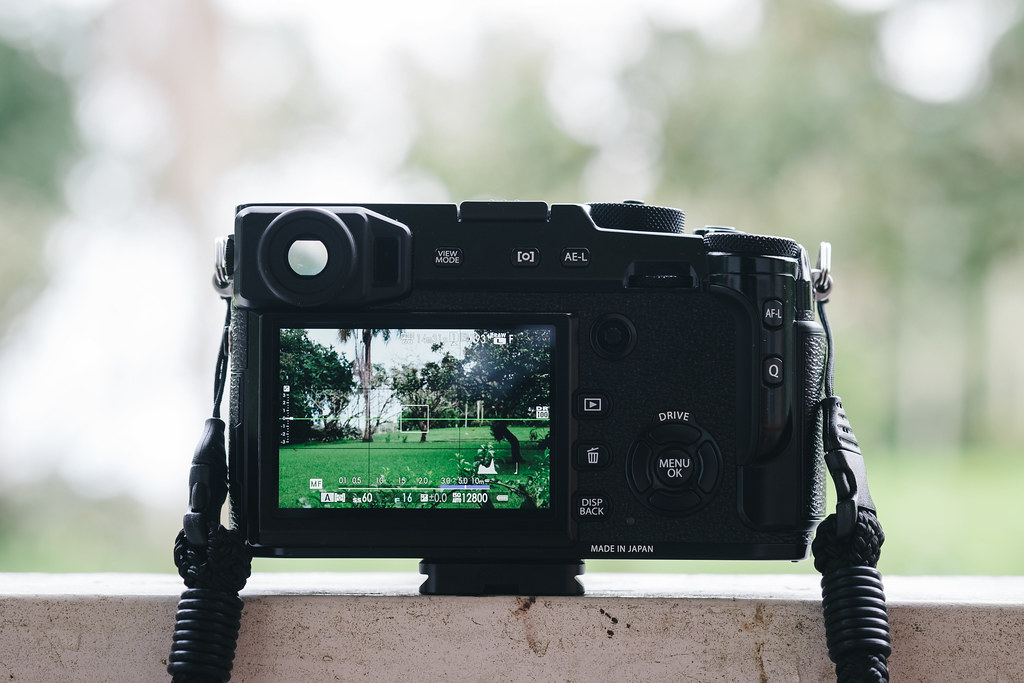
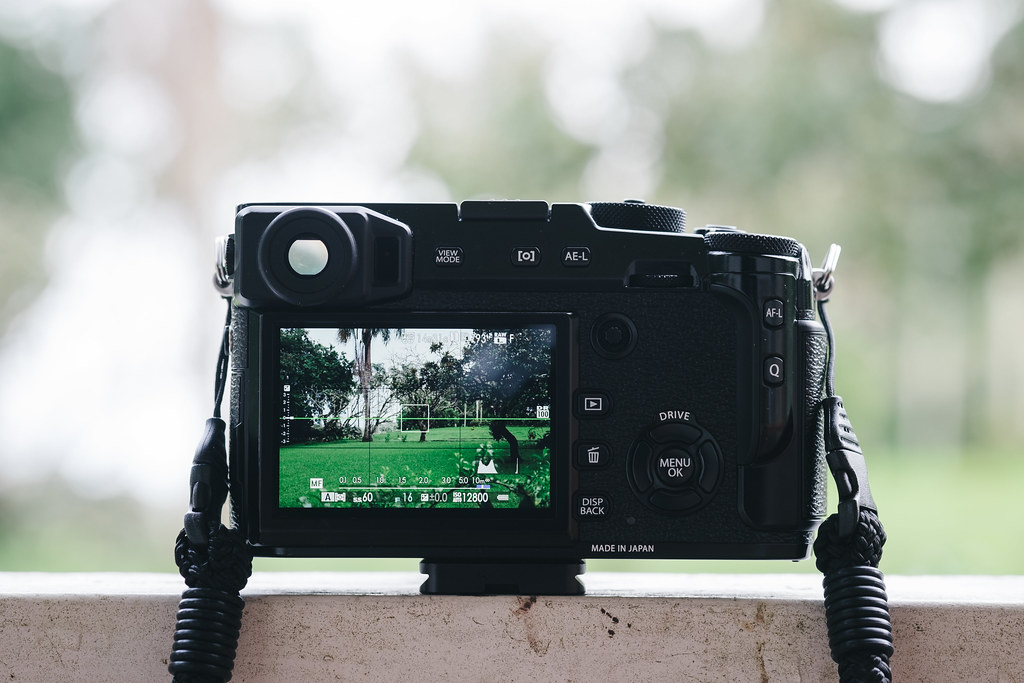
A Fujifilm X-Pro2 after a few days of light use
Four years after the introduction of the X-Pro1, Fujifilm is finally ready to open a new chapter in their book of mirrorless cameras. At first glance, the X-Pro2 looks just like its predecessor. However, it’s a different story on the inside (click here for full camera specs and here for more than 150 straight-out-of-camera and Lightroom RAW conversion sample images).
X-Pro2 with XF35mmF1.4 R
New features include…
- a new 24.3 MP X-Trans CMOS III sensor (Sony-built with 14 bit readout) with no anti-aliasing filter
- a much faster processor (X-Processor Pro) that offers improved image quality, better noise response and better dynamic range
- improved ISO performance that’s about one stop better than the previous generation
- 100% faster sensor readout (resulting in better AF tracking performance, a reduced blackout time of only 150ms and a fast 85 fps EVF refresh rate)
- an improved user interface with a new menu structure (including a custom My Menu with up to 16 entries) and better dials and controls (such as the front command dial and the dedicated joystick to quickly move the autofocus frame or zone)
- weather-sealing with protection against rain, dust and freezing
- an Advanced Hybrid Multi Viewfinder (featuring a diopter adjustment dial) with two optical magnifications and an electronic rangefinder option. The optical viewfinder that now supports focal lengths up to 140mm
- a low-vibration 1/8000s mechanical shutter with 1/250s flash sync that is rated for at least 150,000 shots (supplemented by an electronic shutter with 1/32000s)
- dual SD card slots (slot 1 supports UHS-II)
- faster hybrid autofocus with improved predictive capabilities, a larger phase-detection area and more focus points (either 7 x 11 or 13 x 21 focus points, including either 7 x 7 or 13 x 13 phase detection points)
- automatic pixel mapping (to map out dead or hot pixels)
- a new ACROS film simulation with ISO-controlled film grain
- expanded JPEG settings for contrast, noise reduction, sharpness, color and film grain
- broader ±2 EV bracketing and ±5 EV exposure compensation (along with expanded push/pull options in the camera’s built-in RAW converter)
- lossless RAW compression that cuts file sizes in half
- a much improved battery life indicator (including a 1% accuracy display)
- an enhanced depth-of-field scale with either pixel-based or film-based precision
- the addition of a center-weighted metering option (I wonder who asked for that?)
- proper simulation of hard dynamic range settings in the live view and live histogram
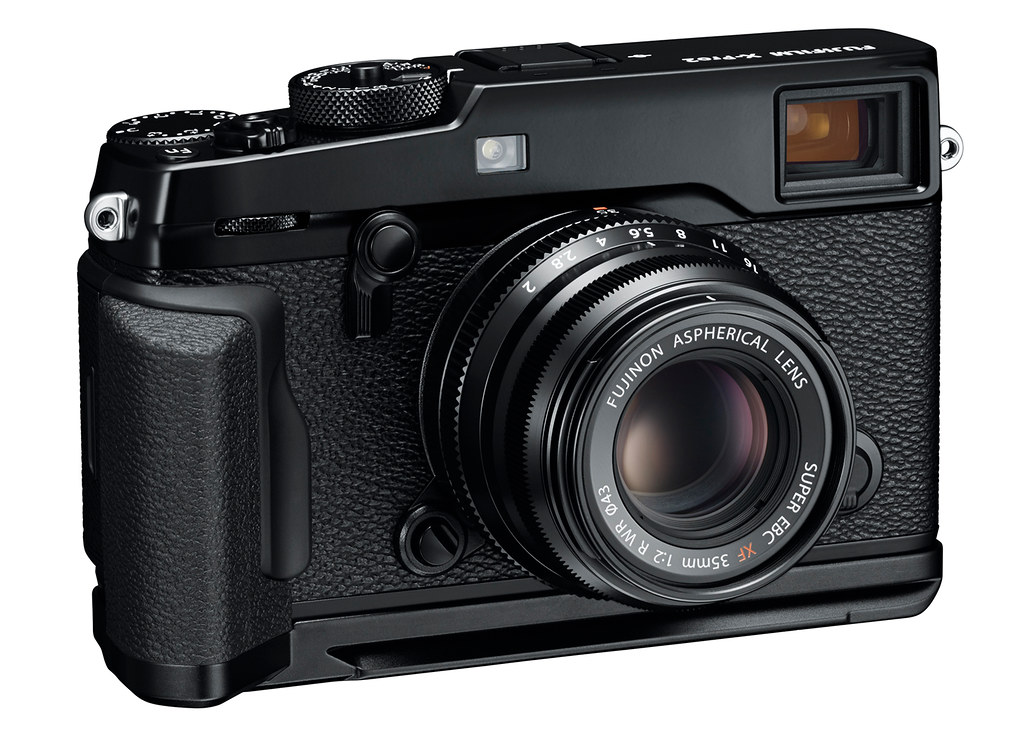
X-Pro2 with optional Arca-Swiss hand grip MHG-XPRO2
Improved Ergonomics
In an effort to be more ergonomic, Fujifilm put the tripod connector directly unter the optical axis and placed all buttons and dials on the right side of the camera. This means that your left hand can always support the lens, adjusting aperture, focal length (zoom) or manual focus as required.
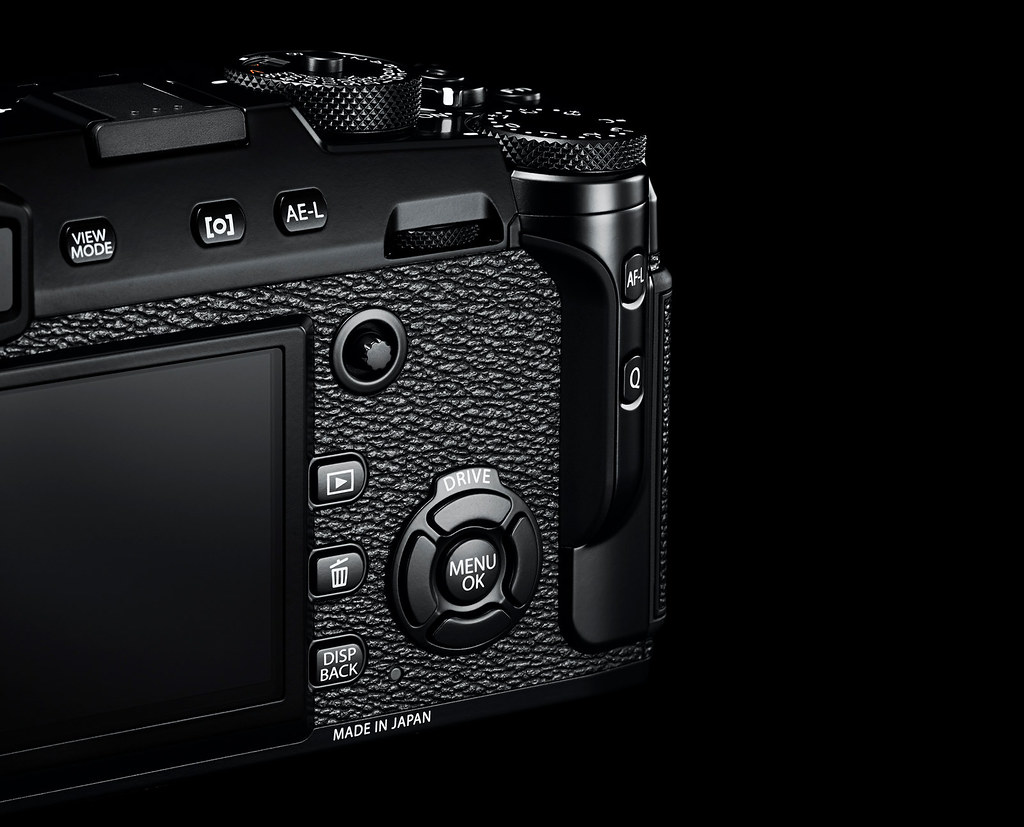
Right here, right now: buttons, dials and the focus joystick
The most important addition to the buttons and dials is the autofocus joystick, which lets you change the active AF frame or zone anytime immediately. It works vertically, horizontally and diagonally, and when you press the joystick, the “normal” AF frame selection window will appear, where you can pick one of five different AF frame sizes by turning the front or rear command dial.
Fujifilm X-Pro2, XF90mmF2 R LM WR, SOOC JPEG
Previously, there were only 49 different AF frames to choose frame. This number has been upgraded to at least 77 (7 x 11) frames in the X-Pro2, but wait, there’s more! If you like, you can also switch the camera to 273 (13 x 21) autofocus frames for even more pin-point AF frame positioning. Thanks to the new focus joystick, navigating that many focus frames is quite a…well…joy.
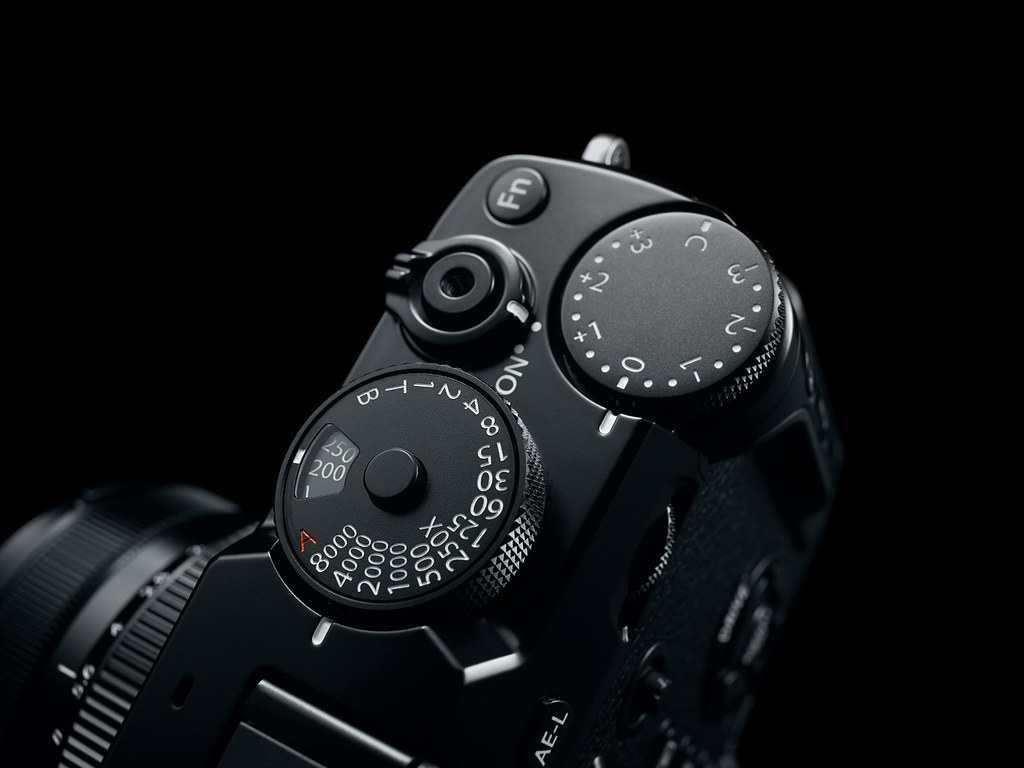
New combined ISO / shutter speed dial and enhanced exposure compensation dial
The ±3 EV exposure compensation dial known from the X-T1 has been enhanced: You can now select a “C” position which assigns exposure compensation to the X-Pro2’s new front command dial, where the exposure can be adjusted within a wide range of ±5 EV in 1/3 EV steps. By the way, exposure bracketing has also been improved to support twice the range as before: ±2 EV. However, it’s still limited to only three different exposures per bracketing. So let’s give Fujifilm another five years to remedy this limitation.
Fujifilm X-Pro2, XF100-400mmF4.5-5.6 R LM OIS WR, ISO 6400, SOOC JPEG
ISO has moved from a menu to a dedicated dial that has been combined with the traditional shutter speed dial. By lifting the shutter speed dial up, ISO can be changed between 200 and 12800 in 1/3 EV steps. There’s also an Auto-ISO (“A”) position and two positions for expanded ISO: “L” (ISO 100) and “H” (either ISO 25600 or 51200). In Auto-ISO, you can pick one of three different configurations (AUTO1-3) that can be configured with respect to ISO range (200 – 12800) and minimum shutter speed (1/4s – 1/500s). To switch between the three available Auto-ISO configurations, you have to either go to the shooting menu or assign it to one of the camera’s six customizable function (Fn) buttons.
Higher ISO
ISO calibration is still based on Standard Output Sensitivity (SOS) and perfectly in line with previous Fujifilm APS-C camera offerings. Please note that cameras from Canon, Nikon and Sony use a different ISO standard names Recommended Exposure Indes (REI).
ISO performance has been improved, but then again, seeing is believing. Click here for a Flickr album showing an ISO comparison that covers ISO 100 to ISO 25600 with camera factory settings.
Click on the image above to access the ISO comparison album
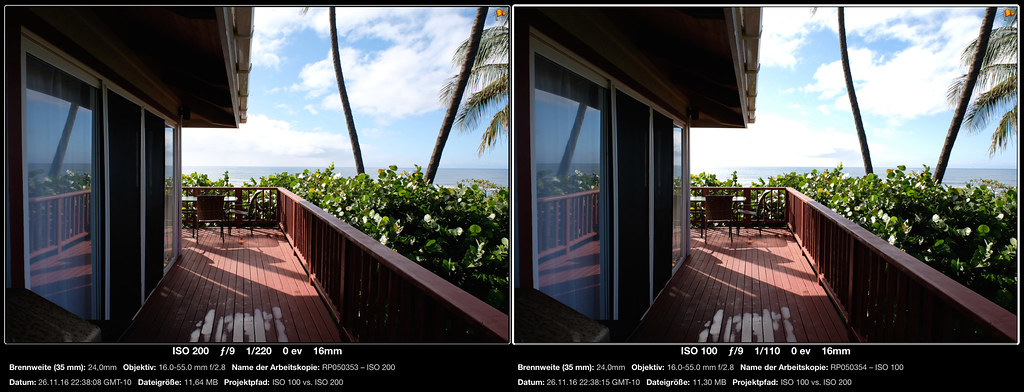
Unlike previous X-series models, expanded ISO settings are now capable of writing corresponding RAW files. Naturally, with a camera base ISO of 200, selecting ISO 100 (aka “L”) will result in a loss of 1 EV of highlight dynamic range, but this can sometimes be quite useful, for example in situations with flat light and scenes with limited dynamic range. In fact, ISO 100 works like a dynamic range setting of DR50%, adding contrast and “punch” to an otherwise flat image.
ISO 200 (left) vs. ISO 100 (right)
As you can see, this is a double-edged sword. In the example above, selecting ISO 100 (the image on the right) resulted in blown highlights. There’s no texture in the clouds and the sky is turning green due to an oversaturated blue channel. This makes ISO 100 a “grown-ups only” setting for users who actually know what they are doing.
This is especially true because the live view and the live histogram will give you false ISO 200 readings when the camera is in extended ISO 100 mode, displaying more highlight dynamic range than is actually available. Only when you half-press the shutter, the reduced highlight dynamic range will be simulated in the live view.
Fujifilm X-Pro2, XF60mmF2.4 R Macro, ISO 100, SOOC JPEG
In the image above, ISO 100 was put to good use by “punching up” this low-contrast scene. Shot noise was minimized thanks to the rich exposure on the sensor level, providing a smooth bokeh with fluid tonality. Basically, this is the classic “overexposure based” ETTR (Expose To The Right) procedure, only that it’s fully automated in the camera’s JPEG engine.
Fujifilm X-Pro2, XF60mmF2.4 R Macro, ISO 100, SOOC JPEG
However, the reduced highlight dynamic range can quickly backfire, as shown in the more contrasty example above, where the bright bases of the tiny trees have been blown out. There goes our fluid tonality. This drop in highlight dynamic range wasn’t visible in the live view and live histogram, so ISO 200 would have saved the day. Or tree. So let’s regard ISO 100 as an “expert setting” for super-clean results, but with limited highlight DR and a tricky live view and live histogram.
Fujifilm X-Pro2, XF35mmF1.4 R, ISO 10000, SOOC JPEG
In the high-ISO department, the X-Pro2 will perform at least 1 EV better than previous X-series cameras. Consequently, the X-Pro2’s Auto-ISO range has been expanded to cover 200-12800. Personally, I had no problems shooting as high as ISO 10000 or 12800. Even then, most of my samples were processed with minimized noise reduction settings. That’s because the camera’s noise is very fine (partly due to the increased sensor resolution) and looks much like film grain (thanks to X-Trans, there’s virtually no color noise, only “organic” luminance noise).
Fujifilm X-Pro2, XF18-55mmF2.8-4 R LM OIS, ISO 10000, SOOC JPEG
Good Vibrations
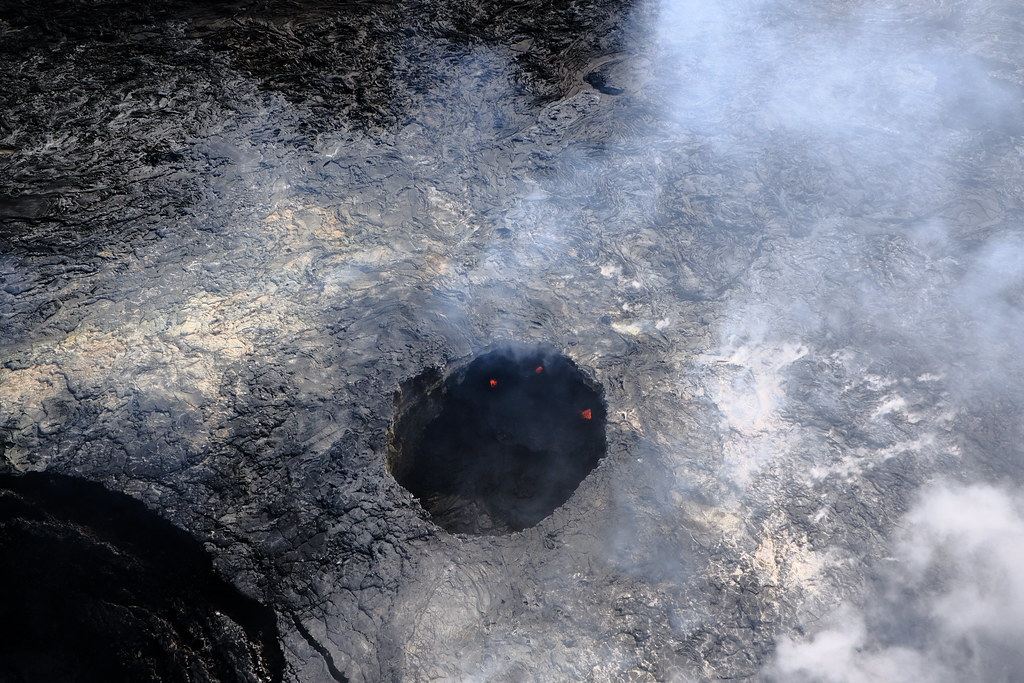
Shooting from a small Hughes 500 helicopter with “doors off” was a bit of a challenge due to the extreme high-frequency vibration of the aircraft. Luckily, Fujifilm’s lens-based OIS works with a sampling frequency of 8000 Hz (way ahead of many competitors) which means that it is possible to stabilize shutter speeds up to 1/4000s. This came in handy for the helicopter shots, where even shutter speeds of 1/2000s and beyond often resulted in blurred images. Turning on the OIS (in mode 2) immediately improved the keeper rate.
Fujifilm X-Pro2, XF18-55mmF2.8-4 R LM OIS, OIS mode 2, SOOC JPEG
This is a nice reminder that there’s an exception for virtually every rule. While it’s usually prudent to switch off the OIS in concert with fast shutter speeds, in this particular case, the OIS proved to be helpful even at 1/2000s and beyond. This may also be of interest for users who keep pressing Fujifilm to automatically deactivate the OIS when fast shutter speeds are detected. As we can see in this example, this would beat the purpose of high-frequency vibration compensation.
Advanced Hybrid Multi Viewfinder
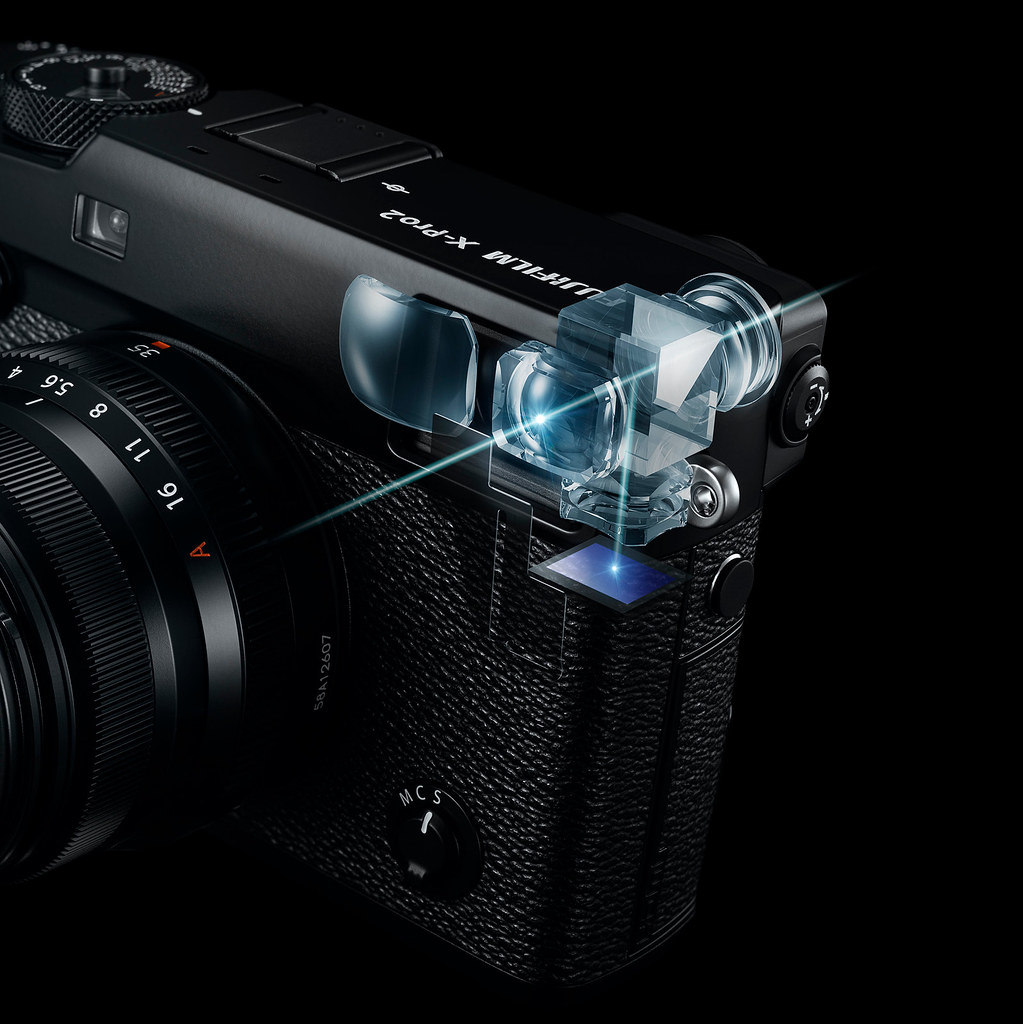
New Advanced Hybrid Multi Viewfinder with diopter adjustment
The X-Pro2 is a rather exotic camera for retro lovers with a heartfelt affection to classic rangefinder designs. Make no mistake: If you aren’t interested in using a hybrid viewfinder, there’s no rational reason to get this camera (of course, irrational reasons remain). You may be better off waiting for the successor of the X-T1 (which is expected later this year), featuring a large electronic viewfinder and tilting rear display. The X-Pro2 ain’t cheap, and much of its price tag is owed to the complexity of the Advanced Hybrid Multi Viewfinder which combines an optical viewfinder (OVF) with an electronic viewfinder (EVF) and an electronic rangefinder (ERF).
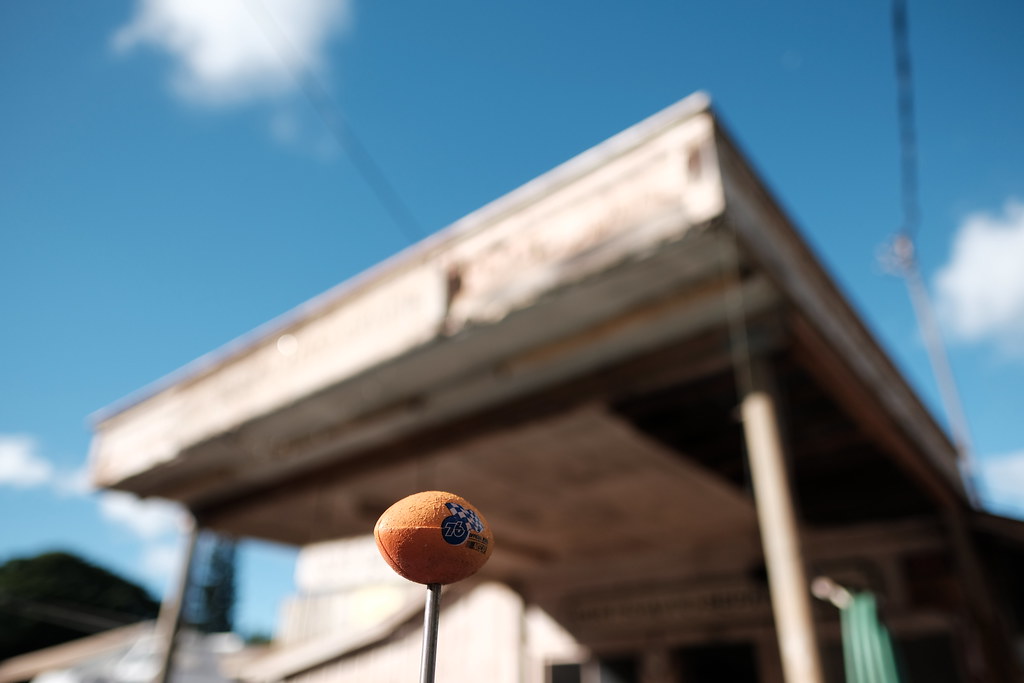
Fujifilm X-Pro2, XF35mmF1.4 R, SOOC JPEG
The optical part of the finder offers two different magnifications that are optimized for 18mm and 35mm focal lengths, which are represented by the XF18mmF2 R pancake, the classic XF35mmF1.4 R and the new XF35mmF2 R WR prime. However, Fujifilm wanted to make the OVF more versatile by expanding its reach beyond the previous 60mm threshold: With the X-Pro2, any focal length between 18mm and 140mm can now be used in concert with the OVF. This means that primes like the fantastic XF90mmF2 R LM WR become even more attractive, but also zoom lenses like the XF18-135mmF3.5-5.6 R LM OIS WR or the razor-sharp XF50-140mmF2.8 R LM OIS WR.
Fujifilm X-Pro2, XF60mmF2.4 R Macro, SOOC JPEG
Since this is a hybrid viewfinder, the optical viewfinder part has an electronic EVF overlay showing the currently active bright frame and AF frame(s) as well as shooting parameters. There’s also an automatic parallax correction for both the bright frame and the active focus frame, and the electronic rangefinder (ERF) option displays a small live view window in the lower-right corner of the OVF. This EVF window is useful to check exposure, colors and the actual field-of-view. It can also be used to manually focus a lens (native or third-party) while using the OVF. Focus assistants such as Focus Peaking or Digital Split Image (now also in color) are also available in ERF mode, as are three magnification levels for the tiny EVF window: a full view of the scene and two zoom levels.
Fujifilm X-Pro2, XF50-140mmF2.8 R LM OIS WR + XF1.4x TC WR, SOOC JPEG
This means that the X-Pro2 is a little bit like an X100T on steroids. Users who love the hybrid viewfinder will cherish the concept (after all, where else can they turn?), while the rest of us will mostly rely on the realtime EVF with its 2.36 megadots, 150ms blackout time and an impressive refresh rate of 85 fps, though the latter is only available in high-performance mode, so better pack some extra batteries.
Batteries & Cards
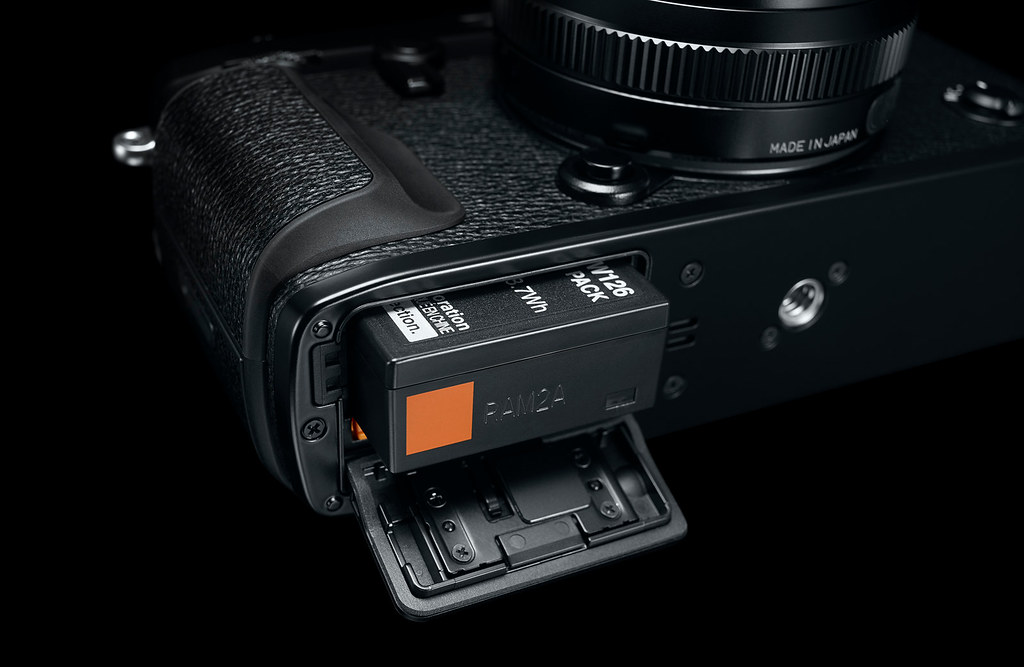
X-Pro2 users will soon be confronted with a truly game-changing innovation…
Luckily, the X-Pro2 eats the same NP-W126 batteries as previous X-series system cameras, so there’s a good chance that you already have a bunch of them at home. Now hang on to your seats, because here it comes! After five years of extensive research, Fujifilm’s finest engineers have come up with something truly magical: a usable battery life indicator! I am not kidding you! It even features an optional percentage display with 1% accuracy.
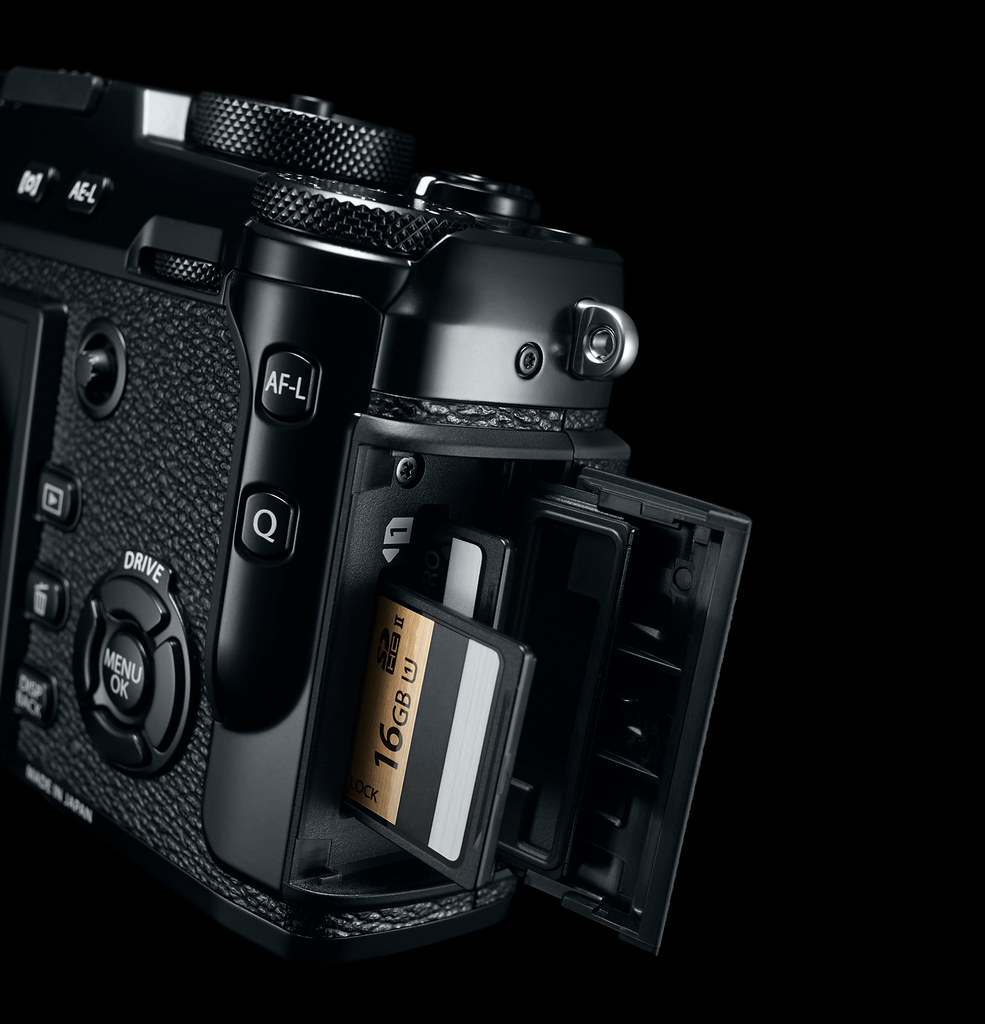
Dual SD card slots with UHS-II support (slot 1 only) and fast RAW / JPEG splitting
When a SanDisk Extreme Pro SD card literally disintegrated in my X-Pro2 (losing all data and clogging the slot for two days with nasty debris), I very much appreciated the existence of a second slot. There is a certain safety aspect to two slots, especially when you use them in Backup mode. With this setting, the camera is writing image data to both card slots simultaneously, basically making on-the fly copies of everything you shoot. There’s also a Sequential mode that works just like a one-slot camera, but giving you a readily available second slot once your primary card is full.
Fujifilm X-Pro2, XF16-55mmF2.8 R LM WR, SOOC JPEG
The last of the three card slot settings is named “RAW / JPEG”. It’s an interesting option for FINE+RAW shooters. In this mode, RAWs are transferred to slot 1 (where a super-fast UHS-II card like the Lexar 2000x should reside), while JPEGs are simultaneously transferred to slot 2 (optimally to a fast 95 MB/s UHS-I card like the SanDisk Extreme Pro). This is the fastest mode for anybody who wants to work with RAW and JPEG, and it’s also pretty safe, because if one card (or slot) fails, you’ll still have either the JPEG or the RAW on the other card. In this mode (and with the fastest cards available) you can shoot an endless stream of FINE/RAW pairs at 3 fps, as the frame buffer will empty just as quickly as it is restocked.
Fujifilm X-Pro2, XF16-55mmF2.8 R LM WR, SOOC JPEG
To achieve this impressive performance, it’s mandatory to use the camera’s new compressed RAW data format, which basically cuts the RAW file size in half (down to 20-30 MB per image). That’s smaller than the uncompressed RAWs of Fuji’s previous 16 MP models! Of course, Fujifilm’s compression method is completely lossless, so using it takes no toll on image quality. The compression is hardware based and super-fast. Independent RAW converter makers (such as Iridient or Picture Code) might have an issue with it, though, as they might need some extra time to figure out how to decompress the files.
Faster Shutter
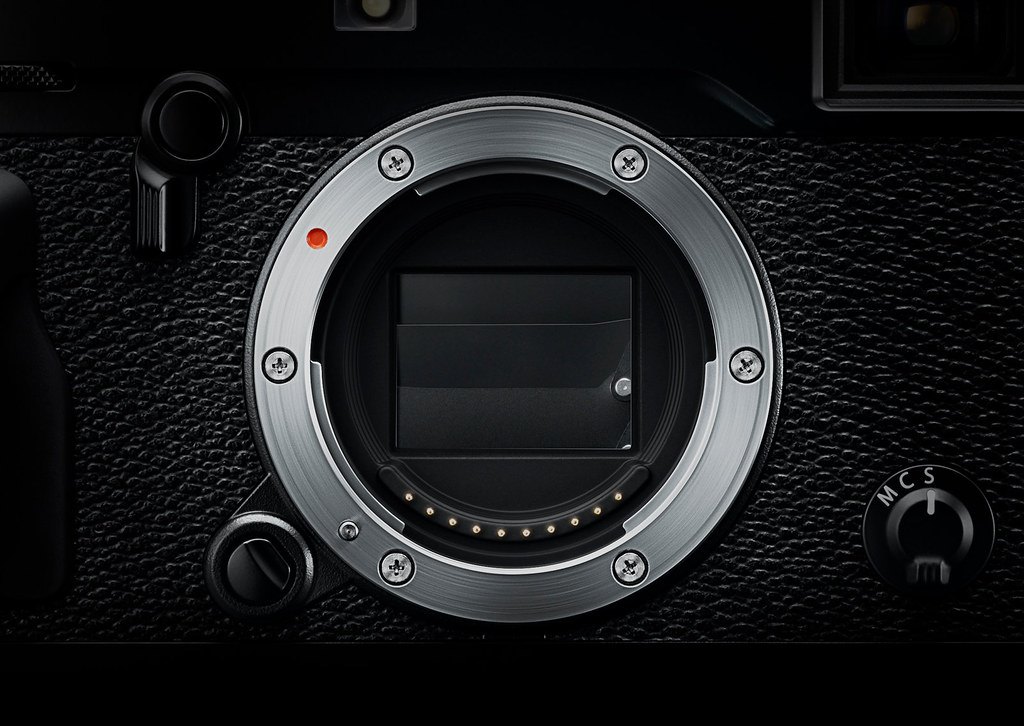
New focal plane shutter with 1/8000s max. speed and 1/250s flash sync. speed
The X-Pro2 is Fujifilm’s first camera to feature a robust focal plane shutter with a maximum speed of 1/8000s and improved 1/250s flash sync. speed. High-speed synchronization (HSS) up to 1/8000s will also be supported with the company’s upcoming EF-X500 flash unit that is supposed to hit the market in summer (presumably in concert with a rumored X-T2). Despite the speed gain, the new shutter is of the low-vibration kind (hence no shutter shock), and it isn’t really louder than the previous model (it sounds different, though). It’s rated for are least 150,000 shots.
Fujifilm X-Pro2, XF16mmF1.4 R WR, 1/7500s, SOOC JPEG
In case 1/8000s isn’t sufficient, there’s also a silent electronic shutter with a maximum speed of 1/32000s. As usual, flash and burst mode AF tracking aren’t available in concert with the electronic shutter, but since the sensor readout speed has doubled in comparison to previous models, it’s fair to assume that rolling shutter effects will be less of an issue than they used to.
Fujifilm X-Pro2, XF35mmF1.4 R, 1/17000s (electronic shutter), SOOC JPEG
Better Sensor
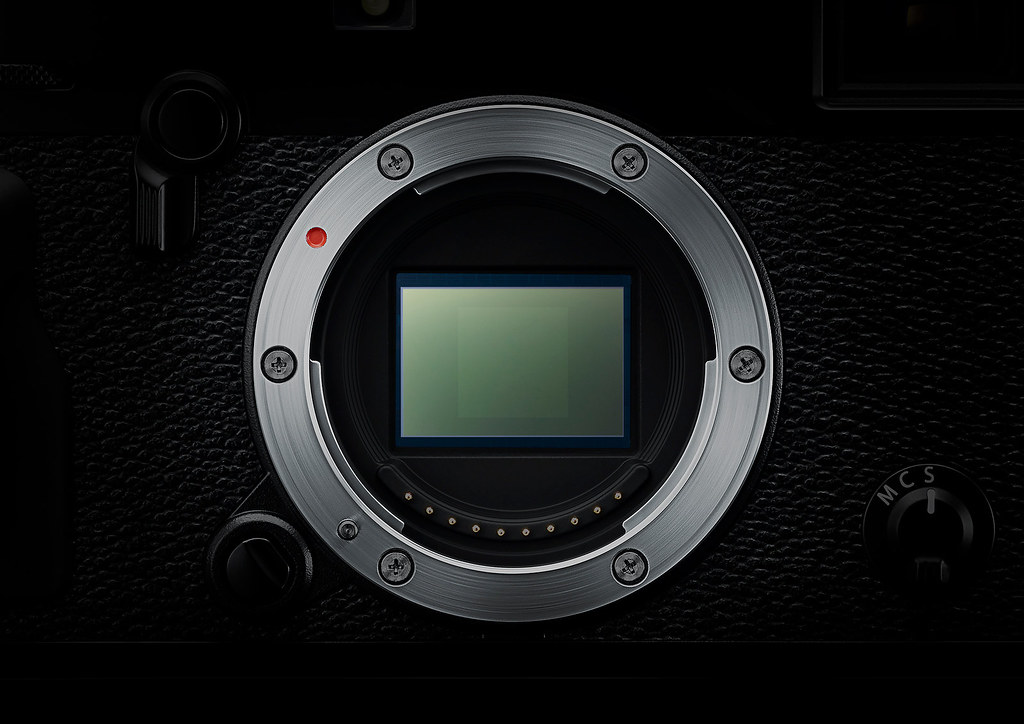
The ISOless X-Trans CMOS III sensor features a larger PDAF area (the square-shaped area in the middle of the sensor), a much shorter readout time, increased dynamic range and very low noise
The new 24.3 MP sensor in the X-Pro2 is a big leap forward. That’s not surprising, since the previous X-Trans CMOS II sensor was introduced in early 2013 with the X100S and was apparently still based on the Sony IMX071 sensor, a popular workhorse from 2011 that was used by companies like Sony, Nikon, Pentax, Leica and, of course, Fujifilm. So what’s new? Well, sensor readout is now twice as fast (despite the larger pixel count). This means that everything else is faster, too: autofocus tracking, EVF frame rate, electronic shutter readout, you name it. It also cuts the blackout time after release in half, making it easier to track moving subjects in the EVF.
Fujifilm X-Pro2, XF10-24mmF4 R OIS, SOOC JPEG
Fears that the higher pixel count has a negative impact on noise (and hence high-ISO and dynamic range) performance are unfounded. Quite to the contrary, the new sensor/processor combo really delivers in this department. Normalized to 16 MP, the X-Pro2 outruns previous 16 MP cameras by at least 1 EV, so you can set the camera to ISO 12800 and will still get results that look at least as clean and detailed as those taken with ISO 6400 using the previous generation.
Fujifilm X-Pro2, XF50-140mmF2.8 R LM OIS WR, SOOC JPEG
More Focus
While the X-Pro2 isn’t a genuine action camera, it sets a precedent for things to come, namely the rumored X-T2. Unlike Sony, Fujifilm has a history of using and reusing the same sensor/processor combo in multiple camera models, so it’s not unreasonable to assume that we are just at the beginning of what Fujifilm wants to accomplish with this new hardware. In other words: This processor still has room to spare. Sony has publicly pledged to renew their hardware in cycles as brief a six months, but my sources tell me that Fuji may have a different strategy: free major firmware updates (also in roughly 6 month intervals) for new products. With firmware 4, Fuji has essentially turned the X-E2 into an X-T10 with rangefinder design, so why not turn the X-Pro2 into an X-T2 later this year? Let’s hope this strategy materializes.
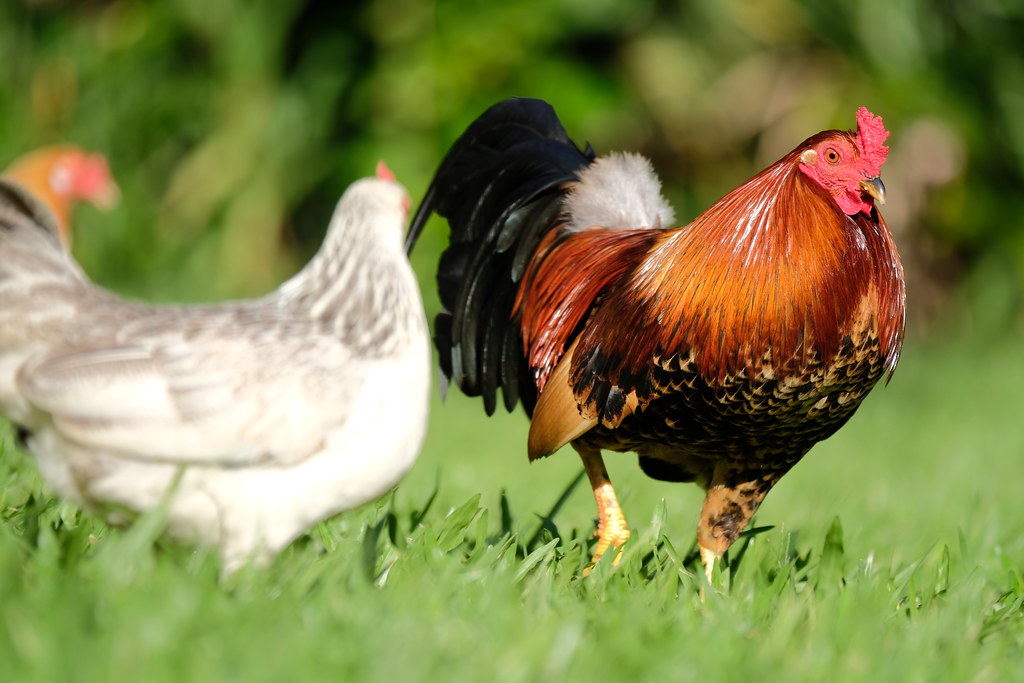
Fujifilm X-Pro2, XF100-400mmF4.5-5.6 R LM OIS WR, SOOC JPEG
As far as autofocus performance is concerned, the expansion of the PDAF area certainly helps tracking moving subjects across the frame. About 40% of the sensor area (a large square in the middle) is now equipped with fast PDAF pixels that allow predictive AF tracking with up to 8 fps. Sadly, the live view only supports slower burst rates of 3 fps, so while the camera my very well track a moving subject at 8 fps, the photographer often cannot (unless he’s looking through the OVF).
Fujifilm X-Pro2, XF50-140mmF2.8 R LM OIS WR + XF1.4x TC WR, SOOC JPEG
AF modes include the usual Single Point, Zone and Wide/Tracking options, but the interface is now more streamlined. The same 77 AF frames (including 49 PDAF frames) are now available in all three modes. In Single Point mode, there’s also an option with 273 AF frames (including 169 PDAF frames), covering the image area without any gaps.
Fujifilm X-Pro2, XF35mmF1.4 R, SOOC JPEG
Manual focusing has been improved, as well. We can now choose between two different electronic depth-of-field scales: a very conservative “pixel based” scale that shows a focus distance range that will be as sharp as the sensor can resolve it, and a much less (about 4.5 stops) conservative”film format based” scale that’s reminiscent of the good old analog film days (and which also happens to perfectly match the engraved DOF scale on Fuji’s clutch-type 14mm, 16mm and 23mm wide-angle primes). Even better: On the X-Pro2, clutch-type lenses set to MF mode don’t hide the electronic distance / DOF scale any longer, so we can finally use the more accurate electronic scale to fine-tune manual focus, set a hyperfocal distance or define a manual focus zone.
Hyperfocal distance using the “film format based” (top) vs. the “pixel based” (bottom) electronic distance and DOF scale
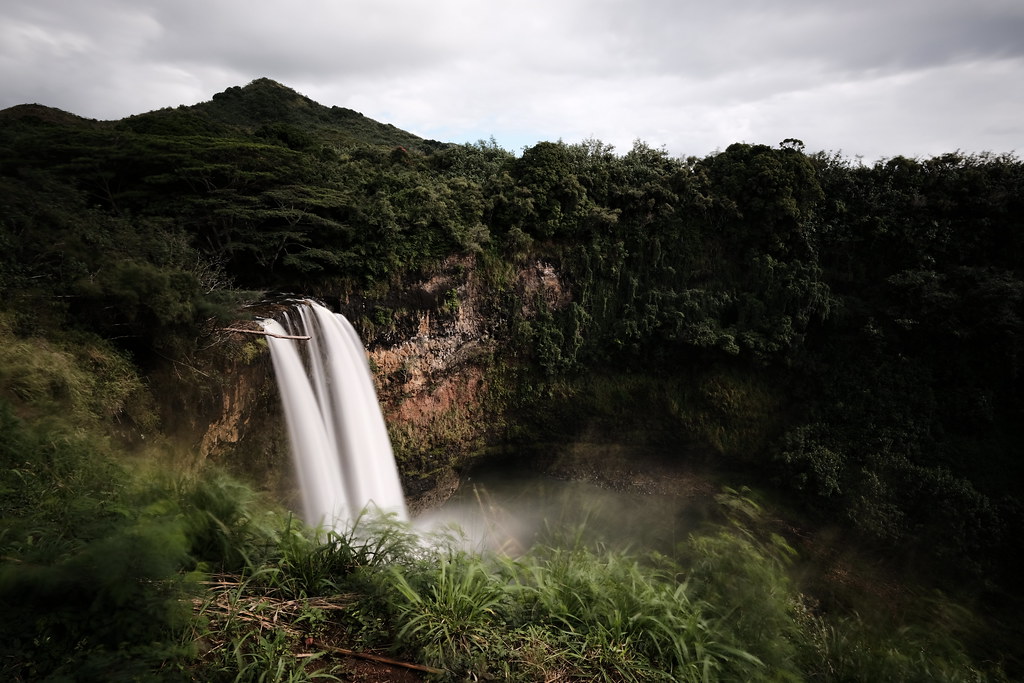
The ability to set a “sensor pixel based” hyperfocal distance was a frequently used feature during my visit on Hawaii, as it allowed me to manually pick the optimal aperture and distance settings for landscape images with pixel-sharpness that stretches to infinity.
Fujifilm X-Pro2, XF16mmF1.4 R WR, SOOC JPEG
It’s important to note that with a pixel pitch of 3.91 µm, diffraction blur is kicking in around f/9. The camera’s Lens Modulation Optimizer (LMO) can push this threshold back one stop, but the LMO only works with JPEG output from the camera’s built-in JPEG engine (also known as the internal RAW converter).
Fujifilm X-Pro2, XF18mmF2 R, SOOC JPEG
Enhanced JPEG Engine
The JPEG engine is responsible for converting naked RAW data into images that feature Fuji’s trademark colors and gradations. Like the X-T10 and X100T (and unlike the X-T1), it uses very little compression to preserve as much image information as possible. Using the FINE quality setting, the resulting 24 MP JPEGs (6000 x 4000 pixels) are mostly larger than 10 megabytes.
Adding texture and micro contrast with film grain effects is now just a matter of seconds
JPEG parameters include color space, white balance, film simulation, color saturation, highlight and shadow contrast, sharpening and noise reduction. There’s also a new setting to add an analog film grain effect (weak or strong). Using the X-Pro2, many of the established JPEG parameters can now be changed in a bolder way. What used to be a scale of ±2 is now for the most part a scale of ±4 (with zero being the factory default setting in the middle). This means that bolder color and contrast setting choices are available in-camera and can also be applied after the fact using the built-in RAW converter. Thanks to the new sensor, the Push/Pull function of the RAW converter now allows exposure changes up to +3 EV and down to -2 EV.
The revamped JPEG engine of the X-Pro2 offers bolder settings changes, such as stronger highlight and shadow contrast settings
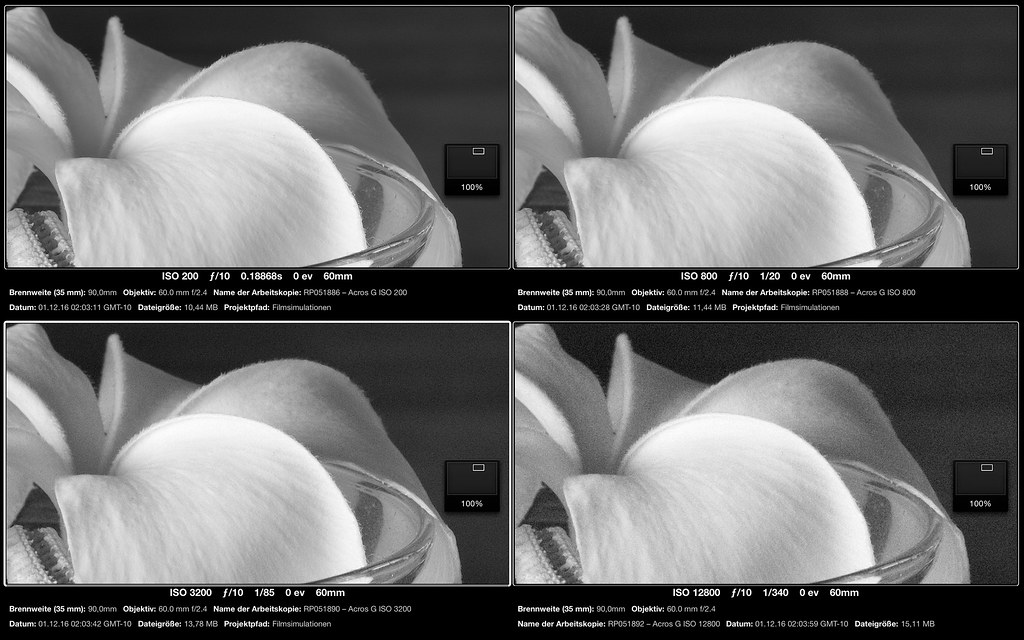
The most prominent tidbit of the improved JPEG engine is the new ACROS film simulation, which is based on the analog Neopan ACROS black & white film. ACROS contains its own adaptive film grain simulation: the higher the ISO setting, the stronger the grain effect.
ACROS grain effect intensity changes in concert with the ISO setting
Dealing with high-ISO shots, organic looking grain can also be achieved by simply reducing the noise reduction to the its minimum setting of -4. The X-Pro2 exhibits very little color noise, and its luminance noise looks similar to film grain. So here we finally have it: Noise that we can actually like!
Fujifilm X-Pro2, XF35mmF1.4 R, ISO 5000, NR -4, SOOC JPEG
RAW Cutting
Acknowledging that the JPEGs of the X-Pro2 are very much high-end, what about the RAWs? We have already discussed the compressed RAW format that cuts file size in half and increases the frame buffer efficiency to more than 33 shots in 8 fps burst mode. Another change worth mentioning is the fact that RAW files are now available for all ISO settings, including extended ISO settings 100, 25600 and 51200.
Fujifilm X-Pro2, XF10-24mmF4 R OIS, ISO 100, RAW FILE CONVERTER EX 2 (beta)
Another change affects the contents of the RAW data. In previous X cameras, ISO settings beyond 1600 were realized by pushing the data during RAW conversion. For example, shooting at ISO 6400 meant that actual RAW data for ISO 1600 was saved in the file and later pushed up 2 EV in the internal or external RAW converter during conversion.
This is not the case, anymore. Instead, the camera is now amplifying / pushing the signal to its final ISO destination before the RAW file is written. This puts less burden on external RAW converters to be “smart”, but it also means that high-ISO dynamic range is different from previous models, because gain-based highlight clipping is now already burned into the RAW file. So there’s no going back after the fact. To avoid overexposed high-ISO RAWs, it’s smart to use the camera’s powerful DR function to expand highlight dynamic range by 1 EV (DR200%) or 2 EV (DR400%).
Dynamic Range
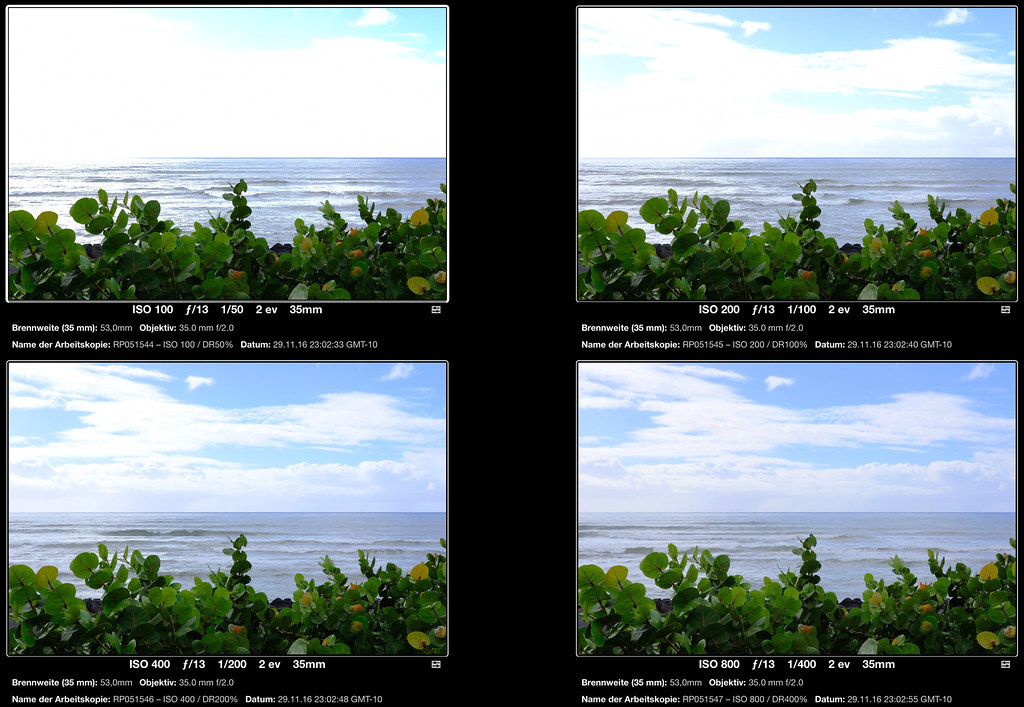
One scene, four DR settings
In the example above, I photographed the same scene with DR50% (aka ISO 100), DR100%, DR200% and DR400% settings. While the exposure of the foreground remains very much the same in all four images, there are huge differences in how the highlights are handled. As more highlight dynamic range is added, more color and texture is revealed in the bright sky and clouds.
Fujifilm X-Pro2, XF50-140mmF2.8 R LM OIS WR + XF1.4x TC WR, SOOC JPEG
The good news about the DR function of the X-Pro2 is that hard DR settings are now fully simulated in the live view and live histogram. For example, setting the camera to DR400% will also give you a DR400% live view and DR400% live histogram with 2 EV of additional highlight dynamic range. Previous models would only give you a DR100% preview, despite recording a DR400% image. Don’t use DR-Auto, though, as this setting will always give you a DR100% live view and histogram, even if the camera decides to use DR200% when you press the shutter.
Fujifilm X-Pro2, XF18-55mmF2.8-4 R LM OIS, 0.4sec. handheld, SOOC JPEG
Properly simulating DR settings has implications on the Natural Live View (aka the PREVIEW PIC. EFFECT OFF setting). In the X-T1 and X-T10 (and also the new X-E2S and X-E2 with firmware 4), deactivating the JPEG parameter simulation with PREVIEW PIC. EFFECT OFF is often used as a “RAW shooter mode”. This isn’t recommended with the X-Pro2, because its PREVIEW PIC. EFFECT OFF implementation activates DR400% in the electronic viewfinder to expand the dynamic range of the live view image. However, this additional DR only applies to the simulated live view image and not to the actual image that’s recorded (unless DR400% is manually set). This isn’t entirely new, because the X30 and X100T work in exactly the same way. However, it’s a first for Fuji’s line of system cameras with interchangeable lenses.
DR100%, DR200%, DR400% (SOOC JPEGs)
The three images above show a practical example of how the DR function can improve a scene. To show you the differences, I processed the same shot with all three DR settings. In order to do so, I had to first shoot it with DR400%. While you can always reduce the highlight dynamic range after the fact, you cannot magically increase it. From a technical standpoint, the DR400% version would be the best choice, as it delivers perfectly smooth tonality without any blown highlights. However, “technically perfect” can sometimes be a synonym for “boring”, that’s why I prefer the DR200% version in the middle. To me, it looks more natural and more alive.
Fujifilm X-Pro2, XF16-55mmF2.8 R LM WR, SOOC JPEG
ISOlessness 🙂
How ISOless (English article) is the X-Pro2? That’s difficult to say without proper external RAW support, but let’s try anyway. Fujifilm has a history of delivering ISOless (German article) cameras. After all, that’s how the powerful DR function works, and that’s how you deliver amazing dynamic range in Lightroom (even though many users don’t know how to properly use it, but that’s what our Fuji X Secrets RAW workshops are for). The X-Trans CMOS III sensor also has a really low noise floor, significantly lower than its predecessor. With read noise that low, pushing up an image a few stops will virtually only amplify the shot noise.
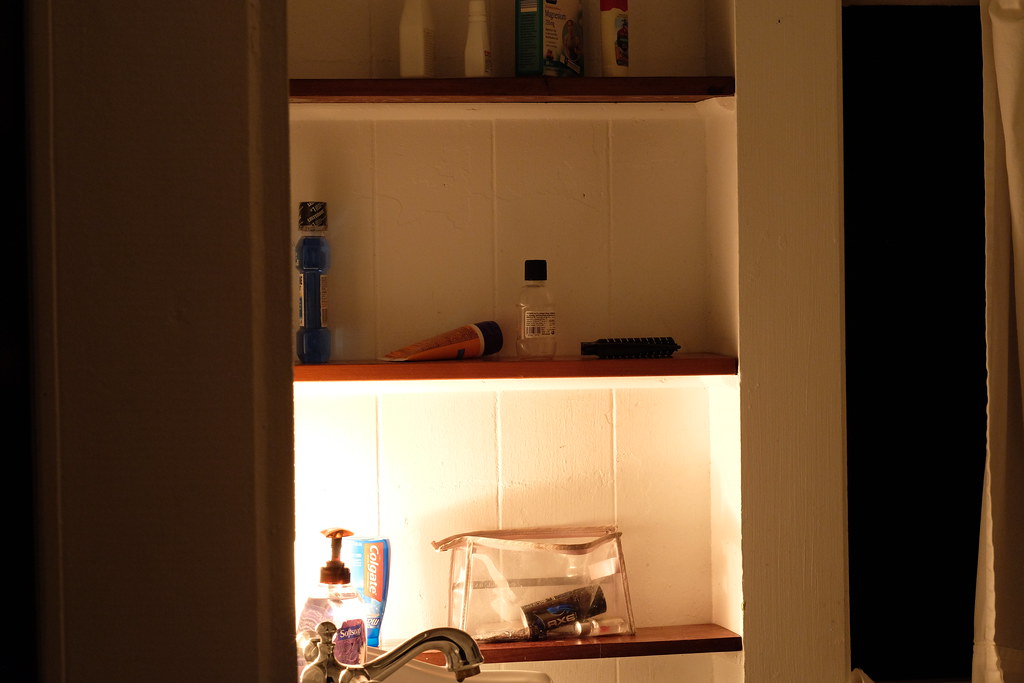
Fujifilm X-Pro2, XF35mmF1.4 R, SOOC JPEG (ISO 200, f/9, 1/320s)
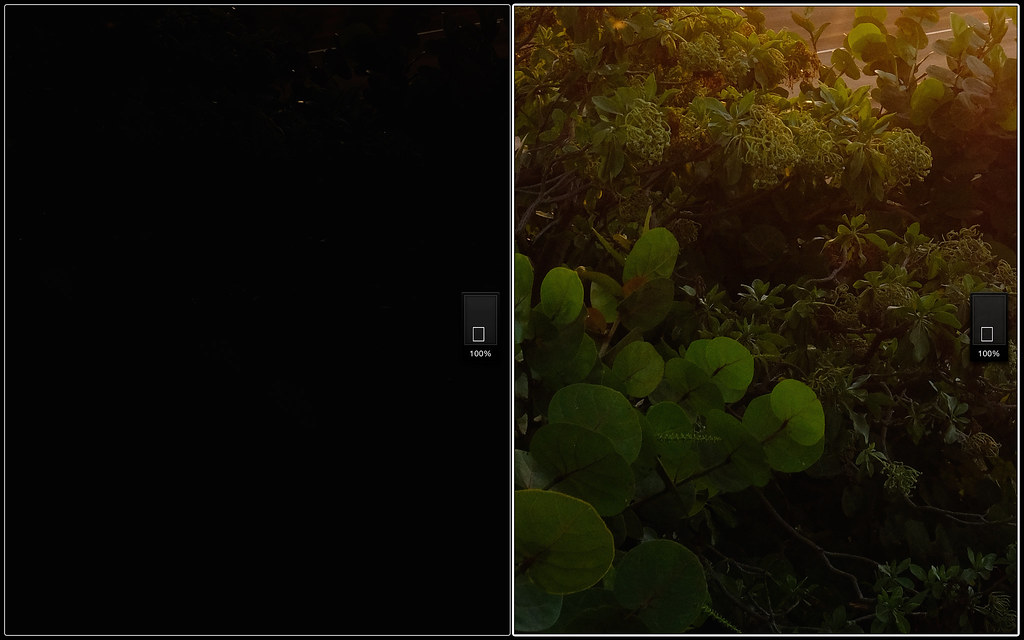
In this example, the scene was exposed to the highlights, nicely capturing the sunset and its colors, but grossly underexposing the foreground, which is nothing more than a large black patch.
Fujifilm X-Pro2, XF35mmF1.4 R, SOOC JPEG (ISO 200, f/9, 1/320s, Push +3 EV)
Here we see the same shot, but pushed up +3 EV in the internal RAW converter. This effectively turns it into ISO 1600. The result looks very much like a native ISO 1600 shot using the same aperture and shutter speed.
But how good exactly is the digital amplification? Let’s have a look:
Actual exposure (left) vs. Push +3 EV (right)
These samples show 100% crops of the original and the pushed images. As you can see, the camera did a great job of transforming a virtually black area into a scene with nice colors and texture, fluid tonality and plenty of detail. The noise we see is mostly shot noise (dark areas emit less photons, and less photons mean more noise).
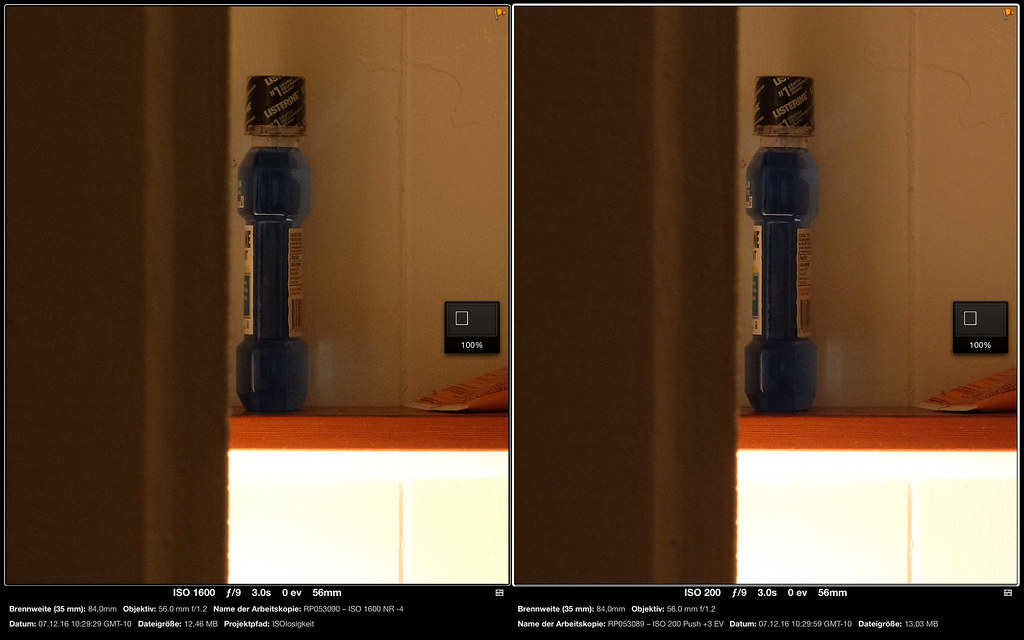
The following example is a direct comparison between a native ISO 1600 shot and the same scene shot at ISO 200 and pushed +3 EV to ISO 1600 with the built-in RAW converter.
X-Pro2, XF56mmF1.2 R APD, ISO 1600, NR -4, SOOC JPEG
X-Pro2, XF56mmF1.2 R APD, ISO 200, Push +3 EV, SOOC JPEG
There’s virtually no difference between the native ISO 1600 image and the pushed image. That’s what you’d expect from an ISOless camera. Let’s compare crops at 100%:
ISO 1600 (left) vs. ISO 200 / Push +3 EV (right)
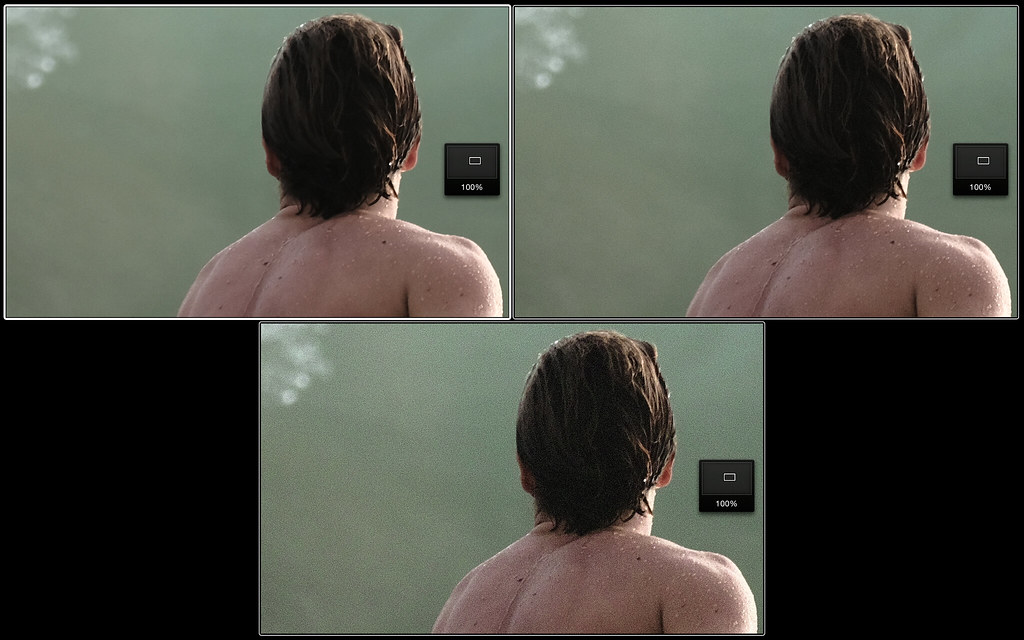
Can you spot any significant difference between the two images? I can’t, and that’s a good thing. It shows that the camera’s dynamic range can easily be expanded by 3 EV without any additional noise penalty. In reality, I expect the X-Pro2 to handle digital push actions of even 5 EV with dignity, placing it next to the best of its peers. Obviously, a Leica Q or SL are no match for the X-Pro2 when it comes to dynamic range (banding, anyone?), not to mention Canon and their outdated low DR / high noise sensors. Instead, I’m looking forward to competent DPREVIEW lab comparisons between the X-Pro2 and Nikon’s state-of-the-art DR monsters (D7200, D750 and D810). Of course, the new D500 might also be a very strong contender in the high-dynamic range and ISOless department. Interesting times.
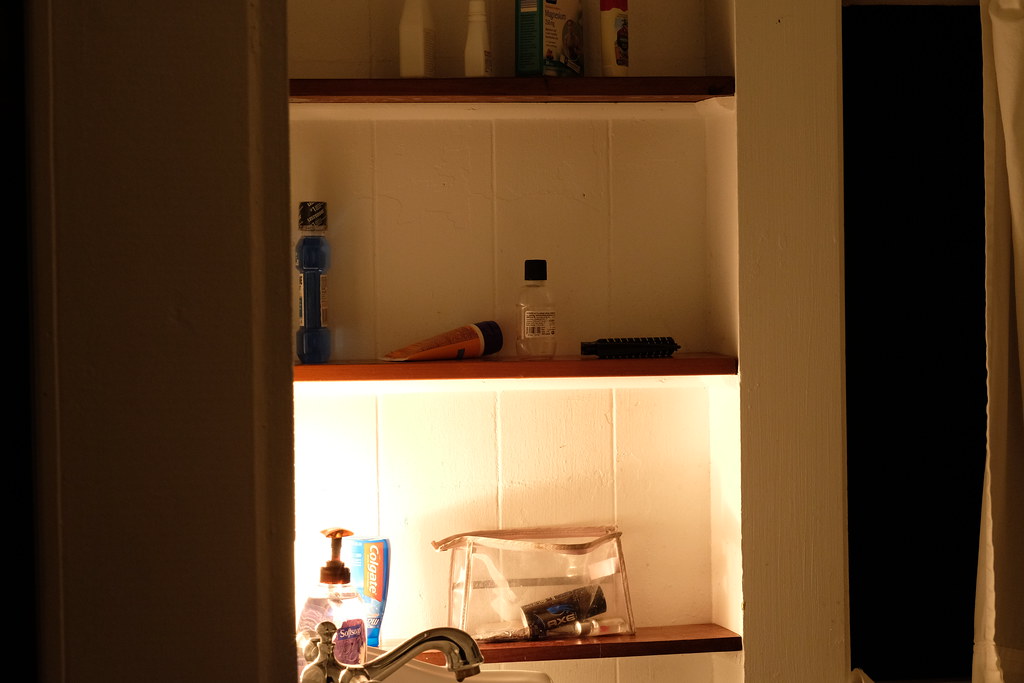
Fujifilm X-Pro2, XF35mmF1.4 R, SOOC JPEG (ACROS)
What Do I Think?
Let’s start with how the camera feels and handles:
- My Menu. I really love combining 16 frequently used menu functions in my personal 2-page menu. Almost everything I need is there and readily available. I say “almost”, because some of the menu items I frequently use can’t be assigned to My Menu, yet. A firmware update could resolve this in the future.
- In-ter-face! Even when the “full monty” of shooting information is displayed, the improved user interface doesn’t obscure critical parts the scene in the live view or optical viewfinder. I also like the presence of a diopter correction dial, but I don’t like how it handles in my pre-production camera. Changing the diopter setting should go more smoothly.
- All Right. Placing all buttons and dials on the right side of the camera clears things up: use your right hand to operate the camera, use your left to hold and operate the lens.
- Buttons and Dials. The combined ISO / shutter speed dial looks and feels nice (so retro), but it isn’t practical at least for some users. In modern photography, ISO is equally important as aperture and shutter speed, and many users change their ISO setting all the time. The buttons feel good (much better than those of the X-T1), and the rear command dial can be depressed despite the weather-sealing. The exposure compensation dial remains as useful as ever, now also with a ±5 EV option in concert with the front command dial.
- Hybrid View. The hybrid viewfinder is still the reason to get the X-Pro2 (instead of waiting for a rumored X-T2). This X-Pro2 is quite unique and eludes comparisons with mainstream cameras. It’s less about the specs per se; it’s more about how those specs were implemented.
- Focus Joystick. A must-have. So now we have it.
- Slotty Business. Feeling safe, already? Dual SD card slots is a feature that many won’t miss until they actually need it. Fujifilm designed it smartly, as you can configure the X-Pro2 for ultimate speed by splitting RAWs and JPEGs on two cards.
- Sealed and Delivered. It’s nice to have a weather-sealed camera that works anytime and anyplace, from freezing glaciers to the tropical sea. Let’s just hope that Fuji’s quality control people didn’t drop the ball. Again.
- Clutch Lenses. I like the new choice between two different depth-of-field scales, and I love the improved support of clutch-type lenses by not hiding the electronic distance / DOF scale when such lenses are used in MF mode.
Let’s talks about performance:
- X-Processor Pro. It’s a whole new world. The new guy in town is about four times as fast as its predecessor. Everything feels snappy and direct. More “just do it”, less “just wait for it”.
- Timing Issues. 85 fps EVF frame rate, real-time viewfinder (5ms lag), blackout times cut to 150ms, fast AF, lossless RAW compression and more. Fujifilm delivers. With room to spare. It was about time.
- Power Struggle. Yes, we have a useable battery status indicator. And yes, you will need extra batteries in high-performance mode.
- Focus! The PDAF area has been expanded, and there are more focus frames to choose from than you’ll ever need. Thanks to the faster sensor readout, CDAF performance has improved, too. Sadly, face and eye detection are still limited to CDAF, and I’m not-so-patiently waiting for a way to quickly select one particular face in a group of people.
Image quality – the Holy Grail:
- Better RAWs. Thanks to the new sensor/processor combo, the X-Pro2 delivers very low noise, high detail (no AA filter) and nice 14 bit tonality. The sensor appears to be ISOless (exactly how ISOless remains to be seen when Lightroom support is available), so its dynamic range is certainly outstanding (just how outstanding remains to be seen, too). Even on a pixel level comparison, DR appears to be one stop better than previous models (which are still very good). This is something that we will look into when production cameras and proper external RAW support are available. In the meantime, click here for a set of ISO samples from 100 to 25600.
- Better JPEGs. The built-in JPEG engine (aka the internal RAW converter) of the X-Pro2 is setting new standards but still remains in line with previous models. This means that you can use an X-Pro2 in concert with an X-T1, and your JPEG results will largely match as long as both cameras use identical settings. However, inherent JPEG quality has been improved in the X-Pro2 by applying only minimal compression. Of course, this results in large JPEG files of at least 10 MB. I also like the addition of a wider range of JPEG settings for sharpening, noise reduction, color and contrast. Combined with the extended Push/Pull function and the ISOless behavior of the X-Pro2, it is now possible to use the built-in RAW converter to improve and modify a shot after the fact in various ways.
- Organic Grain. Ignorants may see it as a gimmick, but I found it actually quite useful: adding film grain to a shot after the fact. What is it good for? Since the new sensor/processor delivers low-ISO images with virtually no noise, adding texture can actually improve an image. Not only does grain make it look more “natural”, it also adds micro contrast and brings out hidden details. Fuji’s film grain also works in blown out parts of an image, bringing back texture and a more film-like and natural roll-off.
- X-Trans. You either love it or hate it. Those who hate it usually do so because they don’t like how Adobe Lightroom handles fine detail and basic sharpening. Fuji sources have indicated that Adobe’s understanding of X-Trans has recently improved. Lightroom/ACR support of the X-Pro2 should be available as the camera hits the shelves, so I wouldn’t be surprised if the next Lightroom version brought further improvements in how Adobe handles its X-Trans demosaicing. Hope dies last.
- Video. I know, I know! Nobody wants video in an X-Pro camera (except for those who do), and Fuji claims that video quality has been improved. I’m sure that’s true (better resolution, more powerful processor, it’s a no-brainer), but I also know that X-Trans and video are a difficult match. The new sensor and processor are capable of delivering 4k video output, but Fujifilm decided to reserve 4k for other models (obviously, they mean the X-T2).
Click here for a gallery with X-Pro2 sample images (including the new XF100-400mmF4.5-5.6 R LM OIS WR).
Of course, I’ll also write a book about the X-Pro2, so look no further. I’m your man.
Fujifilm X-Pro2, XF16mmF1.4 R WR, SOOC JPEG
For your convenience, here’s a TOC with links to my previous X-PERT CORNER articles:
- First Look: Fujifilm XF1.4x TC WR Teleconverter Lens
- First Look: Fujifilm XF35mmF2 R WR
- First Look: Fujifilm XF90mmF2 R LM WR
- First Look: Fujifilm X-T10
- Using Firmware 4
- First Look: XF16mmF1.4 R WR
- Film Simulations in RAW File Converter EX Version 2
- X-T1: Tethering with Adobe Lightroom and Fujifilm HS-V5
- First Look: Fujinon XF16-55mmF2.8 R LM WR
- XF 56mm APD vs. XF 56mm
- New Firmware Features (3): X-T1 Firmware Version 3.00
- New Firmware Features (2): Using Camera Remote
- New Firmware Features (1): Using AF+MF
- First Look: Fujinon XF 50-140mm F2.8 R LM OIS WR
- Using the Fujifilm X100T
- First Look: Fujifilm X30
- First Look: XF18-135mmF3.5-5.6 R LM OIS WR
- X-E2: Behind Firmware 2.00
- First Look: Fujifilm TCL-X100 Teleconverter for X100(S) Cameras
- First Look: Fujinon XF10-24mmF4 R OIS
- First Look: Fujifilm X-T1
- First Look: Fujinon XF56mmF1.2 R
- Exposing Right
- Using Auto-ISO
- Using Face Detection
- First Look: Fujifilm XQ1
- PDAF & LMO Lens Firmware Updates Coming in November
- First Look: Fujifilm X-E2
- How Fuji could save the X-M1
- X-A1 vs. X-M1: Photo Ninja Edition
- X-A1 vs. X-M1: the Shootout
- Using the Fujifilm X-A1 [& X-M1]
- First Look: Fujinon XF23mmF1.4 R
- RAW Converter Shootout Results
- Ultimate RAW Converter Shootout
- First Look: X-M1 with New Kit Zoom and Pancake Lens
- Zeiss Touit vs. Fujinon XF
- Remote Shutter Control for X Series Cameras
- Apple Camera RAW, X-Trans and EXR
- First Look: XF55-200mmF3.5-4.8 R LM OIS
- Studio X
- Using the X100S
- Using the X20
- X100S vs. X100
- X20 vs. X10
- RAW, JPEG, Silkypix and “Fuji Colors”
- Adapting Third-Party Lenses (updated with Speed Booster)
- RAW for JPEG Shooters…
- Tips for Updating your Firmware
- How to Clean the X-Trans Sensor
- Using the XF14mmF2.8 R
- Decoding XF18-55mmF2.8-4 R LM OIS
- Comparing RAW converters: JPEG vs. Lightroom, Capture One, Silkypix & RPP
- XF14mmF2.8 R appears to be almost distortion free
- How to Expand Dynamic Range
- How to Use Extended ISO
- EXR, anyone?
- Capture One – When the Going Gets Tough…
- Using Shooting Profiles and the Quick Menu
Rico Pfirstinger studied communications and has been working as journalist, publicist, and photographer since the mid-80s. He has written a number of books on topics as diverse as Adobe PageMaker and sled dogs, and produced a beautiful book of photographs titled Huskies in Action (German version). He has spent time working as the head of a department with the German Burda-Publishing Company and served as chief editor for a winter sports website. After eight years as a freelance film critic and entertainment writer in Los Angeles, Rico now lives in Germany and devotes his time to digital photography and compact camera systems. His new ebook The Fujifilm X-Pro2: 115 X-Pert Tips is available now!


