The following is an excerpt from Ben Goldsmith’s Adobe After Effects: A Complete Course and Compendium
Creating Shape Layers
Shape layers are first defined by a path—that is, the position of the vectors that make up the shape’s outline. Then, a fill and/or a stroke is added, followed by a Transform control, plus any other effects.
There are two ways of creating shape layer paths—either by using preset shapes with the Shape tool, or by drawing your own with the Pen tool. We’ll start with the former.
Creating Shapes with the Shape Tool
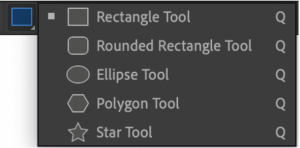 Find the Shape tool in the Toolbar. By default, it looks like a Rectangle, but clicking and holding on the icon reveals presets for Rounded Rectangle, Ellipse, Polygon, and Star. The tool can also be accessed with the hotkey Q. Multiple presses of Q cycles through the different shapes.
With the Shape tool active and no layer selected, click and drag in the Composition panel to create a new shape layer and draw a shape. Note: If a non-shape layer is selected, the Shape tool will instead add a mask to the layer. If a shape layer is selected, the Shape tool will add another shape to the same layer.
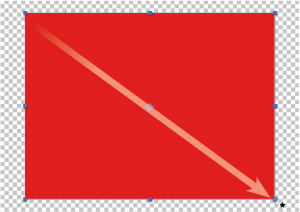
While clicking and dragging to create a shape, you can hold down shift to create a shape that’s X and Y proportional, such as a perfect square or circle. Holding down opt/Alt while creating a layer scales the layer from where you clicked, instead of drawing from one corner to the opposite. You can also double-click the Shape tool icon in the Toolbar to drop a shape into your composition that fi lls the view, or do so while holding shift for a perfect square or circle.
Clicking and dragging from the center of the Comp panel and holding opt/Alt scales the image from the center.
Once the shape is created, you have several options to change how the path points draw the shape.
Rectangle Path
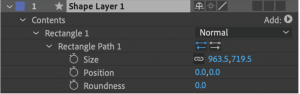 Upon creating a rectangle or rounded rectangle, navigate to the shape layer’s triangle and unfurl Contents > Rectangle 1 > Rectangle Path 1, and you’ll see some options that are exclusive to rectangles: Size, Position, and Roundness.
Roundness allows you to control the curve of all four corners at once, which means the difference between a rectangle and rounded rectangle lies solely in this setting.
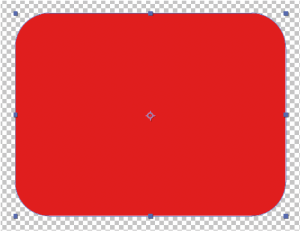
A rectangle can easily become a rounded rectangle, and vice versa.
Keep in mind: Editing the Size and Position in these categories edits the Size and Position of the path points, before fill and stroke are added. Th e Transform control at the bottom of the shape’s contents control transforms after the fill and stroke are added. While Transform might distort things such as the stroke width, these path controls will not.
Ellipse Path
If you’ve drawn an ellipse (fancy name for an oval), your options here are Size and Position. An ellipse with equal X and Y sizes is a circle. Learning shapes is fun!
Polygon Path
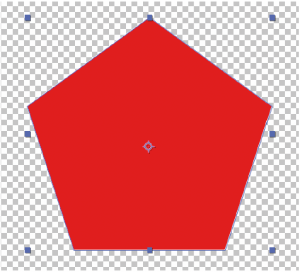 A polygon is a shape with a variable number of sides. By default, this tool creates a pentagon, or five-sided shape.
The parameters of a polygon are found under a category called Polystar Path. Under Type, you can switch between a polygon and a star. You can choose the number of points your shape has, thereby changing it from a pentagon to a triangle, octagon, or what have you. You’ll find our familiar Position and Rotation controls here as well. Outer Radius is akin to scale, and Outer Roundness is similar to our rectangle roundness, controlling the shape of all vertices.
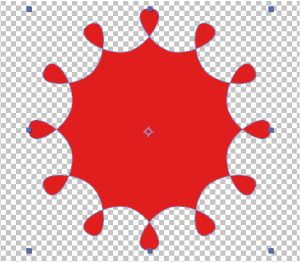
Star Path
A star is similar to a polygon, but for each outside vertex, it has an inside vertex as well, creating spokes.
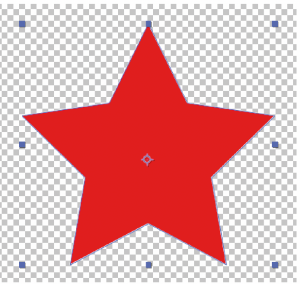
This shape is also edited under Polystar Path. Here, you can convert it to a polygon under Type. Just like with a polygon, we have controls for number of points, Position, Rotation, Outer Radius, and Outer Roundness. We can also control our Inner Radius and Inner Roundness. Playing with these values yields fun results. Roundness values can even go negative, flipping the vertices and creating loopy curves.
Creating Shapes with the Pen Tool
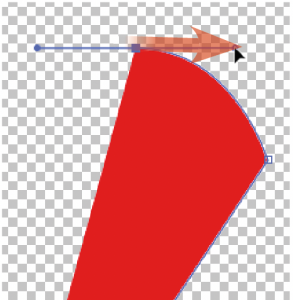
The above shapes are great, because they offer uniform controls for all vertices simultaneously, allowing great control of symmetrical shapes. In some instances, however, you want more control, with customizable shapes. For this, we will create shapes with the Pen tool that are customizable Bezier paths.
Note that by doing this, we lose our nice controls, such as Roundness, Number of Points, Inner and Outer Radius, etc. Basically, Bezier paths are manual mode, and if we want to recreate those nice shapes, we have to do it ourselves.
First, select the Pen tool from the Toolbar, or activate it with the hotkey G. To create a brand-new shape layer, ensure that no other layer is selected. Note again: If a non-shape layer is selected, the Pen tool will instead add a mask to the layer. If a shape layer is selected, the Pen tool will add another shape to the same layer.
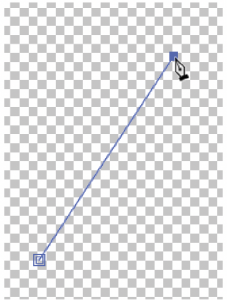
Click within the Composition panel to add vertices.
Clicking to create a point and then dragging creates a Bezier curve, allowing for a curved line. Holding down shift while doing so creates perpendicular curve handles.
Unless you’re creating a shape layer that’s just a stroke (that is, a line graphic), you would typically finish your shape and close it by clicking on the point that you fi rst drew, which has an extra square around it . Th e Pen tool displays a small circle when hovering over this point.
Editing Bezier Paths
Assume the Pen tool is selected for the following section. Depending on what is selected, some of the following features can be edited with the Selection tool, but that selection is less important if the Pen tool is selected.
Clicking and dragging a vertex moves it. If the vertex is a Bezier curve, you can manipulate its Bezier handles to change the shape of the curve by adjusting the angle around the point and the distance from the point.
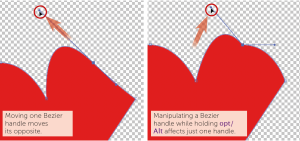
Clicking on a vertex while holding opt/Alt switches it from a hard edge to a Bezier curve, and vice versa. Or, achieve the same eff ect by clicking and holding on the Pen tool icon in the Toolbar and selecting the Convert Vertex tool, then selecting a vertex.
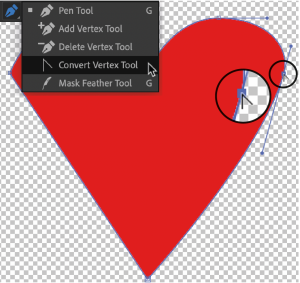
Add a new point along a path by simply clicking on the path.
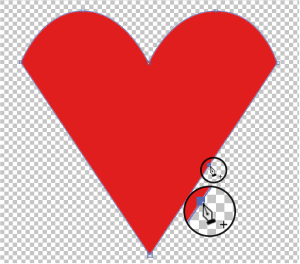
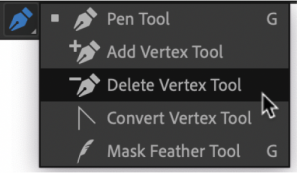 Delete a vertex by clicking on it while holding ⌘/Ctrl. Or, achieve the same effect by clicking and holding on the Pen tool icon in the Toolbar and selecting the Delete Vertex tool, then selecting a vertex.
Convert a Shape to a Bezier Path
To use the above shape-editing tools on a preset shape, it must first be converted to a Bezier path. Remember that when we do this, we will lose our nice controls, such as Roundness, Number of Points, Inner and Outer Radius, etc.
Find the layer’s triangle and unfurl Contents > [Shape] > [Shape] Path, in which [Shape] will tell you the preset shape. Right-click on [Shape] Path and select Convert To Bezier Path.

You can also use the Shape tool to create Bezier shapes off the bat. With the Shape tool selected, select Bezier Path from the Toolbar before drawing your shape.
Convert an Illustrator File to a Shape Layer
You can edit an Illustrator file as if it were a shape layer, unlocking all the features listed below. To. do so, right-click the Illustrator layer and select Create > Create Shapes from Vector Layer. This will create a new shape layer with all the Illustrator data converted into a shape layer format.
You can also do this on a text layer to animate text outlines.
Rotobezier
Rotobezier is a type of shape in which the Bezier curves are automatically placed, so your shape will have even curves throughout. Th is gets rid of your Bezier handles, so you lose your customization options. To draw a Rotobezier shape, with the Pen tool selected, select Rotobezier from the Toolbar before drawing your shape.
You can convert a shape to Rotobezier and back again by right-clicking a vertex and selecting Mask and Shape Path > Rotobezier.