The following is an excerpt from Nick Fancher’s Studio Anywhere 2: Hard Light.
Sometimes the best natural light is not natural at all. Let’s face it, being an “available light shooter” is great…until the only available light is shitty light. As much as I can appreciate natural light and the airy aesthetic that comes with it, good natural light is not always available. So what are your options when it’s cloudy, raining, or dark outside? This chapter will cover both indoor and outdoor scenarios wherein you can recreate sunlight in a space that it didn’t otherwise occupy.
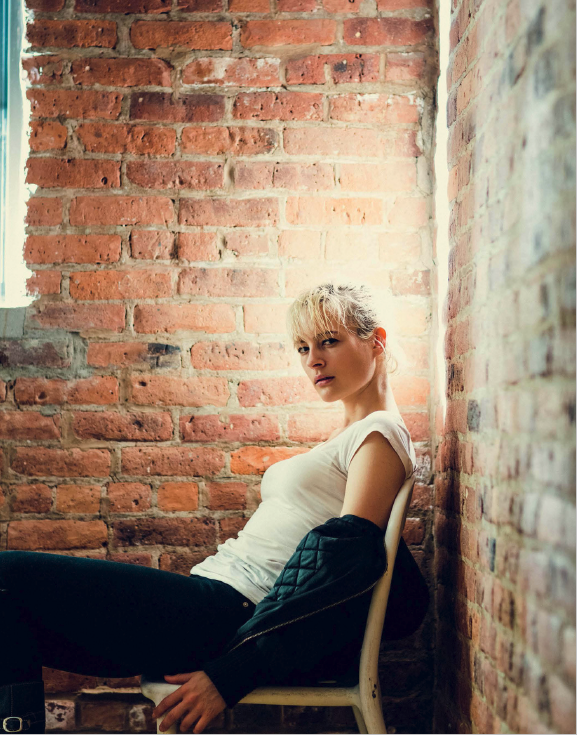
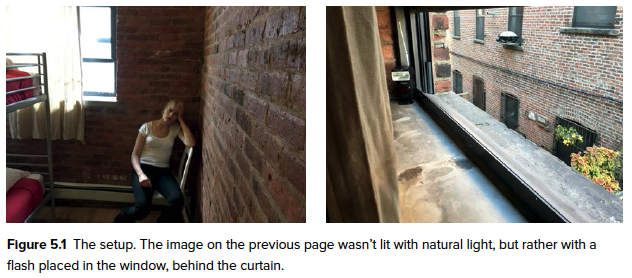
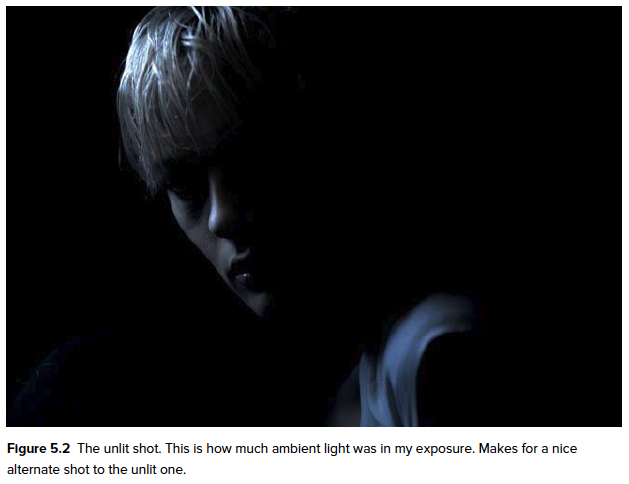
When you look at the image on the previous page, what does your eye see? Mine sees a warm patch of sun peeking through the window, falling on a pretty girl. But that light didn’t actually exist (Figure 5.1). Because I placed a flash in the window, behind the curtain, my light mimicked what the sun might have done, had it actually been out that day (Figure 5.2). Our eyes are used to seeing sunlight in certain contexts, such as on the brick façade of a building or inside, beside a window. By placing a flash in scenarios such as these and matching it to the relational height of the sun to the model, you can fairly easily create a scenario that your eye will read as a sunny day.
ETHEREAL LIGHT
Remember in Chapter 1 when you learned about hacking your reflector? That modifier comes in handy again here. For this scenario, the light was placed behind the subject, aiming away from the camera, in order to create soft, wrapping light. In Figure 5.3 you can see my subject, Hana, standing three to four feet in front of a white door. If you look closely, you can see my flash on the ground behind her feet, aiming at the door behind her. Because I was shooting in a windowless area, the dim room lights were easy to overpower. Note my settings in Figure 5.4. By bumping up my ISO to 320, I was able to use a slightly lower flash output of 1/4 power, which allowed for a faster refresh time and conserved my batteries. Because my only light was behind my subject, I needed to open up my aperture enough such that the light would flood around her and also bounce off the reflector, lighting her face. The closer I stood to Hana with the reflector, the more light was bounced back onto her, increasing the fill light on her face and catch light in her eyes. Conversely, the further away I moved, the less light was bouncing back on to her, resulting in more facial shadows and zero catch light.
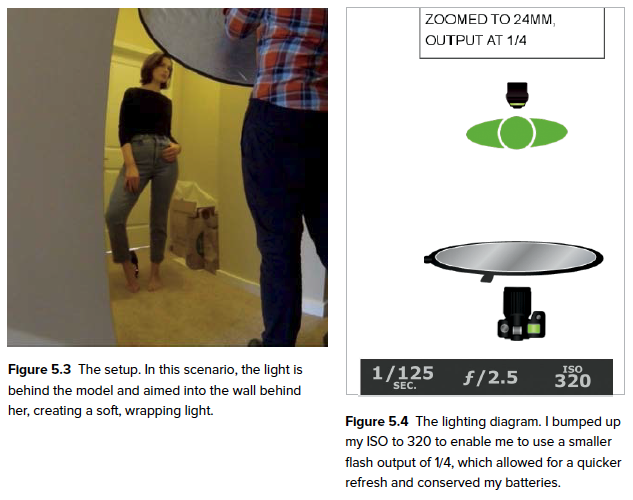
There are a couple of things to note when using this technique. The first is that you need to make sure that you allow several feet of space between the model and the wall/door/whatever behind the person so that the light from the flash has enough space to spread out, covering the whole background. For example, if the subject is too close to the wall, the light spread will be small, causing light to fall off at the edges of the frame. The second thing to keep in mind is that this technique will not produce crisp, clean light, as you may want when shooting a corporate headshot. This technique produces glowing, ethereal light, perfect for beauty shots.
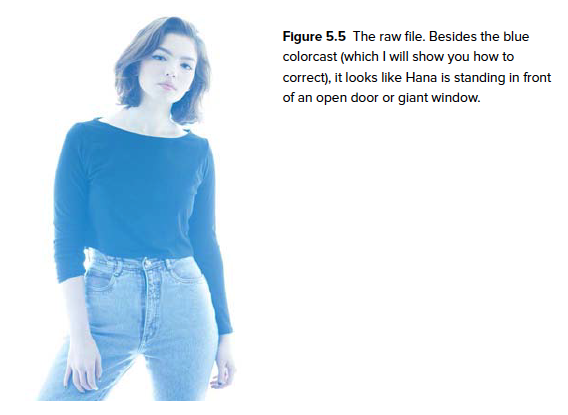
In Figure 5.5 you can see the raw file. My white balance was set to Sun/Daylight, which gave the image the blue colorcast. Aside from the blue tone, it appears as though Hana may be standing in front of an open door or large window with the sun streaming in behind her, rather than the dark, windowless hallway where she was actually standing. And although I personally like the blue colorcast, I will show you how to correct it in post.
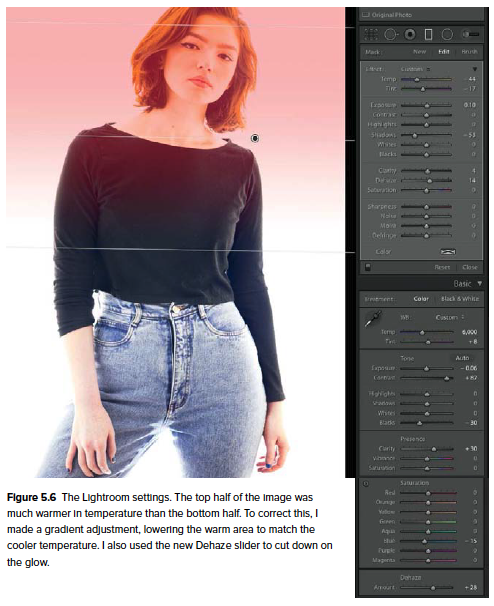
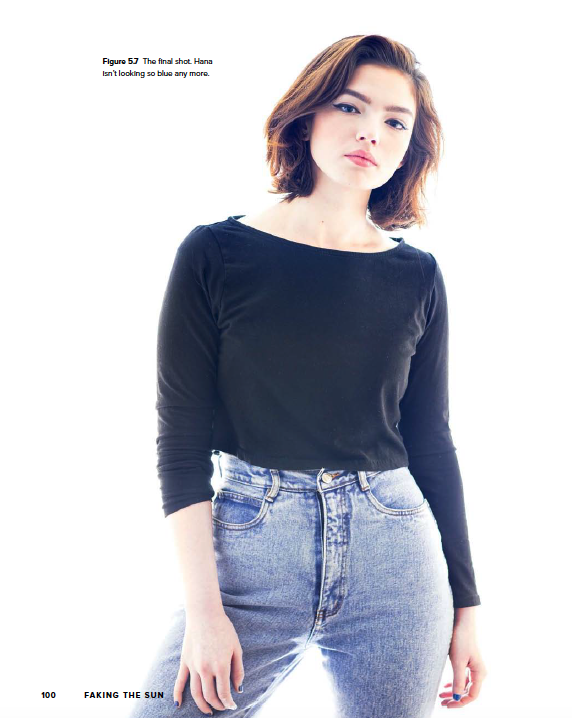
After I corrected my white balance, using the Eyedropper tool, I noticed that the top third of the frame was shifting really orange in color. The ambient tungsten light creeping by under my strobe light may have caused this. For whatever reason, it wasn’t visible in the raw file. It wasn’t until I started warming up the color temperature that I noticed the top part of the frame shifting warm a lot quicker than the bottom part. I easily corrected this by making a gradient adjustment to the top half of the image, cooling down the temperature until it matched the rest of the image (Figure 5.6). Note that I also desaturated the Blue slider in the HSL panel and took advantage of the powerful new Dehaze slider. This effect is like Clarity on steroids. It defines edges and reduces glow like a mother. Just a dab will do ya. Now Hana isn’t looking so blue (Figure 5.7).
LENS FLARE
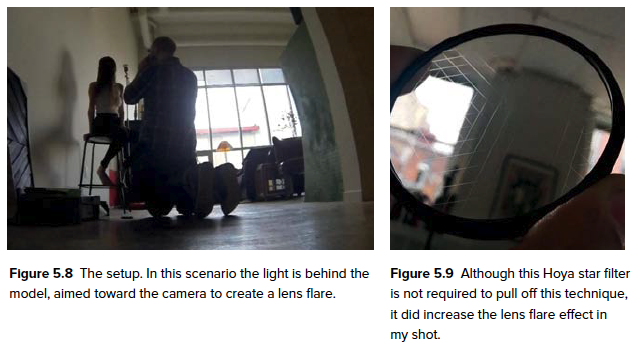
Don’t you hate it when you’re shooting at a client’s apartment and you’re asked to transform the room into a sunny day at the beach? Oh, that’s never happened to you? Well, me neither actually, but it’s still a fun thing to do, so let me teach you how to do it. The white wall seen in Figure 5.8 could be in any room. No ambient light is necessary. All you really need is one unmodified flash. Adding a star-filter to your lens is a bonus (Figure 5.9). I use a Hoya star filter when I want to add an extra twinkle to my light.
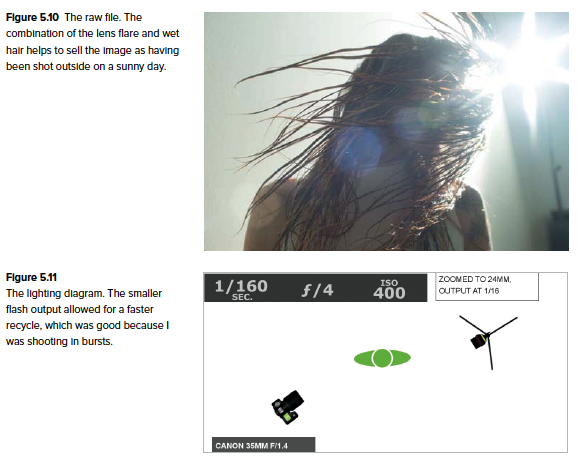
In this scenario, the light is once again behind Sam, my model, but this time it’s aimed back toward the camera, which will provide the lens flare that I’m going for. When you’re faking sunlight, raise your flash to a height that is higher than your subject and aim it back down at the person. Because the flash was above Sam, I needed to get lower than her, making sure that the light was in my line of site, behind her. I also had her wet down her hair and whip it back and forth a bit, to drive the beach vibe home. The combination of lens flare and wet hair helps to sell the idea that this was shot outside on a sunny day (Figure 5.10).
As you may know, when shooting something like motion and movement, it’s best to shoot in bursts to make sure that you get a great frame. That means using a smaller flash output to avoid misfires (Figure 5.11). To make up for the lower output, I raised my ISO to 400. I also wanted to make sure to keep an f-stop of f/4 because I didn’t want the depth of field to be too shallow; there was already a lot of movement in the shot.
In this scenario, the light is once again behind Sam, my model, but this time it’s aimed back toward the camera, which will provide the lens flare that I’m going for. When you’re faking sunlight, raise your flash to a height that is higher than your subject and aim it back down at the person. Because the flash was above Sam, I needed to get lower than her, making sure that the light was in my line of site, behind her. I also had her wet down her hair and whip it back and forth a bit, to drive the beach vibe home. The combination of lens flare and wet hair helps to sell the idea that this was shot outside on a sunny day (Figure 5.10). As you may know, when shooting something like motion and movement, it’s best to shoot in bursts to make sure that you get a great frame. That means using a smaller flash output to avoid misfires (Figure 5.11). To make up for the lower output, I raised my ISO to 400. I also wanted to make sure to keep an f-stop of f/4 because I didn’t want the depth of field to be too shallow; there was already a lot of movement in the shot.
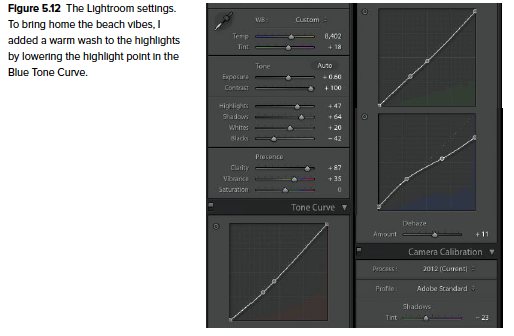
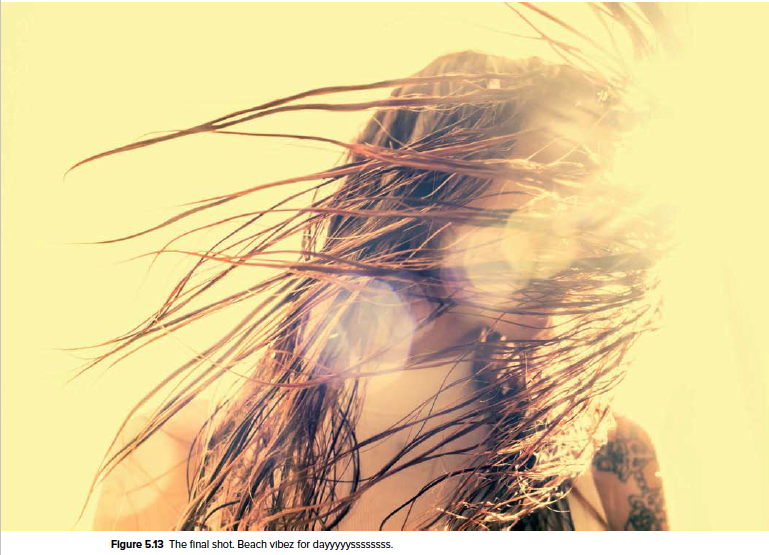
The proverbial cherry on top of my fake sundae was adding warm tones to the highlights in Lightroom (Figure 5.12). Besides maxing out the Contrast and increasing the Vibrance slider, I also lowered the highlight point in the Blue channel of the Tone Curve panel quite a bit, giving the image a golden wash. I used the Dehaze a bit and reduced the magenta glow in the shadows with the Camera Calibration panel. The final shot (Figure 5.13) is looking so cinematic that it’s just one post-rock song short of becoming an episode of Friday Night Lights.