A key component of creating a great photograph is visualization. To fully comprehend the process of visualization it is important to understand the four steps visualization for taking photographs.
Step 1: Photographic Looking and Seeing
Look Deeper. In photography, we accomplish nothing unless we analyze everything. We must search for those elements that can be put together to form a photograph.Visualization starts with in-depth looking and seeing—not the casual perusal that we all do in our everyday lives. When you look for things to photograph you must look more intensely. Photography requires work that begins with careful looking, analyzing, and thinking. You must see things in areas you would have overlooked previously. When putting these “overlooked” items into a photograph, make sure that photograph is compelling enough that the viewer wants to stop to look at it! Let’s face it, if your photograph is as easily overlooked as the items themselves, you’ve accomplished nothing.
Apply Insight. Next, apply insight to your photographs. Insight is the element that separates the great photographers from the ordinary ones. As you gain insight into your own areas of interest (what excites you, why it excites you, how it excites you) you’ll discover new areas to photograph. With increased insight, you’re able to analyze a situation more quickly to determine if it’s worth pursuing, and how to best approach it.
Step 2: Composing an Image

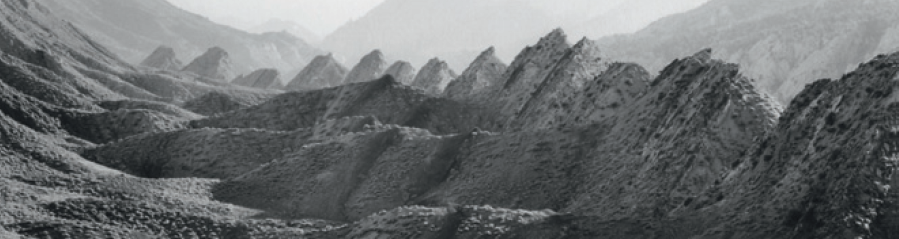
Arni Marble Quarry, by Bruce BarnbaumStep 2: Composing an Image
Camera Position. Composing an image begins with choosing your camera position and focal length of lens. Is the image strongest where you have the camera? Can you strengthen its visual relationships by moving to the left or right, up or down, forward or backward?
Study the Scene. Consider several things while studying the scene. Decide how well the objects relate to one another compositionally. Evaluate their overall balance, the relationship between positive and negative spaces, and the movement of forms and lines within the composition. For color photography, look at the objects as abstract masses and analyze their color balance, and the blending of colors within the composition. In black-and-white photographs, consider the gray tonalities and their relationships.
It is rare that the scene—and the lighting on it—gives you exactly what you wish to show in your envisioned print. You may want to brighten an area or darken others. These alterations may be possible. If you’re aware of the shortcomings while you stand behind the camera, you can begin to formulate a plan to cope with them in the exposure and development of the negative and in the printing of that negative.
Analyze the Light. In other words, is it highlighting exactly the things you want highlighted, and is it doing so in the intensity you would prefer? You will also determine if any filters could enhance the image. Filters are valuable tools that can alter the tonal balance between two items of different color in a black-and-white photograph. In traditional color photography, filters can keep or alter the color balance that you want for the overall scene. But color balance can be altered greatly during printing, both traditionally and digitally.
Step 3: Envisioning the Final Print
Translate the Scene. The most difficult part of visualization is envisioning the final print you wish to make while looking at the scene. Unless it’s a tabletop model that you created and are now photographing, it’s highly unlikely that you created the scene in front of your camera, yet you are always the creator of the photograph. The scene is three-dimensional; your photograph is two-dimensional. The scene has color in it; your photograph may be black and white. The photograph is distinctly different from the scene, and as a result it is foolish to attempt to “capture the scene.” Instead, attempt to convey the mood that the scene impressed upon you.
Go Beyond the Scene. As it turns out, most people are stuck at the level of “reproducing” or “being true to” the scene. Others—the true photographers—go well beyond the scene, using it as a springboard for their own creative and interpretive goals. If your goal is to capture nothing more than what you’ve seen, your opportunities for creativity are limited, indeed. Too often that attitude leads to the making of exceptionally boring photographs. It’s better to have a good memory of a wonderful scene than a bad photograph of it. If you’re willing, able, and desirous of going beyond the scene, your creative potential is unlimited. Not only can you show the viewer the world that is important to you, you can also create whole new worlds. Minor White said, “We photograph something for two reasons: for what it is, and for what else it is.” Those are words to live by.
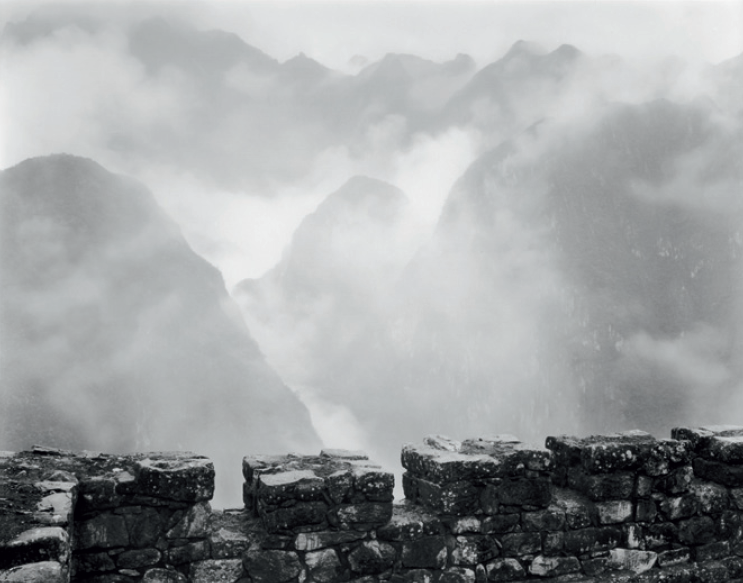
Machu Picchu in The Mist, by Bruce Barnbaum
Step 4: Planning a Strategy for a Final Print
Define Your Printing Strategy. The final step of visualization is planning a strategy for achieving your final print. This involves determining not only your optimal exposure and development of the transparency, negative, or digital capture, but also the means of printing it to achieve your goals. This means, in essence, that while you’re behind the camera—standing there at the scene—you’re thinking about how you’ll print that photograph in the traditional or digital darkroom. At first the notion of thinking about your printing while standing behind the camera may strike you as distinctly odd, or maybe even distinctly impossible. In fact, it’s essential.
You’ve done a lot of the work already. The only remaining decision is how you’ll print. Once you learn to do that, you’ll be mapping out a complete strategy from beginning to end for achieving the image you want. You’ll be integrating the whole process rather than doing it piecemeal. It’s up to you to work the entire process through in your mind to avoid making bad decisions along the way that could derail the whole process.
Think Ahead. If you study the scene for compositional elements while simultaneously projectig forward to the final print, even while swooning over the scene, you can avoid the trap of making “record shots,” those snapshots that simply tell everyone that you were there. When you start to think in terms of your final print right from the beginning, your percentage of successful exposures will jump dramatically. Without such foresight you are simply exposing for the scene and hoping for a photograph. You will be lucky to get one! Always keep in mind that you control the final print. Photography is a creative endeavor. The final print is your creation. Do not limit yourself to capturing the scene as you see it; start to think in terms of interpreting the scene and creating a work of art, a personal statement.
Like what you just read? Learn more from the book, The Art of Photography by Bruce Barnbaum, or check out Bruce’s newest book, The Essence of Photography– available now!