
The following is an excerpt from Warren Nash’s Lego With Dad

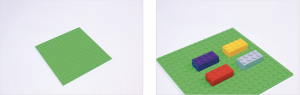
Specialty pieces needed:
• 4 1×6 reverse bow bricks
• Flowers
• Eyes
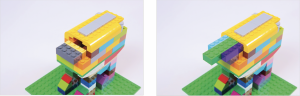
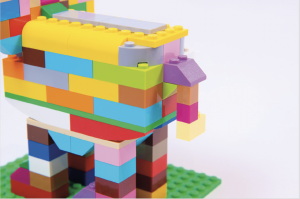
When my wife and I went on our honeymoon to South Africa, we had the best experience walking with elephants in the wild, which is why it wasn’t long until I was building one from LEGO with our little one.
This elephant build looks best when you use lots of brick colors. It includes all the things kids know and love about elephants: big ears, a long trunk, and big stompy feet!
STEP 1
Find a 16×16 baseplate, and then place four 2×4 bricks on the baseplate for the base of the feet.
STEP 2
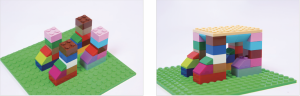
Use 2×2 bricks to build the elephant’s legs up from the feet. Also use roof tile bricks at the front of the feet to give a more curved look, common to elephants.
STEP 3
To start the body, place a 6×8 plate brick on top of the legs, and then attach inverted roof tile bricks angled outward to the underside of the plate brick, between each of the legs. This will give a rounded look to the elephant’s belly.
STEP 4
To continue the rounded look, use inverted roof tile bricks and 1×6 reverse bow bricks at the front and back of the elephant. You can then place another plate brick on top of these if you like to make it easier to build on.

STEP 5
Use regular bricks to build up the side of the elephant. Be sure to add an inverted roof tile brick at the rump for later attaching the elephant’s tail. Also, leave a space at the front of the elephant for attaching the head.
STEP 6
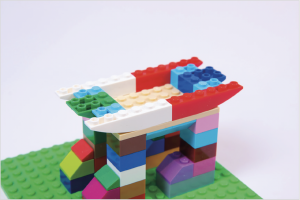
To create a curved look on top, attach rows of 4x1x1 bow bricks running along each side of the length of the elephant. Then at the back, use “inside and out bow” bricks with a regular brick in between to bring them together.
STEP 7
Connect the 4x1x1 bow bricks together with plate bricks, then run some flat tile bricks along the top of the elephant, and then begin building its neck. To do this, attach regular bricks of various sizes to the front and gradually build outwards from the elephant’s body. Use a 2×6 brick for a trunk attachment.

STEP 8
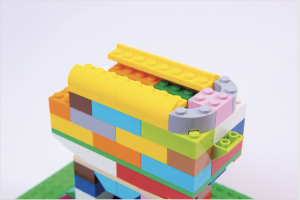
On the long 2×6 brick, attach a 2×3 arch brick at the end. Then place a tile brick where the back of the head will go. For the eyes, attach 1×1 knob bricks to either side of the head with eye pieces attached.

STEP 9
To finish off the elephant’s head, attach a 1×4 1/3 curved brick and 2×4 plate bow brick on top. Then for the ears, attach a 1x1x1 arch brick towards the back on either side of the head. It’s these bricks that will keep the ears in place.

STEP 10
To the 1x1x1 arch bricks, attach some 1×3 bow bricks then use x1 wide regular and inverted roof tile bricks to construct the rest of the ears.
STEP 11
For the tail, attach a tile brick to the inverted roof tile brick that’s poking out at the back. Then attach 1×1 bricks with a 1×2 brick at the bottom.

STEP 12
Finally, it’s time to attach the elephant’s trunk. Simply attach 2×2 bricks to the nose, which is poking out at the front. Then at the bottom of the trunk, use some roof tile and inverted roof tile bricks to give it some curvature. Now all your elephant needs is a name.