Excerpt from: The Landscape Photography Book by Scott Kelby
You’ll Need These Two for Most of These Recipes
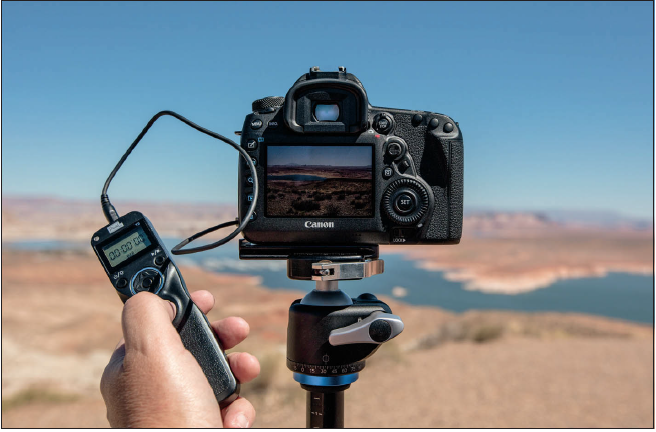
To keep you from having to read this over and over again, for most of the recipes in this chapter: The first step is to put your camera on a tripod and attach a cable release or use a wireless shutter release. I’m just going to write that once, here on this first page, and then it’s just implied for the other recipes. Well, quite honestly, I didn’t use a tripod for the daylight shot on page 207, or a couple of others I shot in daylight, so it’s for most of the shots. For those that were taken in broad daylight, I knew I would have a really fast shutter speed with that much light, so I didn’t pull out my tripod or Platypod like I did for the rest of the shots. Now, would the shots have been sharper if I had? You bet! Anyway, as you’ve learned throughout this book, a tripod and cable release for landscape photographers are as important as a stove and some cooking utensils are for a chef. You need both pretty much every time to nail the recipe. From here on out, I’ll just give you the type of photo it is, and the recipe to get the look, without going into all that tripod and release stuff, ‘cause like a good chef (which is one who cooks lots of comfort food or things smothered in sauce, by the way), you already know that stuff. Alright, preheat the oven, let’s get cookin’.
Mirror-Like Reflections
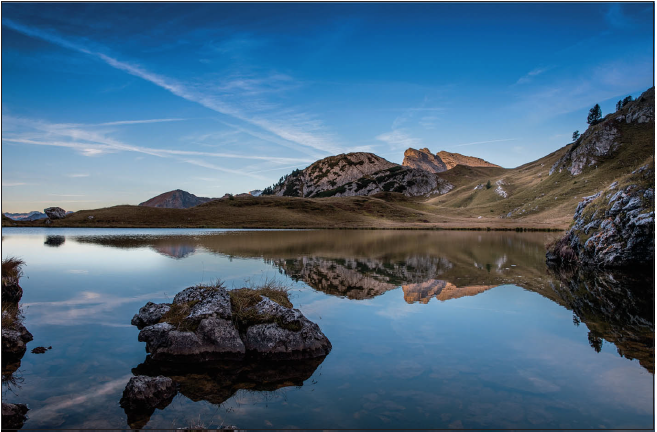
Characteristics of this type of shot: A glassy, mirror-like reflection of the scene.
Ingredients: To get that still, glassy water, you want to shoot first thing in the morning before the winds kick up. In most cases, an hour later and you’re too late—the water gets choppy and the reflection mostly goes away. Because the water is still, you can see through to the rocks in the shallow water in the foreground. If you wanted to see more of those rocks underwater, you could put a polarizing filter on your lens, which cuts the reflections big time, but in this case, our goal was to see the reflection. Compositionally, the horizon line appears to be in the center, which is about my least favorite place for it to be, however, this image is cropped for height to fit the book layout—the actual full-size photo is deeper. Also, to get a lower shooting perspective, I lowered the tripod’s legs.
Location: Lake Valparola in the Dolomites mountains of northern Italy, on the road between the hamlet of La Villa and Falzarego Pass.
Camera settings: Shot in aperture priority mode; 24–70mm f/2.8 lens at 24mm; ISO 100 at f/8; shutter speed: 1/250 of a second. Why f/8 instead of my go-to aperture of f/11? I probably moved the dial by accident, but it was a lucky accident because f/8 is the next best choice to f/11, so no harm done.
Strong Foreground Elements

Characteristics of this type of shot: A strong foreground object that draws you into the rest of the image.
Ingredients: The rock in the foreground is there to add dimension and depth, and to lead the viewer’s eye into the shot. It’s the visual introduction to the shot. I walked along the banks until I could find something to put in the foreground—your eye is immediately drawn to the rock in the foreground—and then I had the lucky occurrence of the reflection in the water creating some leading lines to visually lead you from the rock and shore out to the iceberg. It’s almost a big arrow in the water in front of the rock. I lowered the tripod quite a bit for a lower perspective.
Location: Jökulsárlón Glacier Lagoon, in southeastern Iceland about 50 minutes from the town of Höfn.
Camera settings: Shot in aperture priority mode; 24–70mm f/2.8 lens at 24mm; ISO 100 at f/22; shutter speed: 1/30 of a second. Why the f/22 f-stop? It was an experiment. The background is a row of snow-capped mountains and I was okay with trading a little sharpness, and maybe some lens diffraction, to get the foreground and background both in focus. In this case, it didn’t really pay off. There’s not enough separation between the ice and the mountains to really notice.
Dramatic Skies

Characteristics of this type of shot: A dark, dramatic, cloudy sky.
Ingredients: You’ve heard me mention a few times how you can get some great shots right before or right after it rains, and you’re seeing that type of sky here— after the storm. It was absolutely pouring rain for hours. Pouring so hard, in fact, that during an early dinner, my buddy and I had decided not to even leave the hotel for a sunset shoot since there would be no sunset. But, when he spotted a small break in the clouds, we took our chances (and a 50-minute drive), knowing that if it cleared even a bit, we’d at least have an interesting sky—and boy did we. It rained all the way to the site and stopped just before we arrived. When you have a great sky like this, you compose the shot to show less foreground and more sky. Shooting after sunset ensures nice, soft light, and the clouds mean you’ll probably have a little color. I lowered my tripod and positioned my setup where some of the ice would be right in front of me as my foreground. The still water was a lucky break, but the fact that the rain cleared at all was, too.
Location: Jökulsárlón Glacier Lagoon, in southeastern Iceland about 50 minutes from the town of Höfn.
Camera settings: Shot in aperture priority mode; 24–70mm f/2.8 lens at 24mm; ISO 100 at f/9; shutter speed: 6 seconds.
Oceanside Sunrise
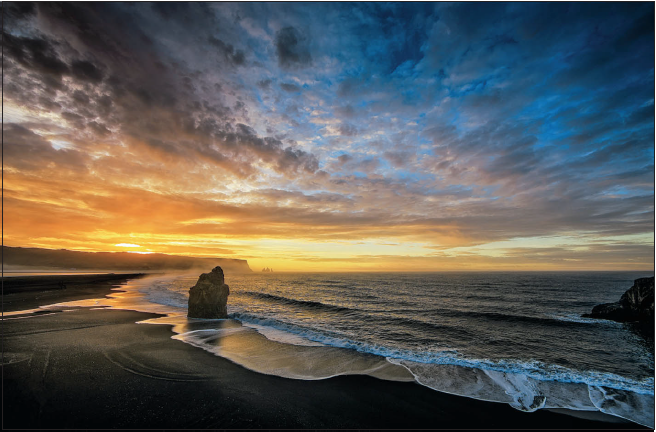
Characteristics of this type of shot: Wide, epic-style sunrise scene.
Ingredients: The biggest part of this shot was luck—being lucky enough to be there one morning when Mother Nature delivered an awesomely cloudy sky to catch all that morning light. Without those clouds (with a bald sky) it would be okay because the light would be soft, but you wouldn’t have all that color, and that’s what really makes the shot. Taken from an overlook up high, with an ultra-wide-angle lens.
Location: Reynisfjara Black Sand Beach, taken from the overlook at Dyrhólaey near the town of Vík, Iceland.
Camera settings: Shot in aperture priority mode; 14mm f/2.8 lens; ISO 100 at f/11; shutter speed: 1/30 of a second.