The following article is an excerpt from Nick Fancher’s Studio Anywhere 2: Hard Light.
Long-exposure photography is an art form. It brings a bit of unpredictability back to photography which, since its switch from film to digital, has become rather predictable. Long exposures allow you to do a range of things, such as painting with light, which results in streaky light, reminiscent of brush strokes. You can also make multiple flash exposures, which results in multiple, perfectly defined captures within a single frame. Or you can do a combination of frozen and blurred subjects.
These techniques of capturing artistic blurring with shutter drag and even using multiple flash exposures to freeze motion date all the way back to the creation of strobe light with Harold Eugene Edgerton’s experiments and the motion studies of Eadweard Muybridge. I will go into both techniques in this chapter.
PERCUSSIVE LIGHT
Long-exposure photography is a tricky beast. At least it is for me. It took me a long time to wrap my head around understanding strobe light versus ambient light and how to control them individually and together. So when you go and throw in long exposure, which is yet again something that is beyond what the naked eye can see, you have a hell of a technical shot on your hands.
My client was Ohio State University. The point of the shoot was to create content for the dance and music department in promotion of its annual collaborative show, Drums Downtown. At our initial meeting, where we discussed concepts for the show, we talked about a darker, moodier set of images that also managed to unify the movement in the percussionists with the dancers. I immediately thought of Edgerton’s strobe experiments (thank you Photo History class). When I showed the director the images, he was sold. I felt confident going into the shoot that I could pull off this technique, but I knew that it’d be tricky. I didn’t realize the full breadth of what I was getting into until we were already shooting. I anticipated shooting in a dark room, so I brought a tripod and a flash with me to the shoot. As you can see in Figure 6.1, my exposure was five seconds long, and this wasn’t because I needed the ambient light to fill in the exposure. In fact, there was no ambient light. At all. The reason for the long exposure was that I needed enough time to fire off a sequence of light bursts in order to capture the percussionist’s moving arms at varying heights.
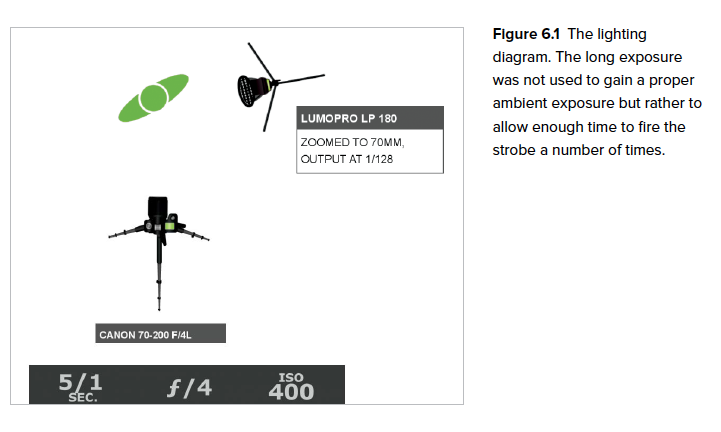
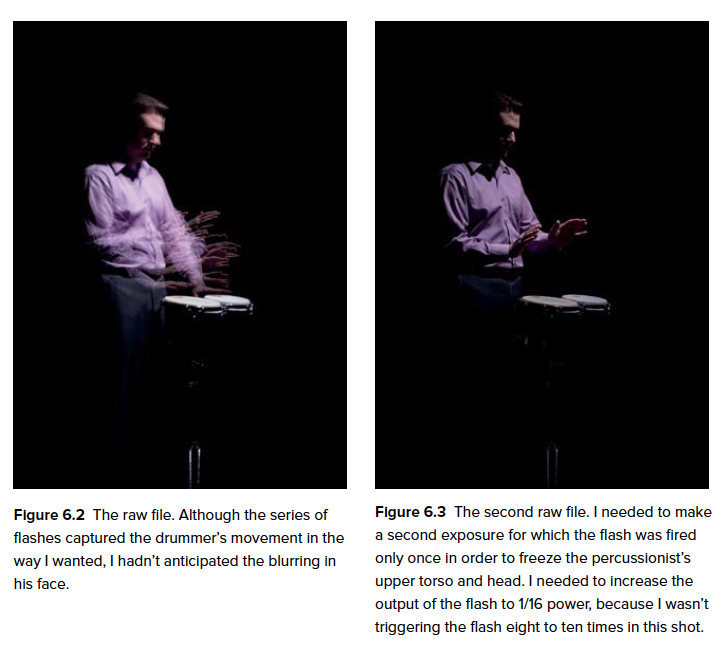
I set up a gridded, unmodified flash beside the subject, raised to about eight or nine feet. I aimed the flash so that the light fell mainly on his arms and hands. When I clicked the shutter, the flash fired as expected. I then used the remaining exposure time to manually fire off the flash by hitting the test button on my trigger. I had my flash set to the lowest output, which allowed for a fast recycle time. If I had to guess, I’d say that I fired off eight to ten flashes during the exposure. The technique went swimmingly. His arm movements were captured crisply and the shot was dramatic (Figure 6.2). What I had failed to anticipate, however, was that his torso and head would also be slightly moving as he drummed, resulting in his face appearing blurry. Once I realized why this was happening, I knew how I could fix it. Rather than trying to have him attempt to drum without moving his upper torso, I had him hold position and I took a single exposure with the flash at a slightly higher output of 1/16 power to get a properly exposed (because I was firing the flash only once instead of eight to ten times) and frozen image of the percussionist (Figure 6.3).
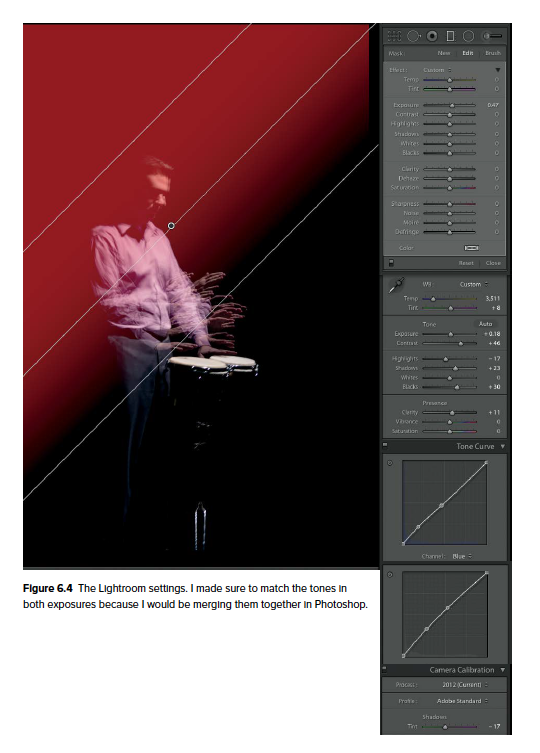
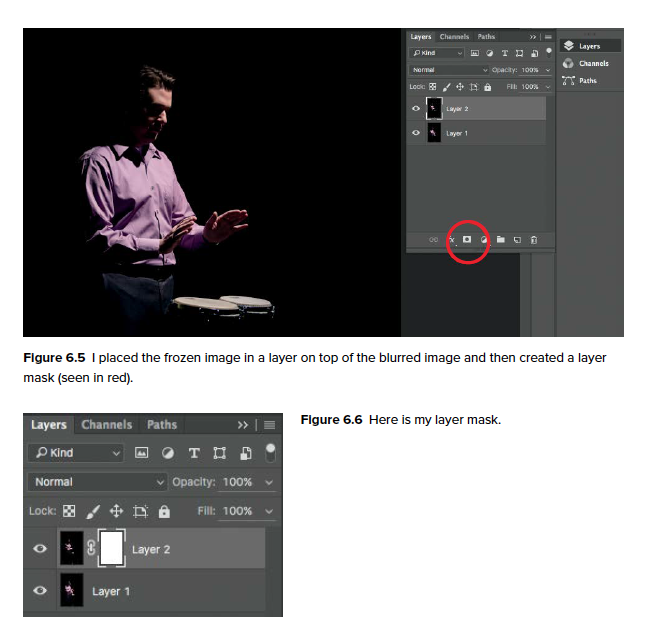
Now all I needed to do was combine the two images into one. Although it may sound tricky, it’s actually super simple to do using layers in Photoshop. In Figure 6.4 you can see my Lightroom settings. I basically needed to align the tones in the two exposures so that blending them together in Photoshop would be easier. Once the files looked good, I opened them in Photoshop. Once in Photoshop, I took the image where the percussionist’s face was frozen and put it in a layer on top of the blurred image (Figure 6.5). Then I created a layer mask (Figure 6.6). Then I selected the Brush tool and set the Flow at 3% (Figure 6.7). This allowed me to blend in my brush strokes, creating a smooth transition from the top layer to the bottom layer. Sometimes I’ll even take it a step further by making a “box blur” on the layer mask, after I’ve painted away the area to smooth out the brush strokes.

Note, this technique of laying a static image over a moving image is based on the same idea that’s behind the cinemagraphs that have been trending these last couple of years. In Figure 6.8 you can see the final shot. That ain’t stage fright causing the percussionist to freeze up. That’s all technique, dawg.

PAINTERLY LIGHT
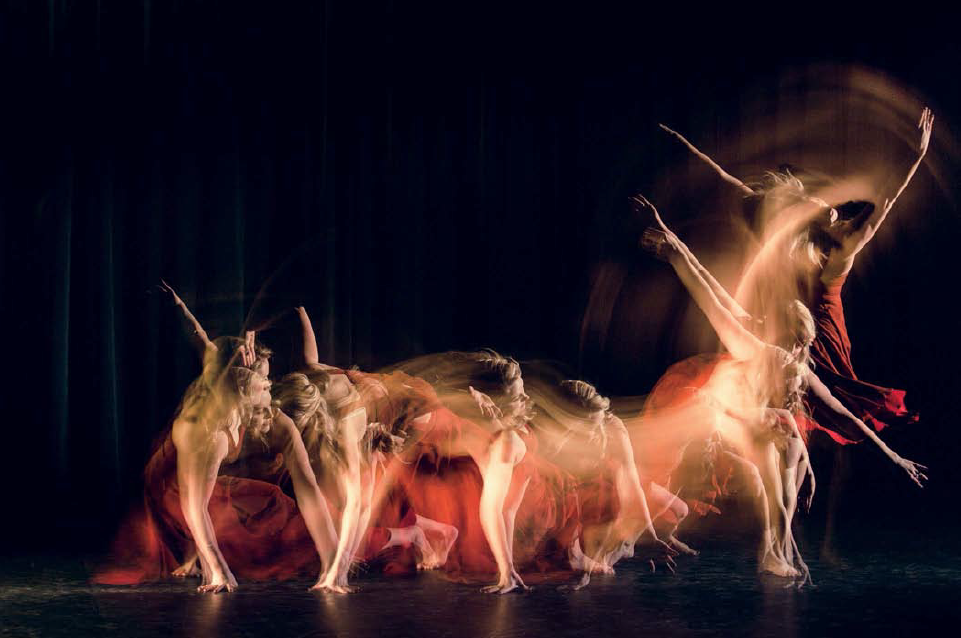
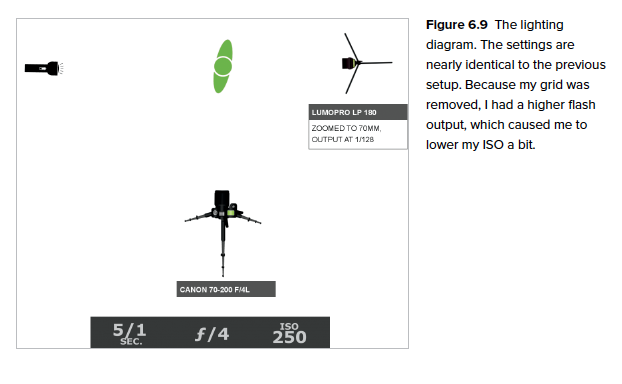
The Ohio State shoot was for a collaboration between the percussion and dance departments. With the percussion half finished, let me explain how I handled the dance portion of the shoot. The camera and flash settings were nearly identical to the first setup (Figure 6.9). The only difference was that I moved the flash into a forward-facing position and removed the grid, which allowed more light to come from the flash. As a result, my ISO was a bit lower. For the dance scenario, I wanted a trail of blurred movement to follow the dancer through the frame. This meant that I needed a second, constant light source to accompany my strobe. At first I tried using a floodlight, but no matter how much I flagged the light, there was still light spill on the black curtains, which were 20 to 30 feet behind the dancers. I finally settled on having the percussion professor hold my flashlight and move it up and down throughout the exposure, “painting” in the light on the moving dancer.
Because my camera was on a tripod and I was in a fixed position, and because it was so dark that I couldn’t really see to focus or compose the shot, I turned on the house lights and locked in my exposure. Note: to keep the camera from attempting to refocus once the lights go out, you can either switch the lens over to manual focus once focus is attained, or you can use back-button focus, which is what I use.
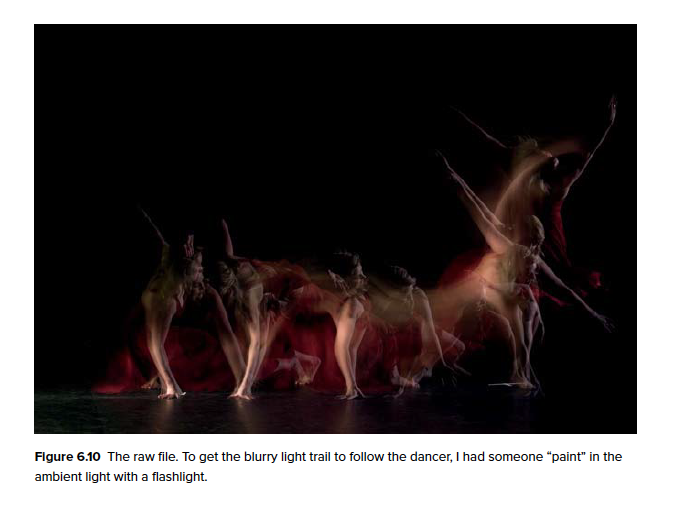
Once I locked in my focus, I had the dancer get in position at the edge of my frame on the left and I marked this starting position with a strip of white gaff tape on the floor. She then moved to the edge of the frame on the right, where I marked the ending point. Now the lights could go off and the dancer had the tape to give her a reference for her movement. After several exposures, I decided that I wanted her to start in a low, crouched position and to transition to a standing position as she moved through the frame. It made for a super rad light trail (Figure 6.10).
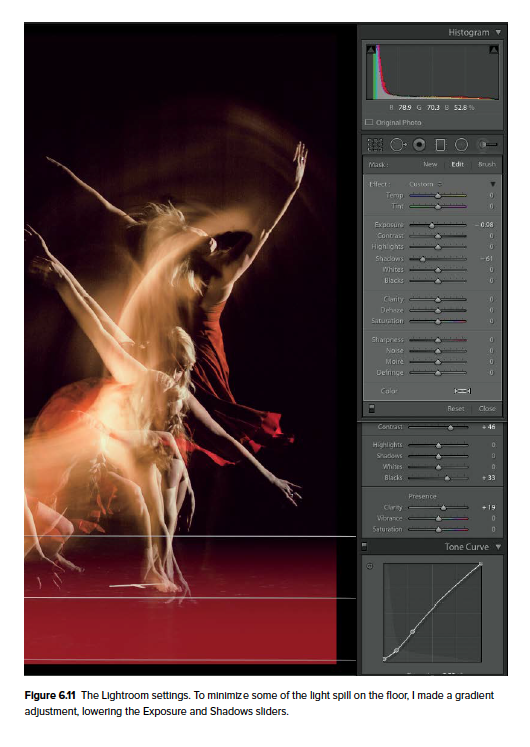
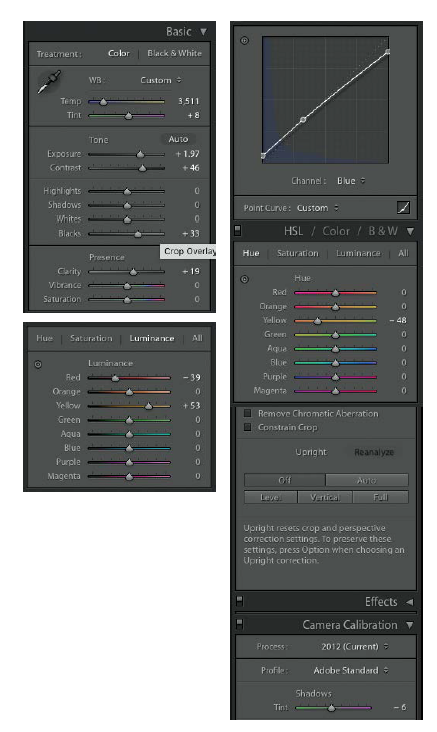
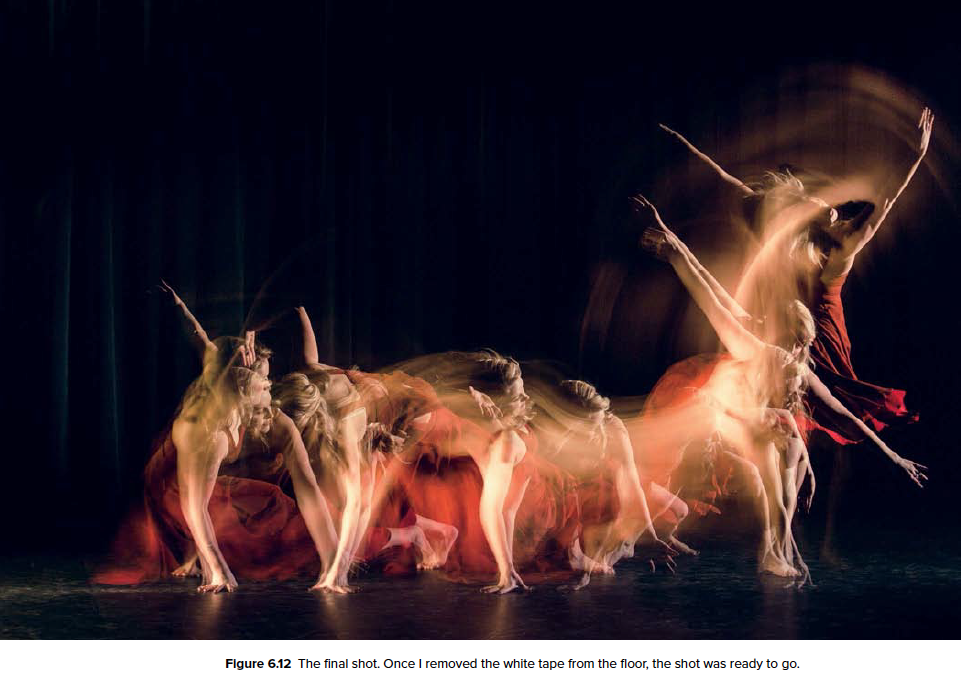
Although I had done my best to minimize light from spilling onto the ground or the curtains in the background in order to retain a dark mood, some light spillage had occurred. To remedy this, I made a gradient adjustment in Lightroom, lowering the Exposure and Shadows sliders (Figure 6.11). After I removed the white tape markers from the floor, the shot was good to go (Figure 6.12).
This article is an excerpt from Nick Fancher’s Studio Anywhere 2: Hard Light.