From The Off-Camera Flash Handbook, by Vanessa Joy
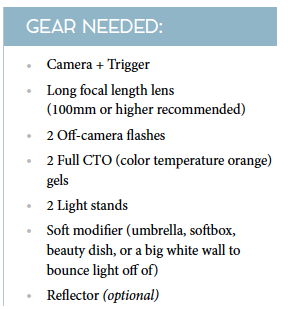
GOAL IMAGE
I’m from the Northeast, which means I’ve had jobs in hurricanes (multiple times) and have definitely had to hide inside due to frigid or wet weather.
Needless to say, it kills my client’s day (their wedding day especially) when their vision of glowing outdoor images is quashed by sleet or rain. But no fear! I can make them happy anyway and so will you after this section! All images in this section are straight-out-of-camera, so you can see what it looks like without me enhancing it in Photoshop.
The concept here is almost exactly like Scenario 2, “Creating Golden Hour.” The difference is that because we’re inside, we don’t need to compete with the power of the sun. We can more easily use speedlights in this case, which makes for a less expensive and less cumbersome setup.
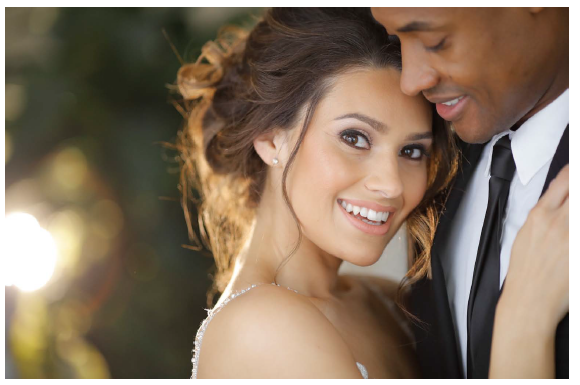
FIGURE 11.1 GOAL IMAGE. CANON 1DX II , CANON 135MM 2.0, ISO 1600, APERTURE 2, SHUTTER 1/160
The secret to getting this right is finding some foliage, except this time you’re probably going to move it. I’ve been know to “borrow” plants that I find around the venue and set them up where I want to photograph this pseudo-outdoor setup. You’ll place one flash behind the plant to make it look like real greenery outside with the sun behind it.
Sometimes “borrowing” plants from the venue simply means moving them away from the wall. To get this shot effectively, you’ll want to shoot in a room where you have about 5 feet of space behind the plants and a white wall in front of or to the side of the plants. You’ll be using a longer lens for this shot so you need to be in a room where you have plenty of room to back up. All of that considered, I usually have to move plants around to make the shot work.
Step by Step
- Turn all other ambient lights off: You need to control not just the amount of light in the room, but the color of it as well. If you have ugly tungsten lights throwing gross colors on your subjects, it’s not going to be pretty. Do yourself a favor and turn them off!
- Position the plants: It sounds ridiculous, but it works. Place the plants in position behind your subjects so the greenery fills the background of the image almost completely. You also need to have about 5 feet of space behind the plants to place your flash far enough away from them that the light will hit all of them.
Position the “sun” backlight: This light will have two CTO gels on it. Try to place it at least 5 feet away from your plants and point it through the greenery toward your subjects. This will rim light your subjects nicely in addition to making your greenery glow.
4. Position the front light: This light will have the soft modifier on it or (and I prefer this) be pointed toward a large white (or lightly colored) wall. If you’re lucky enough to have white ceilings as well, point the light toward a corner of the room. It’ll act like a huge umbrella by bouncing the light back and lighting your subject. The light should be hitting the front of the subject, maybe off to the right or left a little to give everything a little dimension.
5. Set the camera exposure: Get an exposure for the natural light on your subject as if you weren’t using off-camera flash. Because you’re inside, this might not be much. But if you’re in a room with windows, let a bit of that light affect your image if possible. Personally, I like to use a very low aperture so that the background blurs as much as possible, hiding any elements that would give away that this was shot indoors.
6. Set the white balance: The flash that will hit the front of your subject won’t have a gel on it so set your WB to the color temperature of the flash (usually ~5600K). If you’re not into dialing in your white balance Kelvin manually, try using the sunny day preset. Take a test shot and check the coloring of your photo.
7. Adjust positioning: For this to be believable, the greenery needs to fill the background. It’s not going to look like it’s outside if you only see a little bit of greenery on one side of the frame, and wallpaper and a chandelier on the other. Using a longer lens helps compress the image and makes it easier to fill the background with the greenery. It may take some adjusting; move your subject closer or farther away from the greenery until it looks right.
8. Set the back flash: Turn on just your back flash and use TTL to get a power setting. Flip it to manual, keeping the same power setting, and adjust the light until you like how powerful the “sun” looks. Turn this flash head off.
9. Set the front flash: Turn on just your front flash and use TTL to get a power setting. Flip it to manual, keeping the same power setting, and adjust the light brighter or darker for a proper exposure on your subject’s face. If you’re bouncing this flash, you may be at a fairly high power setting. Alternatively for both flash settings you could use a light meter to set the power manually so that the light reads the same f-stop on the front and back of your subject.
10. Check both flashes: Turn your back flash back on. It’ll still have the power setting you got in step 5. Take a test shot with both flashes firing together. Adjust your flashes up or down until you get the look you’re going for.
11. Make adjustments: Once you have a solid image, feel free to change your exposure, white balance, or flash settings. Be sure to only change one thing at a time so you don’t get too far away from what was working originally and you can’t get back.
OPTIONAL: Add a reflector on the opposite side of the front flash to fill in any shadows.

FIGURE 11.2 NATURAL LIGHT. CANON 1DX II , CANON 85MM 1.4, ISO 1600, APERTURE 2, SHUTTER 1/160
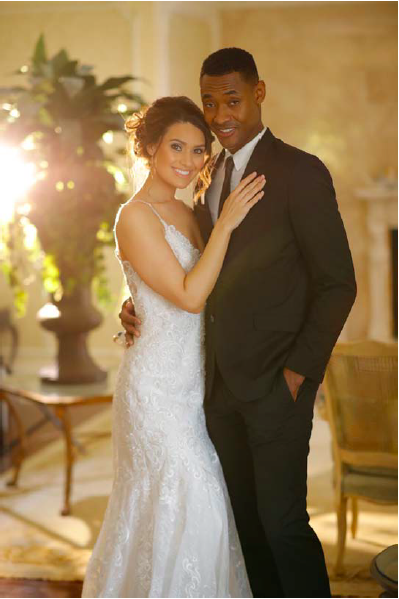
FIGURE 11.3 SHOT WITH JUST THE BACK FLASH. CANON 1DX II , CANON 85MM 1.4, ISO 1600, APERTURE 2, SHUTTER 1/160
.

FIGURE 11.4 SHOT WITH JUST THE FRONT FLASH. CANON 1DX II , CANON 85MM 1.4, ISO 1600, APERTURE 2, SHUTTER 1/160

FIGURE 11.5 SHOT WITH BOTH FLASHES. CANON 1DX II , CANON 85MM 1.4, ISO 1600, APERTURE 2, SHUTTER 1/160
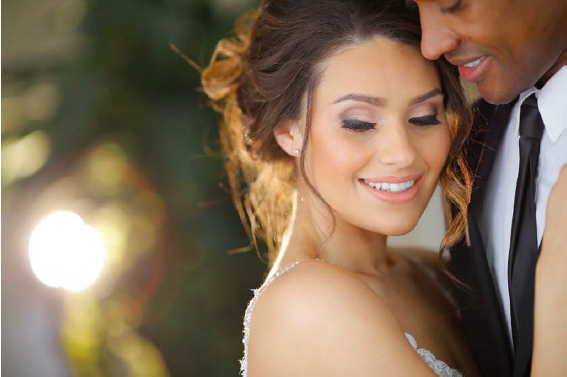
FIGURE 11.6 FINAL PHOTOS, CROPPED TO HIDE THE INDOOR ELEMENTS. ALL SETTINGS ARE THE SAME: CANON 135MM 2.0, ISO 1600, APERTURE 2, SHUTTER 1/160

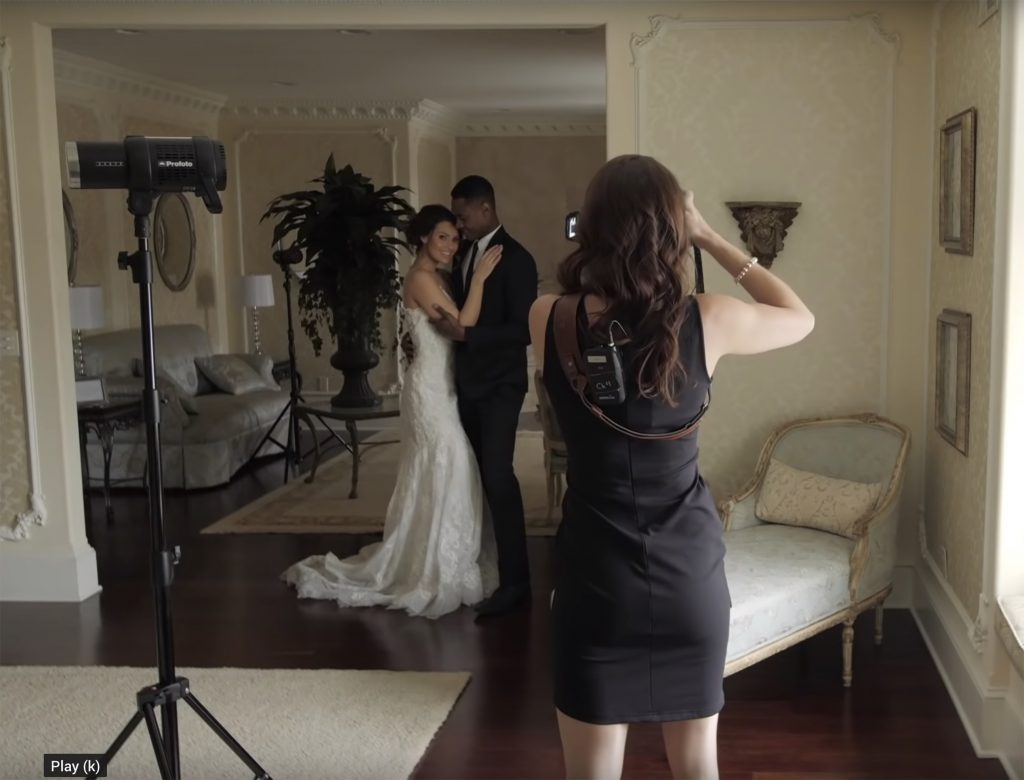
FIGURE 11.7 SETUP, BEHIND THE SCENES.
Potential Problems
This image can look “flashy” if it’s not done correctly. This usually happens because the flash is too harsh or the wrong color. If you’re not bouncing your light, feather it so it’s not directly pointing at your subject. You could also use a larger modifier or bring the light closer to your subject to soften it. If the color is the problem, warm up your white balance a little until you get a more balanced skin tone.
Occasionally, when you set this up and take your test shot using both flashes, you’ll find the “sun” not being as bright as it looks when you’re firing it alone. That typically happens when your front flash is too bright and overpowering the back flash. Boost the power of the back flash, or change your overall exposure to let more light in and lessen the power of the front flash.
Finally, if you don’t think the image looks natural enough, let more natural light of the space in. The easiest way to do this without ruining your flash settings is to lower your shutter speed. This won’t change the way the flash looks in the image, but it lets more of the natural light show up. It may make the image look more believable for this setup.
Practical Uses
I love being able to cheer up clients that are bummed about not being able to shoot outdoors. It can instantly brighten their day when you show them the back of your camera. To them, it’s magic. You’re giving them something they thought was taken away from their day. Even if you can only pull off a few close up pictures like this, it can alter the mood of the entire shoot.
Give this a try for individual and couples portraits. It will definitely cheer up your clients! Also, if you advertise a warm photographic brand, you can use this technique consistently in your images.