The following is an excerpt from Masha Knots’s The Beginner’s Guide to Friendship Bracelets
Before you start learning about reading bracelet patterns, it is a good idea to make a few simple bracelets to practice the basic friendship bracelet knots. In this chapter I will explain how to make a few of my favorite beginner-friendly bracelets. The bracelets in this chapter are organized in order of difficulty, from easiest to hardest. I recommend you start with the Classic Chevron bracelet before trying any other bracelets in this chapter.
In this chapter we will look at some main knots used in friendship bracelet making and the overhand knot, which is oft en used to create a beginner’s loop or to tie off your strings at the end of your bracelet.
Typically, knots are made between two individual strings but in some cases, they can be made between one string and a group of multiple strings or between two groups of multiple strings.

 The Forward Knot
The function of a forward knot is to switch the positions of the two strings while making a knot of the left string’s color.
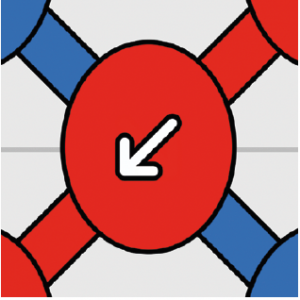
In a pattern, the forward knot is typically represented by a circle with an arrow pointing to the right. The color of the circle represents the color of the knot created and will always be the color of the left string going into the knot.
When creating a knot, I like to use one hand to hold the string I’m making the knot onto and use the other hand to hold the string I’m making the knot with. In a forward knot, since we are moving the left string to the right, I like to use my right hand to make the knot. Not everyone changes hands depending on the direction of the knot they are making, but since this is how I do it, this is how I will demonstrate the process.
Following are the steps used to create a forward knot:
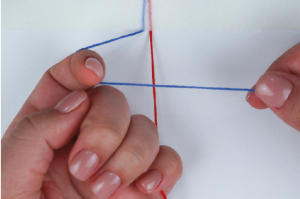
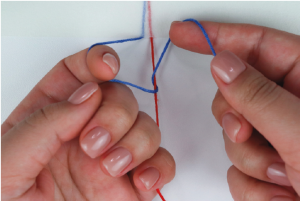
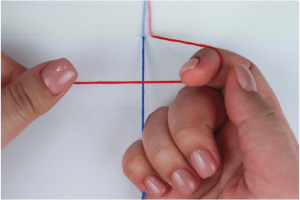
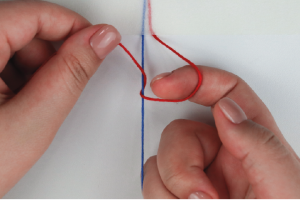
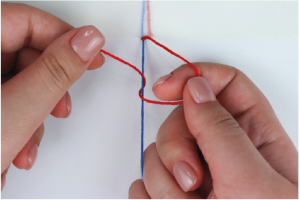
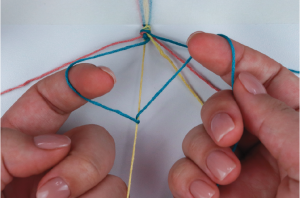
1. Take the string you will be making a knot onto. At the start it will be the one on the right. Grip it with the pinky finger on your left hand. Pull the string toward you slightly so it is a little tight, making it easier to work with. With your right hand, take the string you will be making the knot with. At the start it will be the string on the left. Stick out your left index finger and loop the string over it with your right hand. Drag the left string across the right string so the left string is on top. The result should look like you’re making the shape of the number 4 with your strings.
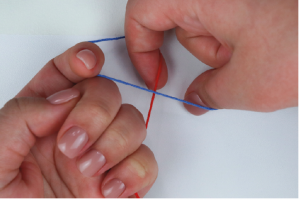
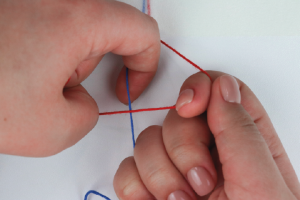
2. Now extend your right index finger and put it into the loop of the “4” shape that you created and push it under the string you’re making your knot onto.
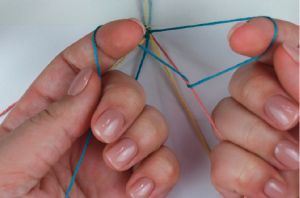
3. Still using your right index finger, use your nail to catch the string you’re making the knot with.
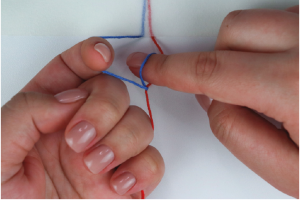
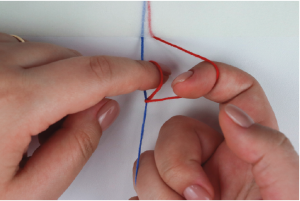
4. Use your right index finger to twist the string you’re making the knot with and pull it through and out of the loop.
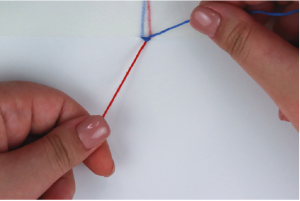
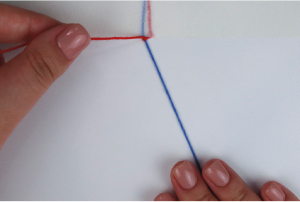
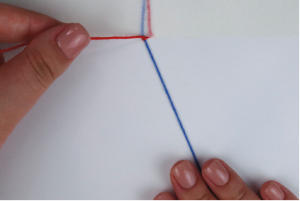
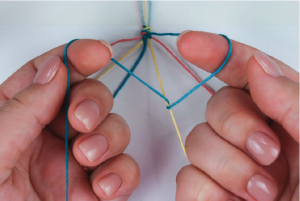
Before we continue, let’s pause and have a look at what the knot looks like at this point. All we’ve done is twist the string we’re making the knot with (the left string originally) onto the other string (the right string originally).
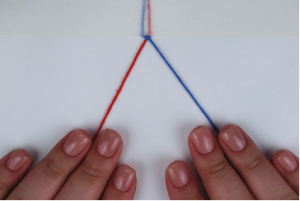
5. Pull the string you’re making the knot with up until it sits where you would like the finished knot to be. At this point we have created the first half of the forward knot.
6. To create the second half of the knot, we must repeat steps 1–5. The second half should look something like the image above.
7. To complete the knot, pull the string up once more. The forward knot is now complete! Notice how the strings have switched positions and the knot is the color of the string that was originally on the left.

The Backward Knot
The function of a backward knot is to switch the positions of the two strings while making a knot of the right string’s color.
In a pattern, a backward knot is typically represented by a circle with an arrow pointing to the left. The color of the circle represents the color of the knot created and will always be the color of the string on the right that creates the knot.
A backward knot is a mirror image of a forward knot. I like to switch the hand I make the knot with when making a backward knot. Since the right string is moving from right to left, I like to use my left hand to make the knot.
Below are the steps used to make a backward knot:
1. Take the string on the left—the string you will be making the knot onto—and grip it with the pinky finger on your right hand. Pull the string toward you slightly so it is a little tight, making it easier to work with.
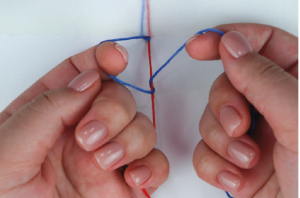
With your left hand, take the string you will be making the knot with. At the start it will be the string on the right. Stick out your right index finger and loop the string over it with your left hand. Drag the right string across the left string so the right string is on top. The result should look like a mirror image of the shape of the number 4 with your strings.
2. Now extend your left index finger and put it into the loop of the mirrored “4” shape that you have created and push it under the string you’re making your knot onto.
3. Still using your left index finger, with your nail catch the string you’re making the knot.
4. Use your left index finger to twist the string you’re making the knot with and pull it through and out of the loop.
Before we continue, let’s pause and have a look at what the knot looks like at this point. As with the forward knot, all we’ve done is twist the string we’re making the knot with (the right string originally) onto the other string (the left string originally).
5. Pull the string you’re making the knot with up until it sits where you would like the finished knot to be. At this point we have created the first half of the backward knot.
6. To complete the knot, we must repeat steps 1–5. The second half of the knot should look something like this example.
7. To complete the knot, pull the string up once more. The backward knot is now complete! Notice how the strings have switched positions but, opposite to the forward knot, the knot itself is the color of the string that was originally on the right.

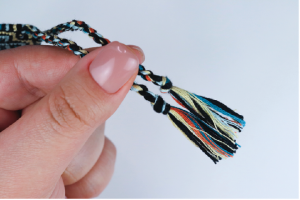
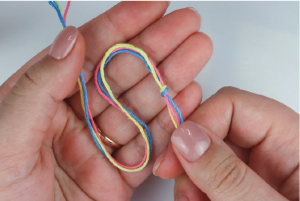
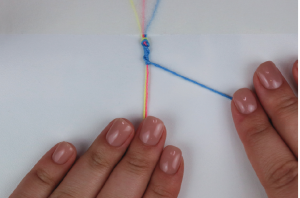
The overhand knot is often used to create beginner’s loops and to tie off strings at the end of your bracelet.
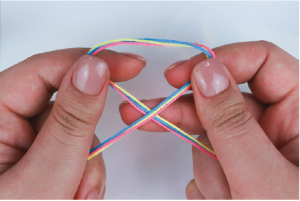
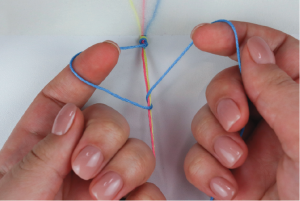
1. Fold one group of ends of your strings over the other to create a loop.
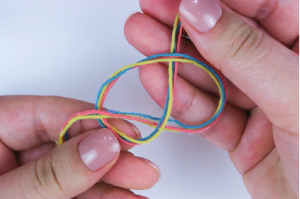
2. Grab the ends that are on the bottom and put them through and under the loop.
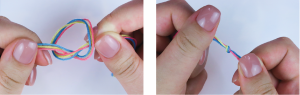
3. Pull on both groups of ends to tighten the knot. Your overhand knot is now complete.
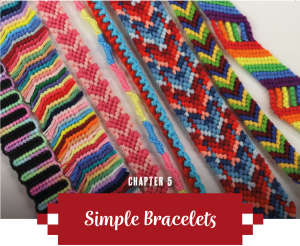
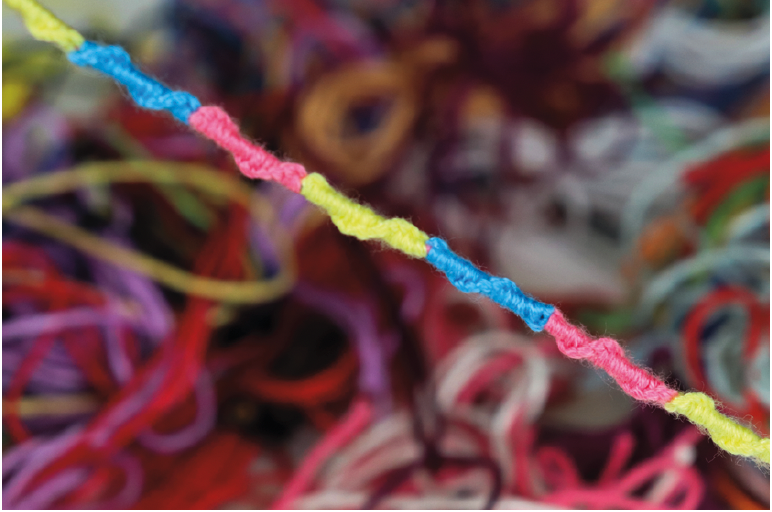
The Classic Chevron Bracelet

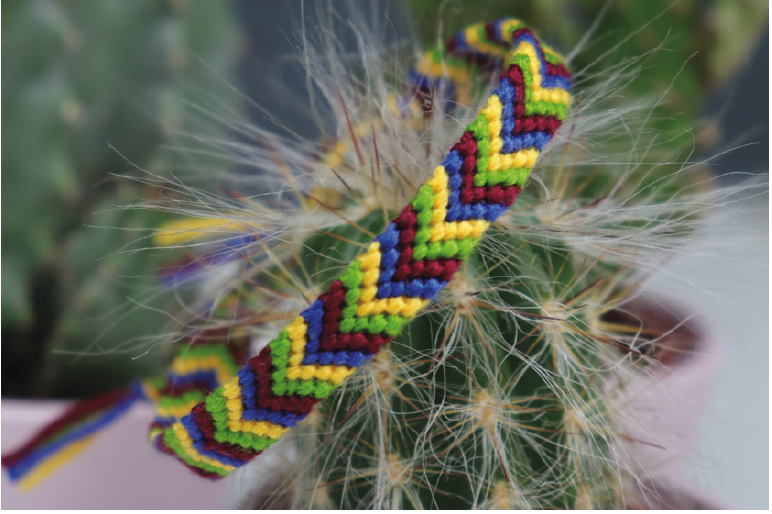
The Classic Chevron bracelet is a perfect bracelet for beginners to make as it uses both the forward and backward knots equally, making sure you get an equal amount of practice for both. The Chevron bracelet pattern is what we call a normal pattern. You can tell this by the fact that the knotting structure is diagonal.
Pick Your Colors
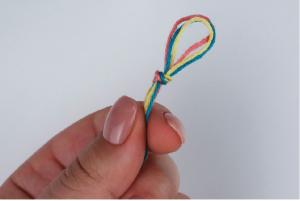
Start by picking your colors. You can choose as many colors as you like. The more colors you choose, the wider your bracelet will be, the longer the strings will need to be, and the longer it will take to finish. I will choose three colors for this tutorial. For simplicity, cut one string per color, 6 feet in length. Fold the strings in half and make a beginner’s loop, explained in chapter 9.
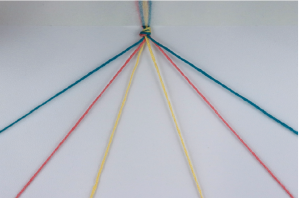
1. Start by arranging your strings. Separate them into two bundles with one string per color in each and lay them out symmetrically in the order that you want them to appear in your bracelet. Blue, pink, and yellow for me.
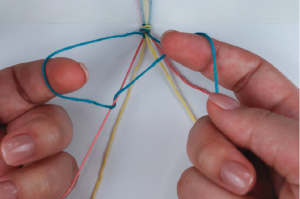
2. Grab the outermost string on the left side and make a forward knot onto the next string, which is just to the right of it.
3. Grab the next string and do another forward knot onto it with the same string. If you have more strings, continue making forward knots onto them in order until your string reaches the middle.
4. Next, grab the outermost string on the right side and do a backward knot onto the string that is just to the left of it.
5. Grab the next string and do another backward knot onto it with the same string. If you have more strings, continue making forward knots onto them in order until your string reaches the middle.
6. Once both of the strings are in the middle, make a knot between them. This can be any kind of knot as knots made with two strings of the same color will always be the same. Here I’ll just make a forward knot.
The Chinese Staircase

The Chinese Staircase is a fun bracelet for beginners to make as it uses only one type of knot, is simple to make, and still produces a beautiful bracelet. Since this bracelet doesn’t follow a pattern or the regular knotting structures, it falls into the category of what we call special bracelets.
1. Start by choosing your colors. The more colors you choose, the thicker your bracelet will be and the longer the strings will need to be. For this tutorial I will choose three colors. For simplicity, cut one string per color, 1 yard in length. Make an overhand knot, leaving enough length at the end to make ties with once you finish your bracelet.
2. Separate one string from the bundle and make a forward knot with it onto the entire bundle of strings at the same time.
3. Continue making forward knots with this string onto the other strings. You will notice that the knots will start to coil around the bundle. This is what gives the Chinese staircase its name, as it resembles a staircase.
4. When you want to switch to a different color, simply place your string down to join the bundle and bring out the string you want to switch to and make a forward knot with that string onto the entire bundle of strings, now including the previous string.
Continue making knots and switching colors until the bracelet reaches the length you want. Once you’re done you can create ties for your bracelet. These are explained in chapter 9.
For more information on making simple friendship bracelets please check out Masha Knots’s The Beginner’s Guide to Friendship Bracelets.