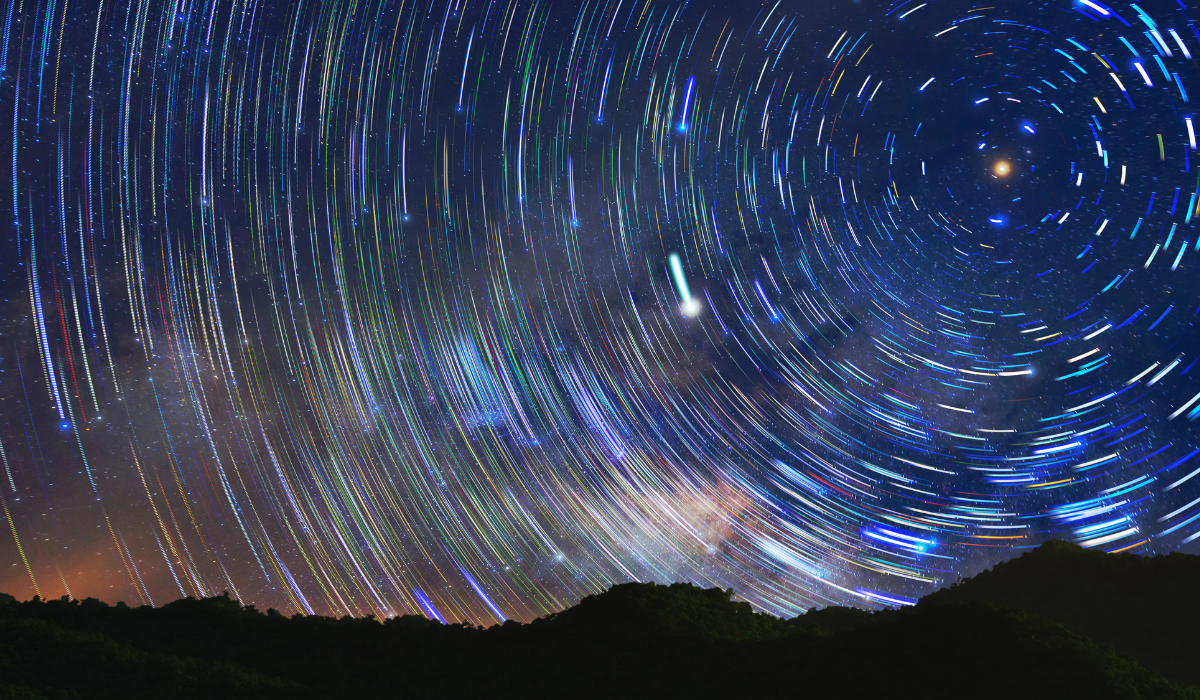
The Great American Solar Eclipse, August 21, 2017, photographed near Glendo, Wyoming
A total solar eclipse is one of nature’s most spectacular events. It’s also one of the rarest. On April 8, 2024, a total solar eclipse will be visible along a narrow path cutting diagonally across North America. To see the next one in North America, you’ll have to wait until 2033 and travel to Alaska. The Lower 48 won’t see totality again until 2044. Here’s how to photograph this year’s eclipse.
First, be sure to protect both your eyes and your camera. Eclipse glasses are essential to protect your eyes during the partial phases of the eclipse. Your camera, too, will need the protection provided by a special-purpose solar filter over the lens. Ordinary neutral-density filters are not sufficient. Only during the fleeting minutes of totality can you view the sun directly and photograph the sun without a solar filter.
Planning
I recommend using Photo Ephemeris Web (PEW) to plan your shoot on your desktop or laptop computer. Maps are most useful when they’re large, and PEW is the best photo-planning app available that will display detailed maps and satellite photos on a large monitor.
A solar eclipse occurs when the moon passes between the earth and the sun. First contact is the moment when the moon first appears to take a bite out of the sun. Second contact marks the beginning of totality. The moon now completely covers the sun’s disc, revealing the sun’s magnificent corona, which can be viewed safely with the naked eye. Third contact marks the end of totality. Fourth contact occurs when the moon’s disc no longer covers any part of the sun. The eclipse is over.
The path where totality will be visible begins in the Pacific Ocean about 900 miles northeast of American Samoa and ends in the Atlantic Ocean about 700 miles west of Brest, France. The eclipse path first crosses onto land at Mazatlán, Mexico, where it’s about 125 miles wide. The path then cuts a diagonal swath across North America, exiting land at Bonavista, Newfoundland, where it’s about 100 miles wide. PEW provides a detailed map of the eclipse path, as well as a cool simulation of the phases of the eclipse.
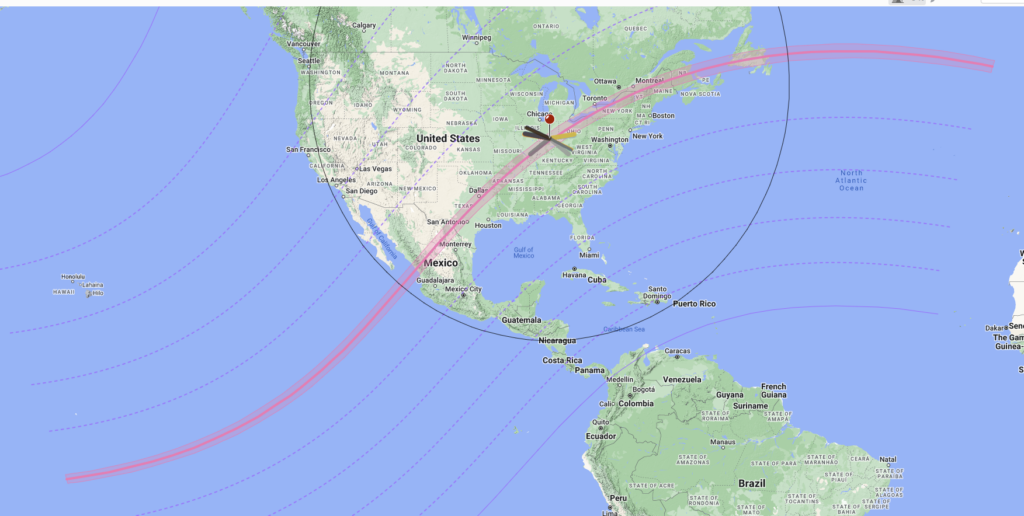
PEW also provides information on where the sun will be in the sky during each phase of the eclipse. Unfortunately for photographers who like to integrate celestial events into a grand landscape, the sun at totality will be quite high in the sky at most locations along the portion of eclipse path that extends over land. The exception is at Bonavista, Newfoundland, where at maximum totality at 5:15 p.m., the sun will be 24° above the horizon. In Indianapolis, by contrast, roughly halfway along the land portion of the eclipse path, the sun will be 55° above the horizon at maximum totality. Unless you’re fortunate enough to shoot from Newfoundland, the sun will be so high in the sky it will be difficult to compose it to include a natural landmark such as a mountain, desert tower, or sea stack.
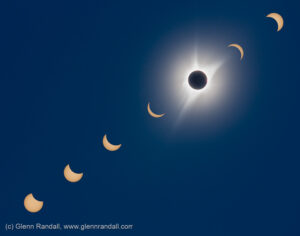
Remember that the sun is very small in an angular sense, with an angular diameter of only 0.5 degrees. To make it a significant part of the frame, you’ll need a long lens, preferably 300mm or longer. Your best bet may be to shoot a series of images showing the various phases of the eclipse, then use Photoshop to assemble the individual images into a composite.
Exposure
Solar-eclipse filters vary in density, depending on the brand. You should test your filter in advance on a sunny day with the sun high in the sky to determine the best exposure. Put your filter over the lens and shoot a bracketed set of photos of the sun. For my Lee filter, I found that an exposure of 1/60th, f/8, ISO 100 was about right. This exposure will remain constant during almost all of the partial phases of the eclipse. When the sun is a thin crescent, you will probably need to open up the exposure by 1 or 2 stops. Be sure to bracket your exposures.
The correct exposure will be much different during totality. Be sure to remove your solar filter! The brightness of the corona varies tremendously with distance from the sun. The difference between the brightest part of the corona adjacent to the sun and the wispy bits of corona several solar diameters away from the sun is around six or seven stops. Be sure to bracket widely. When photographing the August 21, 2017, solar eclipse, I started my exposure bracket sequence at 1/30th, f/8, ISO 400, and did a seven-frame bracket set with a two-stop bracket interval, producing exposures ranging from 1/2000, f/8, ISO 400, to 2 seconds, f/8, ISO 400 (the lightest exposure was too blown out to be useful). Remember that pixels are free. Opportunities to photograph a total solar eclipse are priceless.
Processing your images and assembling a composite
The first step after downloading all your images is to select the best bracketed sequence of totality. The easiest way to include all the detail captured in the various exposures is to combine them using the HDR utility in Lightroom. Select all the images, then choose Photo>Photo Merge>HDR. Lightroom will produce a new DNG, which is Adobe’s proprietary RAW format. Edit the photo to taste.
Start in Lightroom to assemble a composite showing all phases of the eclipse. First, select all the best exposures showing the partial phases of the eclipse, as well as your HDR image of totality. Choose Photo>Edit In>Open as Layers in Photoshop. Click the top layer in the layer stack, shift-click the bottom layer to select all layers, and change the blend mode to Lighten. Move the individual layers using the Move tool until the composite looks pleasing.
To learn more about using Photo Ephemeris Web to plan a solar eclipse photo, as well as many other landscape photos, please attend my webinar on March 28, 2024, at 10 a.m. Pacific time.
To learn more click here!