The following article is an excerpt from The Enthusiast’s Guide to iPhone Photography by Seàn Duggan.
PEOPLE ARE ONE of the most common subjects for mobile photography. It’s both fun and meaningful to photograph our family and friends. For the purposes of this discussion, a portrait is a photo where the subject is aware they are being photographed and may be an active participant in the process.
This sets it apart from more candid or street photography. For the best portraits, pay careful attention to the lighting and the location where you are shooting.
The Normal Lens versus the Telephoto or Portrait Lens
The standard lens on an iPhone is a moderately wide-angle lens. Higher end iPhone models since the 7 Plus also have a second camera with a moderate telephoto or portrait lens. If you have an iPhone with a portrait lens, or if you have an accessory portrait or telephoto lens, consider using that for portraits. Typically lenses with a portrait or moderate telephoto focal length (50mm–65mm) create a more flattering view of the face than the iPhone’s standard wide-angle lens (Figure 37.1).
If all you have is a wide-angle lens, try not to get too close because this tends to add a slight distortion to the facial features. Wide Angle lenses are great for showing more of the subject or for showing more of the scene around the subject, but they are not ideal for a close-up view of a person’s face.
Portrait Mode to Blur the Background
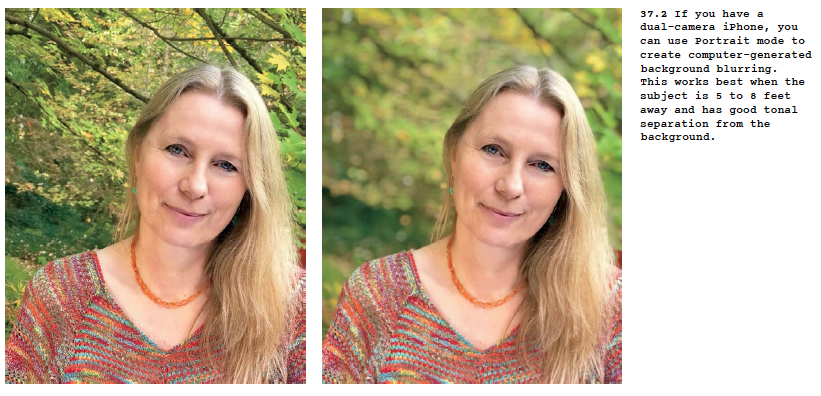
If you have a dual-camera iPhone, don’t forget the Portrait mode. This mode automatically uses the moderate telephoto or portrait lens to capture the subject and uses the wideangle lens to separate the foreground from the background. It then creates a depth map that applies live, real-time computational background blurring. This effect creates a more classic portrait look, like you might expect from a digital SLR camera (Figure 37.2).
The Portrait mode isn’t perfect and there may be some subjects and background combinations in which the edges between the blurred areas and the in-focus areas are not perfect, but in many scenarios the results are very impressive. We’ll explore other ways you can take advantage of the Portrait mode depth map for creative processing later in this section and in the section on double exposure and compositing.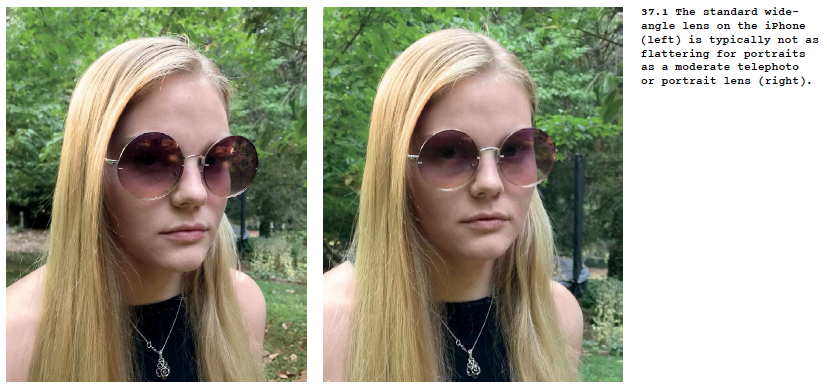
Find Open Shade for More Flattering Light
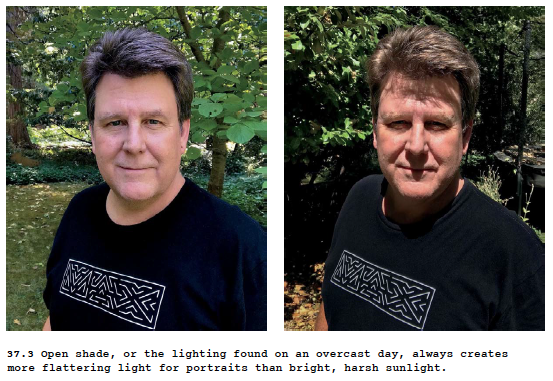
If you’re outside and want to make a portrait, look for areas of open shade. This diffused light is more flattering for portraits than harsh, bright sunlight. In sunny conditions, people often squint, and there can be bright highlights on foreheads and dark shadows from facial features. Open shade offers a softer and more even quality of light (Figure 37.3).
This is not to say that you cannot make interesting portraits in hard, high-contrast light. This quality of light will create bright highlights and deep shadows, and can work well with high-contrast black-and-white treatments, where a classically flattering look is not the objective.
Take Advantage of Window Light
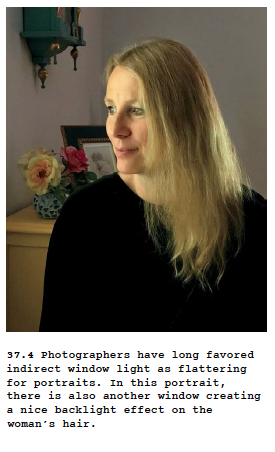
Window light, especially, softer, indirect light, has long been used in portraiture because it is flattering and versatile. A classic portrait setup utilizes soft winter light from a north-facing window. If the light comes through a thin curtain or drape, the material will help soften the light. You can modify the placement of curtains that block the light to create the specific lighting look for your intended portrait (Figure 37.4).
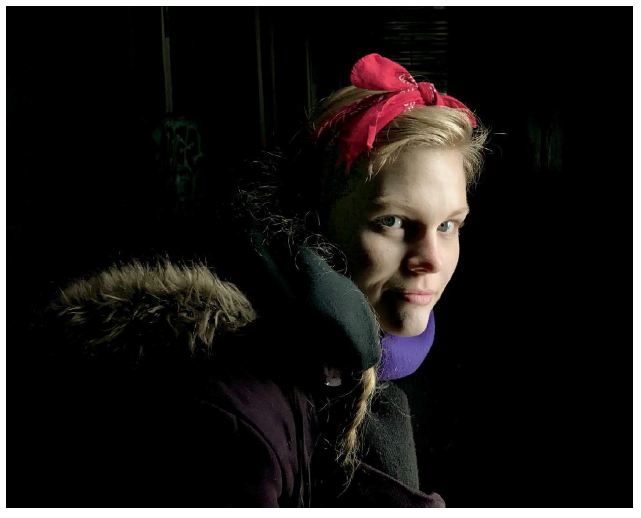
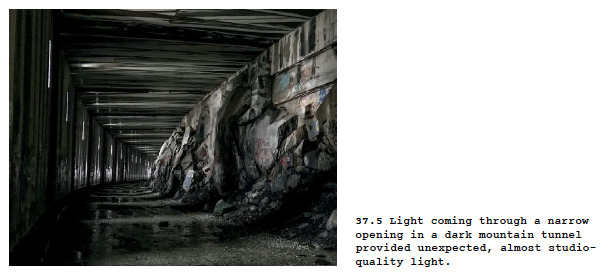
Window light doesn’t always have to come from a window; any small opening that directs light onto your subject will work. Consider the image in Figure 37.5, in which a narrow opening in the side of an abandoned snow shed in the Sierras created beautiful portrait lighting.
Simplify the Background
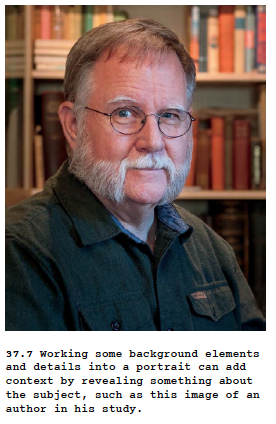
A busy, cluttered background contains visual distractions, especially when photographed with the standard wide-angle camera-phone lens. When you make up your mind to create a portrait, try to find a location where the background is simple, with fewer details to distract the eye (Figure 37.6). Locations with a background that is dark and far away from your subject work very well, as seen in Figure 37.5. You may be able to take advantage of a black (or white) cloth that can be arranged behind your subject. Consider the color of your subject’s skin and clothing, and pick a background color and tone that will make their face the most prominent element in the image. For some portraits, you might also consider leaving in certain background elements that reveal a little bit about them, who they are, and what they do (Figure 37.7).
Environmental Portraits
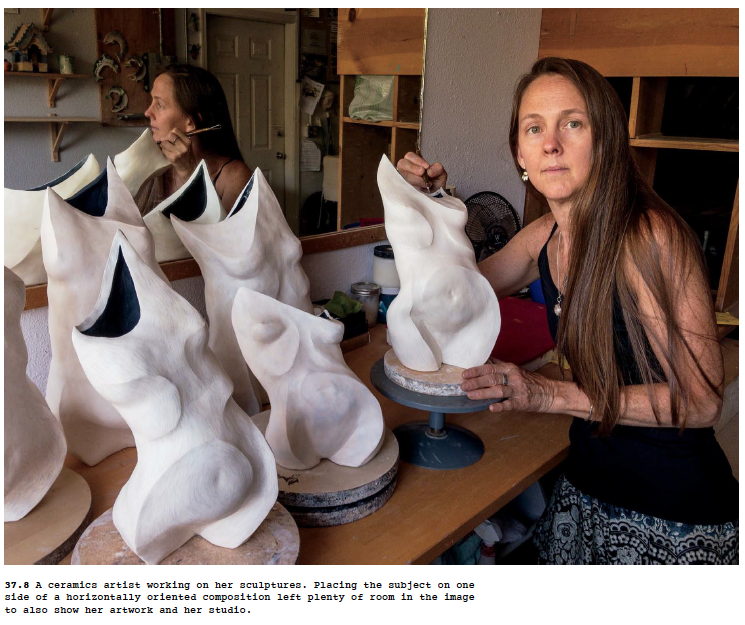
The goal of environmental portraits is to show a person in the environment where they live, work, or play. This type of portrait usually includes details that tell a story about the person’s relationship to that location. The iPhone’s standard wide-angle lens is often the preferred choice for environmental portraits because you can include more of the subject’s surroundings. Consider placing the person off to one side of the frame, allowing you the rest of the composition for the location. Environmental portraits are often used in documentary photography because they effectively tell a visual story about the subject (Figure 37.8).
Not all environmental portraits have to be taken with the wide view; some subjects and the work they do may lend themselves to a more close-up approach.

Using Depth Maps for Creative Portrait Editing
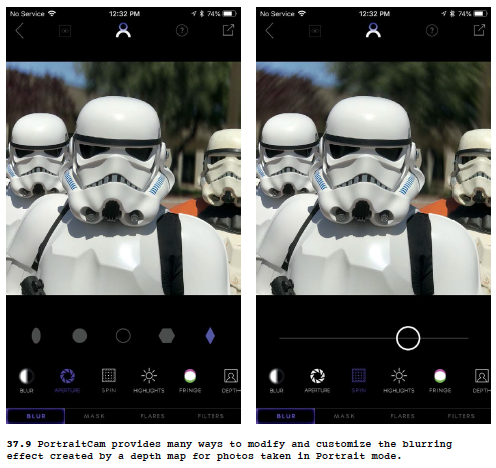
The PortraitCam app by Brain Fever Media lets you take the basic background-blurring effect that shooting in Portrait mode provides and then customize the blur in a variety of ways (you can also shoot directly from the PortraitCam app). You can adjust the amount of blurring and even change the shape of the blurred highlight points in the background.
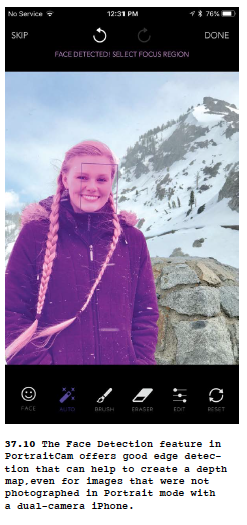
There are spin blur controls, color-fringing effects, and a variety of other available adjustments (Figure 37.9). You can use the depth map created by Portrait mode as a mask, or you can apply a blurring effect using more traditional radial, linear gradient, or landscape (tilt-shift) masks. You can also use a wide choice of lens-flare effects and color filters to top off your image with some final visual seasoning. You can even take a photo that was not shot in Portrait mode and, through face and edge detection, create and edit a mask to separate the foreground subject from the background and apply the same blurring effects that you would with a camera-generated depth map (Figure 37.10).