The following article is an excerpt from The Enthusiast’s Guide to Lightroom by Rafael RC Concepcion.
NOW THAT YOU’VE finished making some of the major edits to your picture, let’s go ahead and do a little bit of cleanup. No matter how hard you try to keep your camera clean, you’re always going to get something on your sensor that will translate to spots on a picture. The last thing you want is to send a picture to print, only to get it back with spots that stand out like a sore thumb.
Fortunately, Lightroom gives you the ability to perform spot correction right inside the Develop module, and provides a couple of tools that make the process a lot easier. Select the Spot Removal Tool by pressing the letter Q on your keyboard, or by selecting the icon that sits to the right of the Crop Tool. When you select the tool, your cursor will turn into a circle, which you will use to cover the entire spot on your image.
In the image shown in Figure 25.1, it’s kind of hard to see where the spots are. In this type of situation, I recommend using the Visualize Spots option. When you put a check in the Visualize Spots checkbox below the main image, you will get a black-and-white overlay on the picture (Figure 25.2). The slider next to the Visualize Spots option allows you to adjust how much of the image turns black and white.
Drag the image slider to the left and right until you see the spots appear in your picture. From there, all you have to do is adjust the size of the brush so that it covers the spot you want to remove, and then click on the spot and release. Lightroom will sample the surrounding area and find the best area from which to pull information to replace that spot. Don’t worry, if you don’t like the area that Lightroom chooses, you can always change it by selecting the area and dragging it to a new location.
You can also change the size of the spot after the fact. Hover over the edge of the spot, and you’ll see a diagonal arrow appear (Figure 25.3). Click and drag it out to make the sample area bigger.
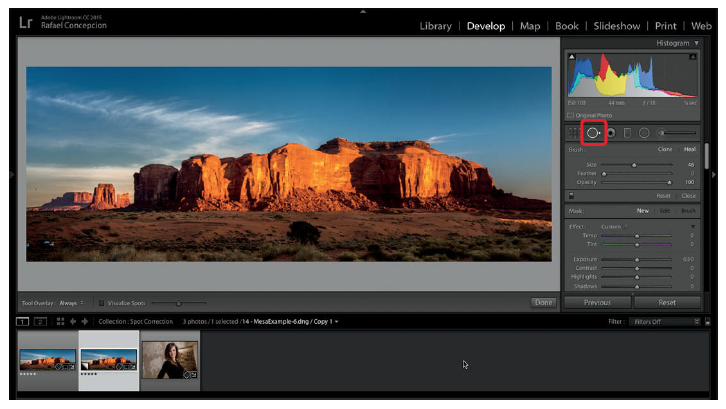
Figure 25.1 The Spot Removal Tool in Lightroom.
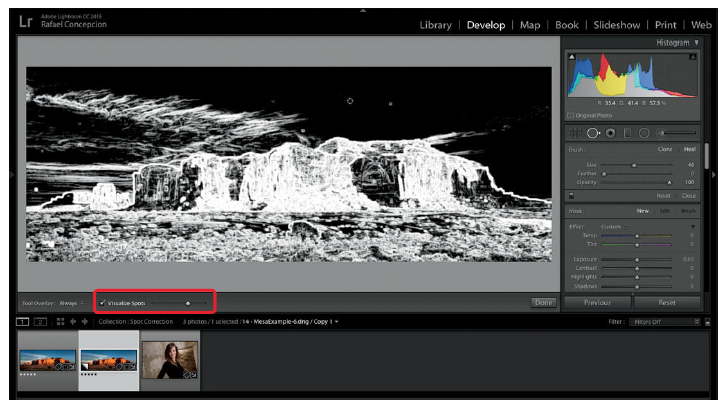
Figure 25.2 The Visualize Spots option can make spotting sensor dust problems much easier.
Previously, Lightroom only worked with circular spots. But recent changes to the software have made it possible to use brushstrokes as well, which I think is great. Notice that there are a couple of cars in the bottom-left corner of my picture. They’re not spots per se, but I can use the Spot Removal Tool to cleanly remove them from the image.
For this removal, I’ll use a really large brush and I’ll drag it across the two cars (Figures 25.4 and 25.5). You can see that this creates a brushstroke option and samples from a surrounding area. Again, I can always change that area by single-clicking on the sample and dragging it to a new spot. Once I find the area that I think is a better match, I can click the Done button.
You will see all of the different brushes and sample spots as white circles on your image. Don’t worry, these won’t print, but they give you a good idea of the type of work you’ve done so far (Figure 25.6).
The Spot Removal Tool is also great for portrait retouching (Figures 25.7–25.9). Individual blemishes or marks can be quickly removed right in Lightroom. This is something you would have had to do in Photoshop before, but now it’s quick and easy to do it in Lightroom without having to leave the program at all.
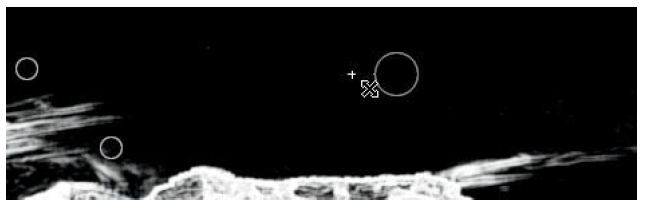
Figure 25.3 Adjusting the size of the Spot Removal brush in Lightroom.
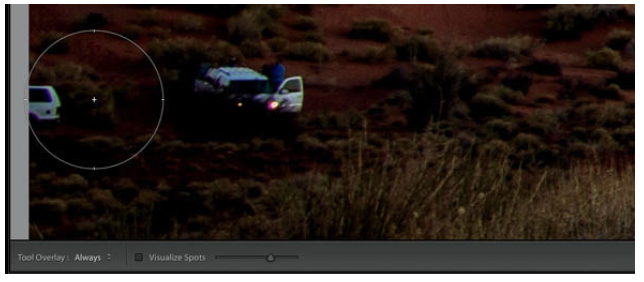
Figure 25.4 I selected a large brush size to remove the cars from my image.
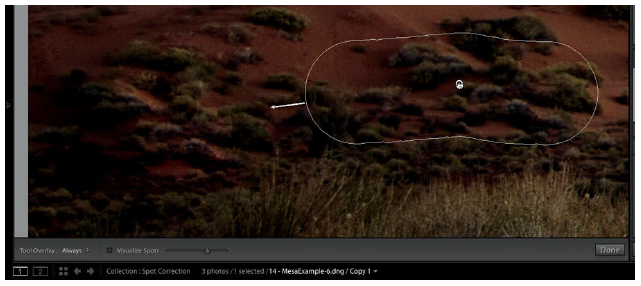
Figure 25.5 I dragged my brush over the cars to create a long brushstroke, and Lightroom replaced the area with a sample from a nearby area in the image.
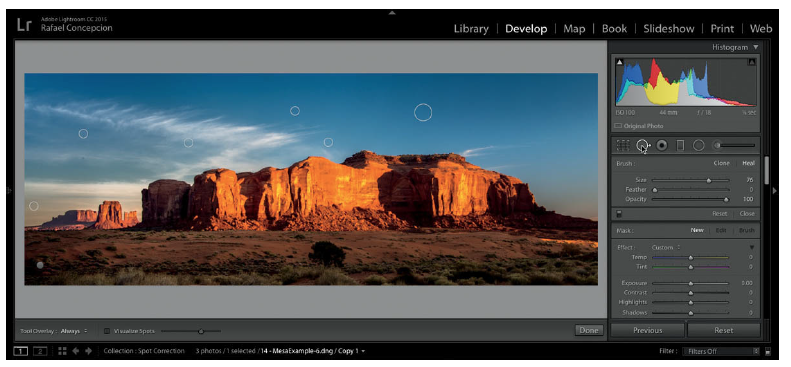
Figure 25.6 The final product with spots removed.
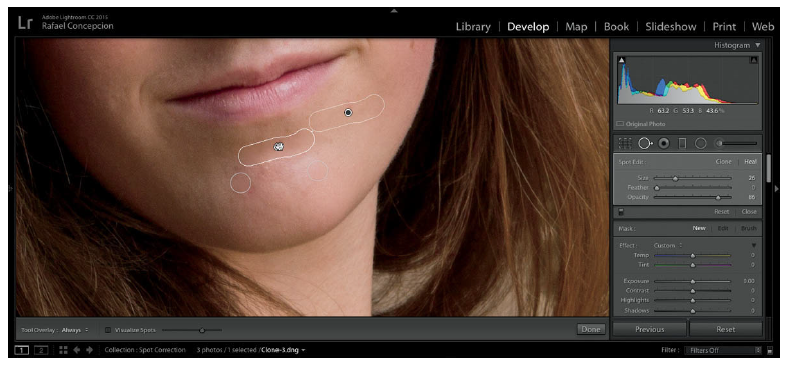
Figure 25.7 The Spot Removal Tool is great for removing marks or blemishes on portraits.
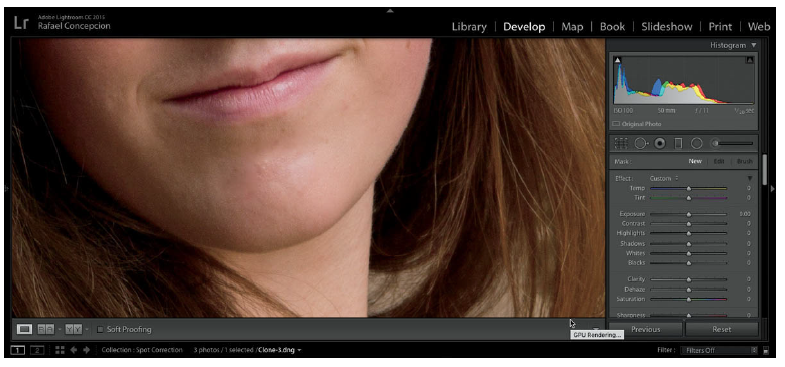
Figure 25.8 Before Spot Removal.
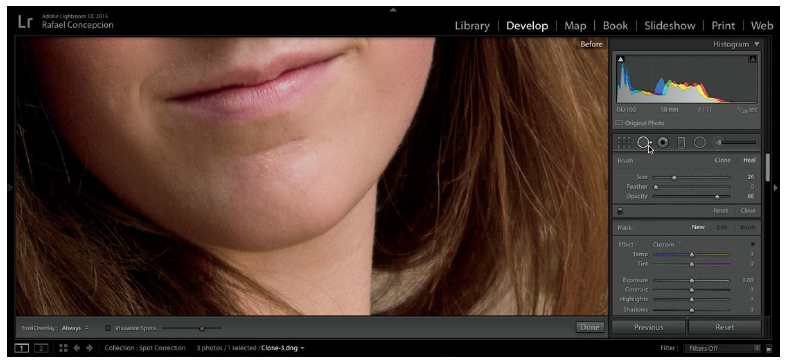
Figure 25.9 After Spot Removal.