The following is an excerpt from William Neill’s The Photographer’s Portfolio Development Workshop
OVERVIEW
The objective of Lesson Two is to begin to organize your photographs by theme. This first step in the process will help you find your strongest themes. Then, once they are established, you will refine and build upon the themes with existing images from your image library.
ASSIGNMENT
Pick two themes about which you feel passionate and that show off your personal vision. Choose up to ten images that represent each theme (for a maximum of twenty images total). Being highly selective is key. (The assignment is described in more detail on page 24.) The photographer’s task is to explore, photograph, and share with others the multitude of exciting aspects of our world and our lives. We show others what and how we see—that which they might otherwise miss. What a joyful job! Our busy lives make it challenging to find time to photograph the subjects about which we are most passionate. Many amateurs are just happy to get out to photograph on the weekend. Many pros are distracted by the demands of running their business, from filling orders to marketing to keeping current with the latest technologies to managing employees. I include myself in this second group!
FINDING THEMES
Throughout the lessons in this book, I want to help you concentrate your attention on developing thematic portfolios so you can determine which images are strongest and weed out the lesser images. The first phase is to see what themes exist in your photographs, then analyze which photos are the most promising and start editing those images into a portfolio that exemplifies your best work.
PULLING THE WEEDS!
In the past, when I would work with students in a one-on-one workshop critique, I often found a few good images mixed in with many lesser ones. The overall impression was not as good as it could have been. When I pulled out the weaker images and set aside the best ones to define a more effective portfolio, the photographer instantly became better! Even when setting aside only two or three “best” images, good editing elevated the photographer’s sense of achievement and ability. It clarified for me, or any viewer, of what the photographer was capable. It is this positive experience that I hope to duplicate in this book.
EDITING EVOLUTION
It is important to remember that the curation of a collection of images is an ongoing process. As you begin to assess the current level of your work, you also learn to maintain that standard of quality through your editing skills, and you become conscious of ways to improve your future efforts. There is no scientific way to do this, so we must rely on our own instincts and observations and the opinions of others. Our instincts depend on how well we feel an image translates our vision and the subjective process of comparing our photographs to others.
It is important to remember that the curation of a collection of images is an ongoing process.
In the early years of struggling to launch my career, I remember saying to myself, “my images are that good,” when looking at other photographers’ published work in magazines or books or calendars. At that early stage of one’s development, it’s hard to know if, in the outside world of judgment, our own assessment is realistic or not. The judgment of editors, curators, art directors, teachers, and publishers was especially critical when I came up since there was no social media or Internet on which to share images so easily.
Ideally, many of us want to make photographs that we are pleased with, and we aren’t too worried about others’ thoughts. Still, it is enjoyable to have our images appreciated by others beyond family and friends. If you are interested in developing a reputation as an artist, you’ll need to build up your editing skills. Unavoidably, we end up comparing our work to others. If done in moderation, judging your images against others can provide healthy motivation and confidence like I experienced as a young man. If overdone, comparing yourself to other photographers can easily lead to discouragement and frustration. Proceed with caution!
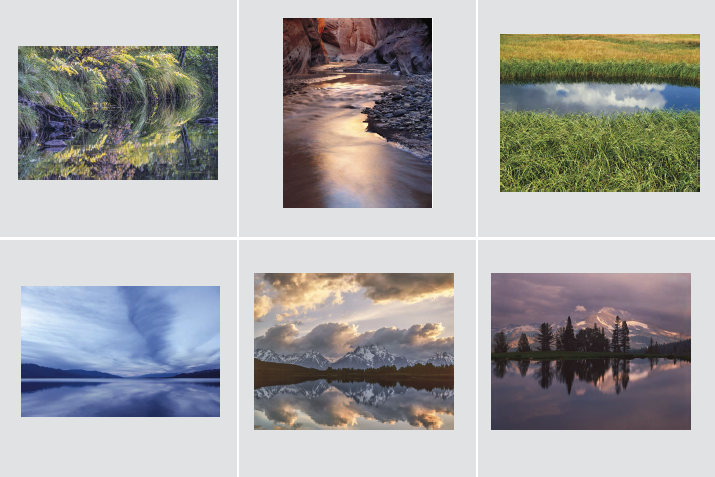
I’ll use these six images to illustrate different options for finding themes in your work. Hopefully, how I think about organizing my photographs will give you some ideas about curating your own. These six photographs are organized into a group entitled “Reflections.” They work okay as a group, but something is not quite right.
The bottom three images from the group are a bit too similar for such a small grouping. If the portfolio has at least ten or more photos, their similarities might not be so evident. If I take one of the bottom three out, and don’t place the remaining two adjacent to one another, the balance of the five (shown on the next page) works better.
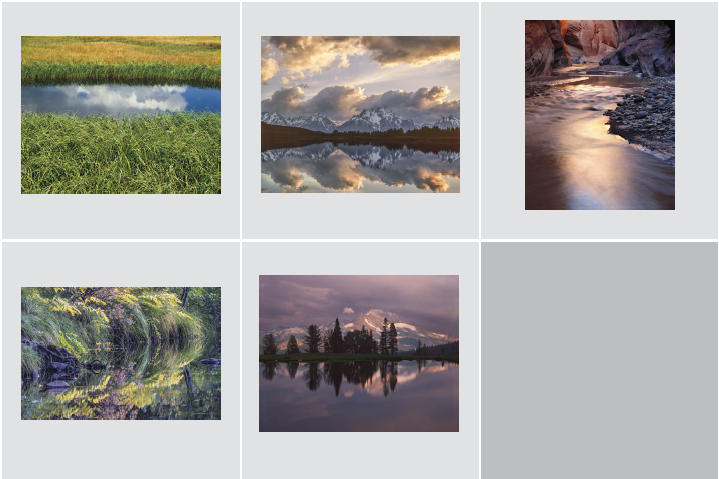
The balance of these five images looks better to me, and I eliminated the sense of repetition I had in the first group simply by removing one “symmetrical” photo and shuffling the order.
The bottom three images from the first grid might also point the way to a new direction, that of “Symmetrical Reflections.”
The top two corner images above—Cloud Reflections and Grass, Yosemite and Reflections, Paria River, Utah—fit the overall “Reflection” theme. Yet, I find them fitting into another reflection theme where only the reflection itself is included, without its source. I may find that I have more images (of equal quality, of course!) that fit this theme, or this may lead me to find more photographic opportunities for this new idea while out photographing. It may lead me to go where I might find more “Just Reflections” images.
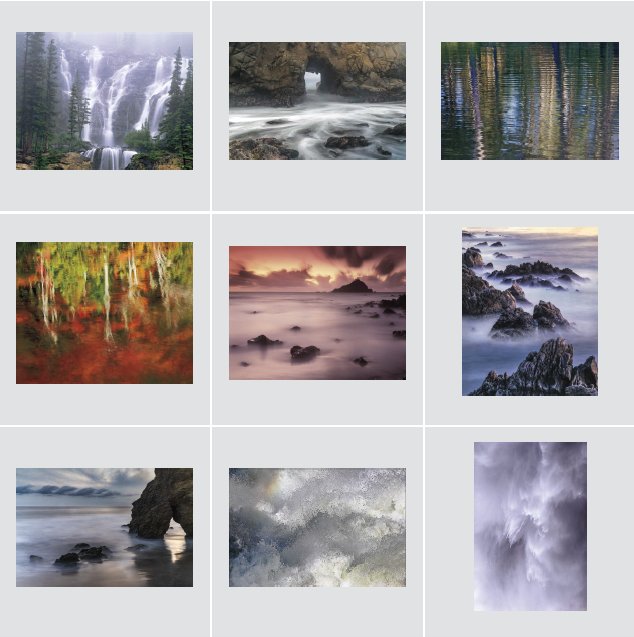
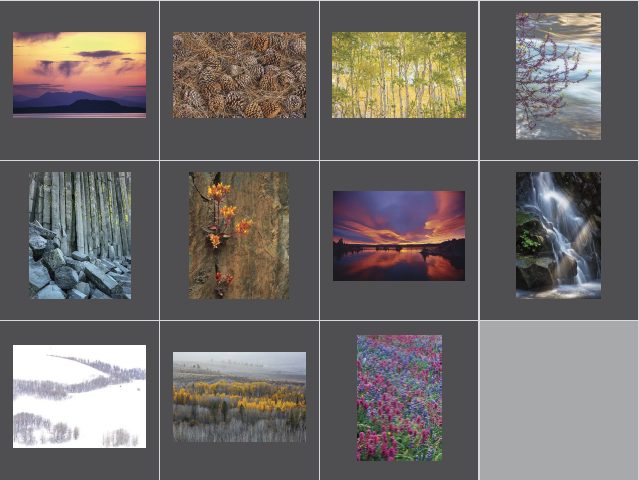
These are exercises in tightening up a theme to create a balanced group by refining the visual themes. I could also take the group of five in another direction, by expanding my “Reflections” grouping into a “Water” portfolio.
When I can see all my “Water” images together, I notice that I have five surf images out of the eight. Two others are ripple reflections. My analysis is that I need other types of water images such as waterfalls, river rapids, or lakes. I see my tendency to use slower shutter speeds is repeated in most of these images, so I would look for some water images that use fast shutter speeds and show strong textures in order to break up the pattern of blurred water images (unless, of course, long blurs are part of the theme idea).
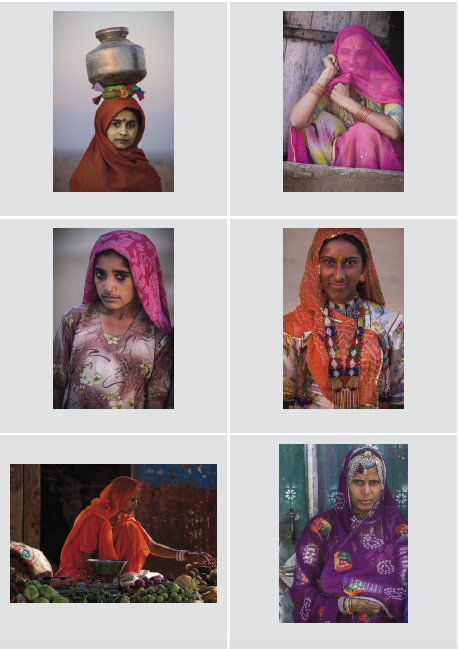
On the opposite page is a small collection of portraits from Rajasthan, India. I wanted the group to show both the faces and colorful dress of these women. As I browsed through my library and then organized the images into a “Portraits” collection, I noticed that I mostly preferred the frames that show direct eye contact. So, in the grouping here, I would remove the bottom-left photo to make the “eye to eye” aspect more strongly apparent.

YOSEMITE PORTFOLIO CASE STUDY
One aspect of the selection process for my Yosemite book is that I wish to include work made in the broader Yosemite ecosystem. The regions of the Sierra Nevada surrounding the park’s border have been important for me in my development as an artist. I lived in the Merced River Canyon just west of the park for twenty years. The eastern slope of the mountains to the east—which include Mono Lake and the canyons that run east out of the high peaks of Yosemite—are important to the ecosystem and have been a haven for me photographically. In the grid below, I have picked ten photographs and assembled them in a collection I call “Beyond Yosemite.”
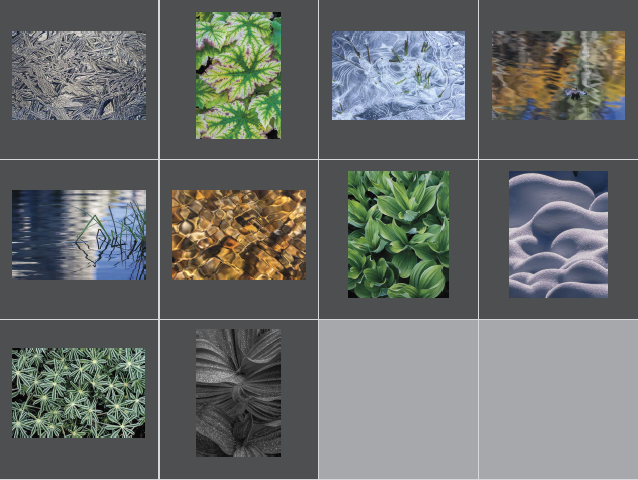
Another critical aspect of my Yosemite work is the close-up details that I always seek out when I explore the park. My grouping below is my theoretical submission for this assignment; I picked these from my broader collection for the book. I chose close-up photos showing a variety of color, seasons, and subject matter. Although, if selected, these photographs will be dispersed throughout the book, this group allows me to judge where my process stands, and what might be added to improve my selection for the final book.