From How Do I Do That in Lightroom? By Scott Kelby
Using Lightroom’s Built-In Book Module
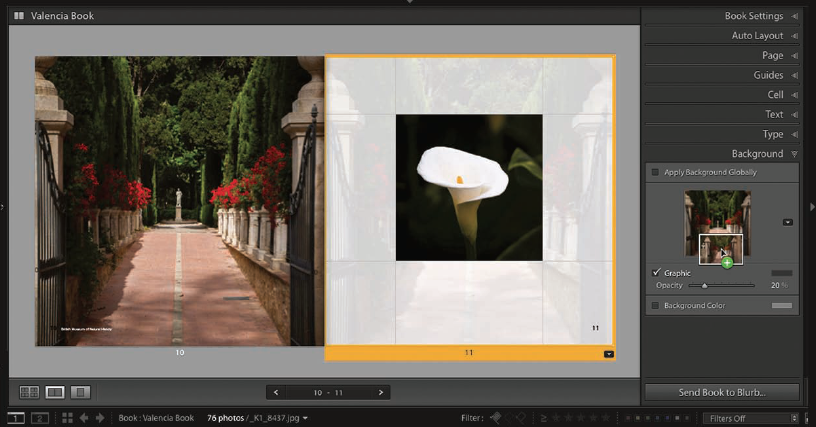
Before you begin your book, put all your final images into a collection. These should be “final” images, meaning they’re cropped, sharpened, edited—you name it. Put ‘em all in one collection, and then click on Book up in the taskbar across the top of Lightroom’s window ‘cause you’re ready to go!
How do I: Choose My Book’s Physical Size?
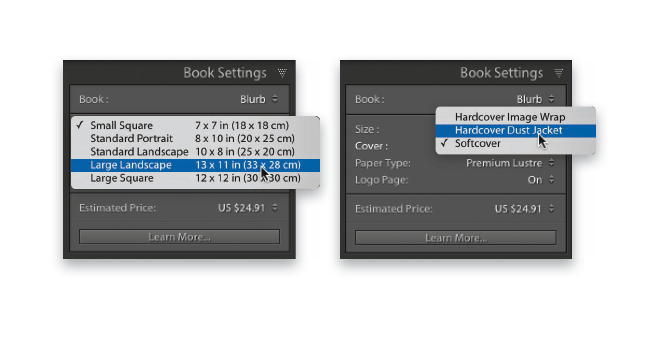
At the top of the Book module’s right side Panels area is the Book Settings panel, and near the top of that panel is the Size pop-up menu, which has the standard sizes supported by Blurb.com. Directly below that, you get to choose the Cover style. The Softcover choice is actually better looking than you’d think (it’s the one I make the most, by far). The Hardcover Dust Jacket option is more like you’d see for a coffee table book, where there’s a separately printed, outside glossy cover with flaps that tuck in the front and back. But, don’t worry, even if the cover gets torn, or you lose it, etc., the hard cover under it has the same cover image and text printed on it, as well. Finally, the Hard Cover Image Wrap option has your image printed right on the cover (picture the dust jacket version without the dust jacket).
How do I: Have Lightroom Lay Out My Book for Me?
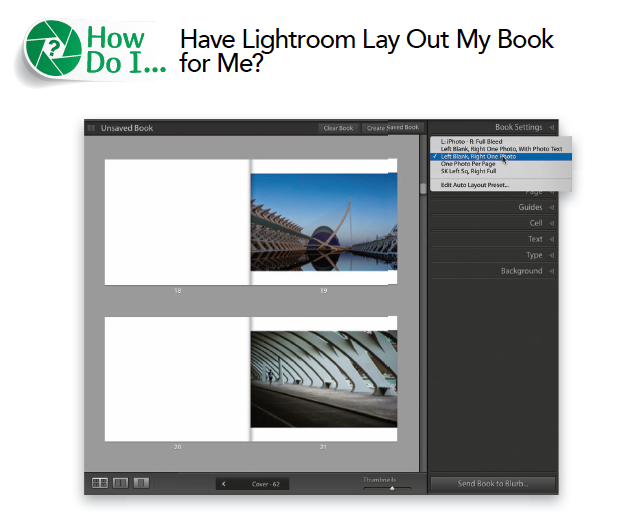
Right under the Book Settings panel (in the right side Panels area) is the Auto Layout panel. It doesn’t look like much—just a single pop-up menu and a couple of buttons. Click on the Preset pop-up menu and you’ll get a list of page layout presets (put there by Adobe, along with ones you create yourself). For example, the one named Left Blank, Right One Photo will create a book with every left page blank (duh), and every right page will automatically be filled with a single photo that fills the page to the side edges, as seen above. The images appear in the order they appear in the collection you created, with the first image appearing on the cover and page 1, the second image on page 3 (remember, the second page is blank), and so on. If this seems kinda lame, it’s only because the presets are lame. When you get some decent looking layouts and create your own presets, this can be a really awesome starting place that gets you 90% of the way there with just one click.
How do I: Customize the Auto Layout Feature?
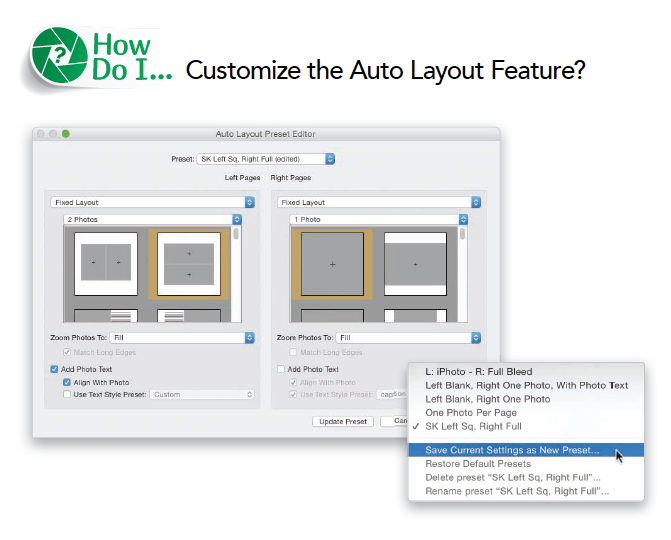
Go to the Auto Layout panel, in the right side Panels area, and from the Preset pop-up menu, choose Edit Auto Layout Presets to bring up the Auto Layout Preset Editor dialog you see above. Here, you can choose any layout you want, on the left or right pages separately, from the built-in presets that come with Lightroom. You can choose how many images will appear on each page, what each layout will look like on each side, if they’ll have an area to add text, and if the photos will fill the photo cell or fit fully inside it. Also, if you’ve created your own custom layouts, you can choose those, as well. When you’re done choosing what you want to appear on the left page and the right page, it’s time to save this as a preset. Just go up to the Preset pop-up menu at the top of the dialog, choose Save Current Settings as New Preset (as shown in the inset), and give your preset a name (I usually name mine with something that describes what’s on the left side, and the right). Now, you can choose these same settings without ever opening the Auto Layout Preset Editor— just choose this preset from the Preset pop-up menu in the Auto Layout panel.
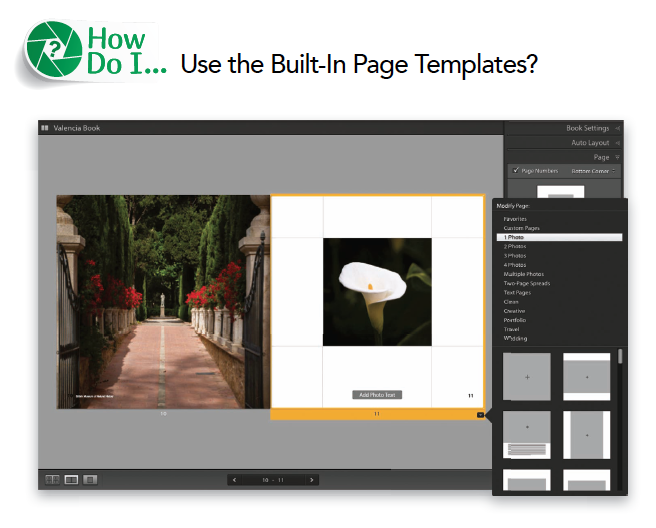
How do I: Use the Built-In Page Templates?
Click on a page and a yellow highlight will appear around it, and in the bottom-right corner you’ll see a black arrow button. Click on that button and the Modify Page pop-up menu appears. Start by clicking on how many photos you want to appear on the page, and the templates appear below in a scrolling list, showing a thumbnail of each layout. To apply any layout, just click on it. The option at the very top, Favorites, is the ones you picked as favorites from Adobe’s built-in templates (you can make any of those thumbnails a favorite by Right-clicking on a thumbnail and choosing Add to Favorites). Custom Pages, also near the top, are pages you created from scratch and saved to that set.
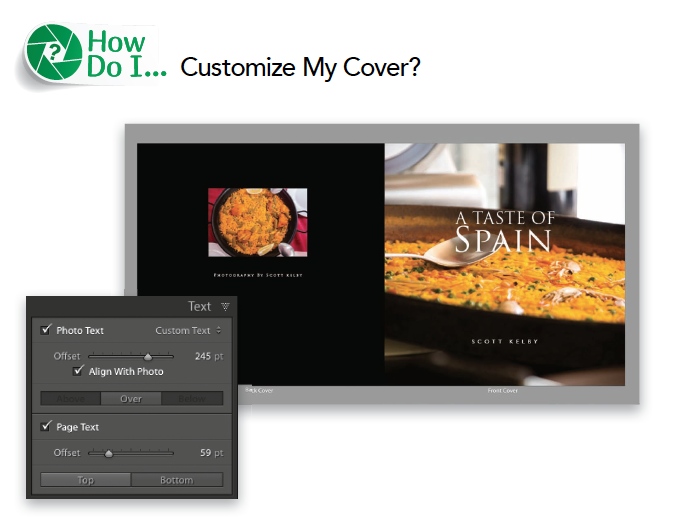
How do I: Customize My Cover?
The front cover of your book is treated like a two-page spread (not two separate pages like the rest of the book), but it does have a bunch of templates you can choose from— just click on the cover, and then click on the little black button with the down-facing arrow, in the bottom-right corner, and the Modify Cover pop-up menu with cover templates appears. Click on the one you want and it applies it. If you use the default template, it lets you put one photo on the front, and one on the back. Also, all of these templates have some text ready to go, just be sure to turn on the Photo Text checkbox in the Text panel, in the right side Panels area. I also ended up changing the background color to black, here, in the Background panel.
Like what you read? We thought you would! Click here to check out the full version of Scott Kelby’s book now!