An excerpt from The Enthusiast’s Guide to iPhone Photography by Sean Duggan
To Flash Or Not To Flash?
NEXT TO THE HDR setting in the iOS camera app is the flash. Like HDR, this can be set to Off (my preferred setting), On, or Auto. I usually leave the flash set to Off for a couple of reasons. The primary one is that I am not fond of the light it creates. It’s okay in situations when there’s no other way to take the photo, but as light goes, it’s not that interesting. If I can figure out a way to provide illumination some other way, I will (Figure 10.1).
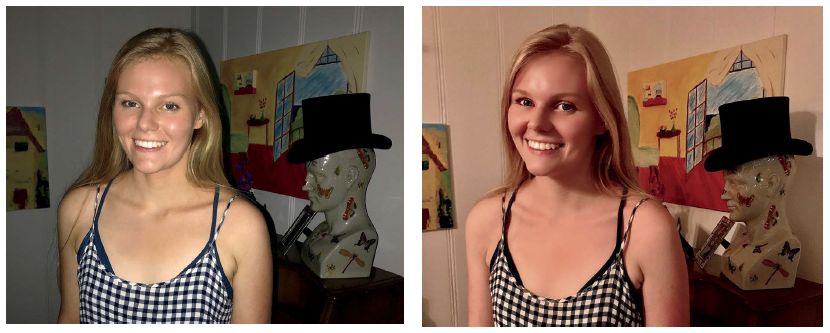
10.1 The same scene photographed with and without flash. I had to make sure the camera was steady for the non-flash shot, but the lighting is more pleasing and natural.
The other reason I like to leave it set to Off is that I don’t like to be surprised by the flash going off unexpectedly, which can ruin a moment if you’re trying to get a natural shot without drawing attention (Figure 10.2). If a quiet approach is your aim, be sure to turn the sound off on your iPhone so you can take photos without the shutter sound. Still, there will be those times when you have to use the flash. Keep in mind that the reach of the flash is not that far. It’s good for subjects that are moderately close, but don’t expect it to light up anything too far away.
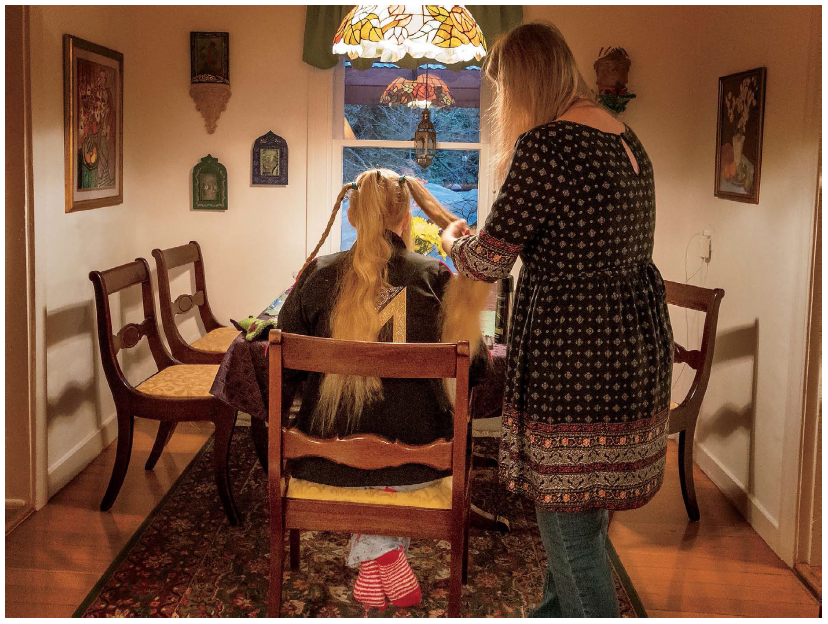
10.2 Quiet moments such as these can be ruined when a bright camera flash disturbs the subject. This is why I leave the flash turned off most of the time.
Capture Action with Burst Mode
SOMETIMES WHEN TRYING to get a photograph of fast moving subjects such as a dancer, an athlete, or your dog running crazy circles in the living room, it can be tricky to get the timing just right to capture the shot you want. To help you with such scenarios, the iPhone has a cool feature called Burst mode.
Activating Burst mode is as simple as pressing and holding the shutter button. You’ll see a number counter quickly flash on the screen telling you how many shots you’ve taken, and if you have the sound turned on, you’ll hear a fast “camera shutter” sound (Figure 11.1). If you keep your finger pressed down for a while, you can easily fire off a lot of shots, so just be aware of that number. If you normally have a “slow” shutter-button finger, chances are good that you’ve already inadvertently run into Burst mode.
Photos taken in Burst mode have their own album so you can easily find them. In that album and in the Camera Roll, the small thumbnails look like a stack of photos. When you open one to see it larger, it will have a label identifying it as a Burst and how many photos it contains. You will only see one photo in the sequence initially. Tap Select under the image (or above the image if the camera is positioned horizontally) to see the entire sequence (Figure 11.2).
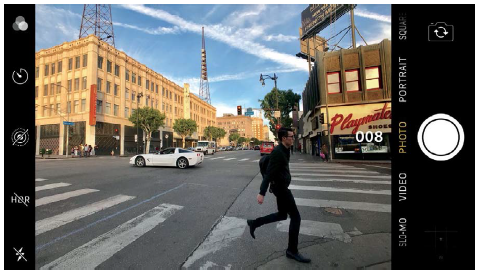
11.1 Press and hold the shutter button to activate Burst
mode. A number counter will show how many shots are being
taken. For this street photography shot, using the Burst
mode gave me several different shots of the man in black
crossing the street.
You can swipe horizontally on the large photos to scroll through them, or you can swipe on the small filmstrip underneath to quickly review the images. This action displays the different photos in a way that looks like a short movie clip. Tap on images to select them as ones to keep, then tap Done. You can choose to keep all of the photos in the Burst, or only the selected favorites. If you keep all of the photos, the selected favorites are added as separate photos to the Camera Roll, and the full Burst sequence is still in the Bursts album.
If you choose to keep only the chosen favorites, the Burst sequence is removed (you can still find it in the Recently Deleted album for 29 days, after which it will be permanently deleted from the phone).
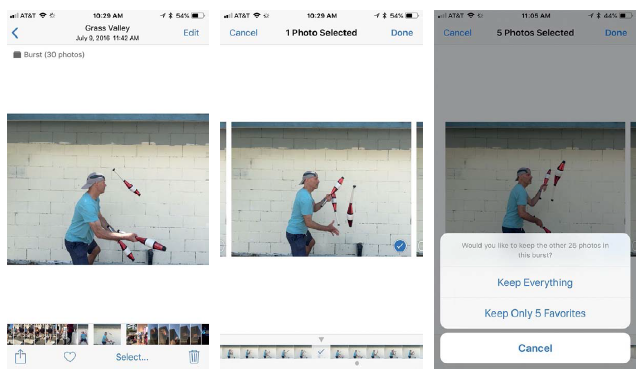
11.2 Burst mode shots show up as a single image until you tap Select. Then you can choose which images to keep from the burst sequence.
Turning a Burst into an Animated GIF
Apart from photographing action, you can also turn Burst sequences into animated GIFs that can be shared to your social media channels. Unfortunately there is no way to do this from within the iOS Photos app, but there are several apps you can use that will do it for you. GIF Toaster and ImgPlay are two GIF-creation apps that I’ve used, and both are very capable. They allow you to turn photos, videos, Live Photos, and Bursts into animated GIFs; let you control their speed and direction; and specify whether or not the GIF is set to an infinite loop. GIF Toaster provides additional options for cropping, applying filter effects, and adding text or image banners. Both apps allow for easy sharing to standard destinations on your iPhone and on the Web.
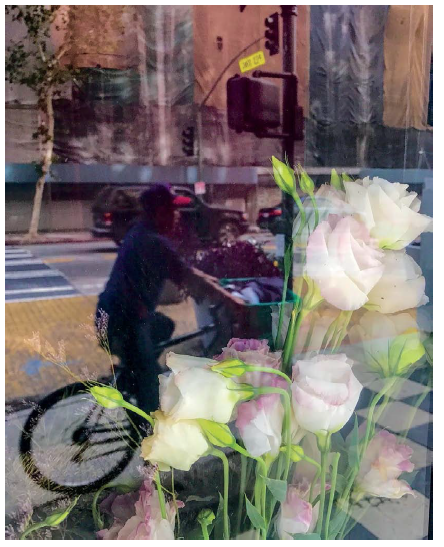
11.3 While shooting early one morning in Los Angeles, I noticed a bicyclist approaching. I composed a shot looking in through the window of a flower shop, knowing the cyclist would be reflected in the glass. To ensure I got the photo, I used Burst mode to take 16 photos as he passed by.