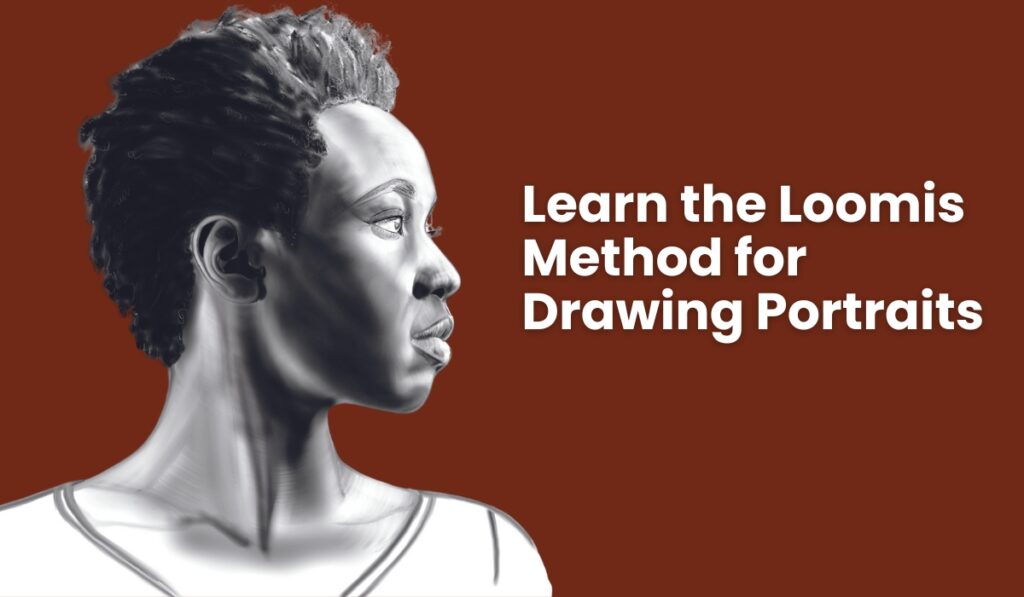
An excerpt from Drawing the Portrait by Braden Messer

William Andrew Loomis was an American illustrator, writer, and art instructor who studied at the Art Students League of New York under George Bridgman and Frank DuMond. Much of his work was featured in magazines and advertising campaigns, but some of his most significant contributions to the arts came in the drawing books he wrote. Drawing the Head and Hands, Figure Drawing for All It’s Worth, and Successful Drawing are a few of his most notable publications. Widely regarded as his pièce de résistance, his method for beginning to draw a portrait is addressed in his book Drawing the Head and Hands.
William Andrew Loomis was an American illustrator, writer, and art instructor who studied at the Art Students League of New York under George Bridgman and Frank DuMond. Much of his work was featured in magazines and advertising campaigns, but some of his most significant contributions to the arts came in the drawing books he wrote. Drawing the Head and Hands, Figure Drawing for All It’s Worth, and Successful Drawing are a few of his most notable publications. Widely regarded as his pièce de résistance, his method for beginning to draw a portrait is addressed in his book Drawing the Head and Hands.
Drawing with the Loomis Method
The Loomis method is a drawing approach that uses simple forms and measured landmarks to construct the human head in any angle. This method allows you to easily analyze your reference and begin to understand it in three-dimensional space. I’m sure you have already tried many times to draw a portrait before you came across this book, so you probably already understand the struggle that ensues if you do not have a solid, foundational approach from which to start. The Loomis method solves this problem by providing a foundation for the portrait to come. The Loomis method is more rooted in principle construction than aesthetic appeal, so don’t worryabout how that foundation looks so much as the proportions that it provides. Now Iwill show you step by step how to draw a Loomis head with this method.
Step 1: Draw Your Circle
Start by drawing a circle to represent the beginnings of the cranium. If you are hesitant to draw one manually, you can use a compass to draw a perfect circle with very little effort and even less stress.
If you want to challenge yourself, draw your circle manually. Now there is a provenway to draw manual circles, and it goes like this: Grip your pencil with the overhandgrip, straighten your back, stiffen your wrist and drawing arm, and then draw your circle by moving your arm at the elbow. This is how most professional portrait artists draw their circles.


Step 2: Draw Your Oval
The oval showcases the cranium’s side plane, which elongates it. Exactly where you place the oval will depend entirely on the direction that your reference is looking. For example, if you are drawing a profile portrait, then draw the oval as a smaller circle within the larger initial circle due to the nature of the angle. However, virtually any other portrait angle will dictate thatyou should draw the side plane as an oval of varying degrees.


Step 3: Draw Your Axis Lines
Draw two axis lines inside your side plane (oval). Make the first axis (horizontal) follow the direction that your subject is looking. Place the second axis (vertical) at a perfect 90-degree angle to your horizontal axis. These two lines will help you understand the orientation of your portrait.

Step 4: Draw Your Guidelines
The four guidelines shown in this step will always be relatively the same no matter the angle that you draw. The Loomis method is extremely simplistic by its very design. These guidelines will help you place the hairline, brow line, nose line, and chin line. We will cover more about specific feature placement in Chapter 9. Our main focus here is for you to get very comfortable with the basic Loomis head. In addition to the main horizontal and vertical axes, the Loomis method includes four guidelines to help you place specific features. You’ll learn more about how to use these in Chapter 9. For now, focus on how to draw each.
Hairline Starting from the top of the side plane and using that as the basis, pull a line across the face. This is your guiding line for the hairline to come.
Brow line Following your horizontal axis line, pull a line across the face. This is your guiding line for the brow line to come.
Nose line Start from the bottom of the side plane and using that as the basis, pull a line across the face. This is your guiding line for the bottom of the nose.
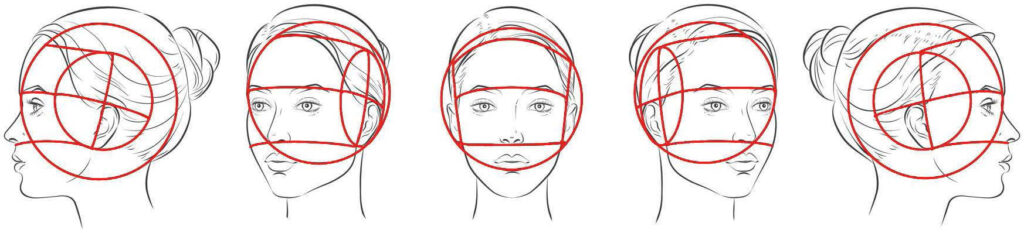
Chin line Now this is where things get a little tricky. To help you find where to draw the chin line, place your pencil pointing vertically on the face of your Loomis head. Make sure that the pencil tip is in line with the brow line and pinch the pencil where the nose line intersects it. Without moving your pinched fingers, slide the pencil tip down to the nose line. Your pinched fingers now mark roughly where you should draw the line to signify the bottom of the chin.
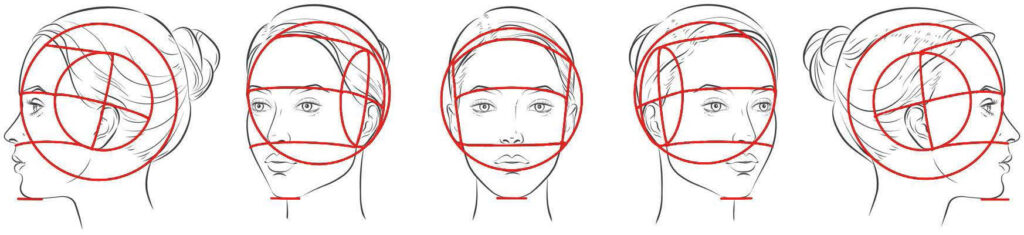

Step 5: Your Third Section into Thirds
To help you position the upper and lower lips, add marks to divide the lower third of your portrait (nose line to chin line) into thirds. These are more anchor points than lines, and they are adjustable. You can use your pencil to gauge their placement, similar to how you gauged where to place the bottom of the chin.

Step 6: Draw Your Jaw Line
To draw the jaw line, start at the bottom of your vertical axis line and pull a line down then curving across to attach to the chin line.
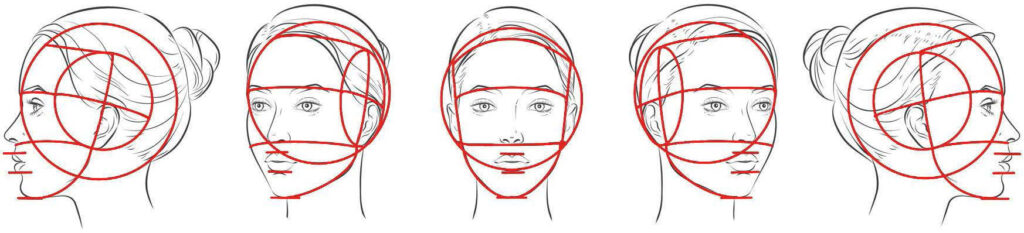
Finally, pull your line up from the bottom of the chin, all the way to the top and connect it with the initial circle so you have a rough outline of the outside edge of the entire face.
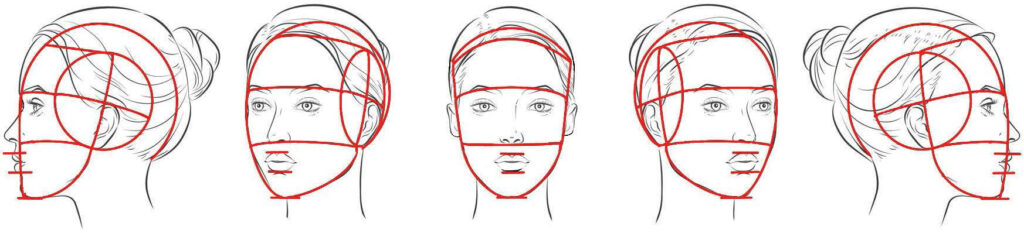

Step 7: Draw Your Cheek Line
Because you have the basic shape of the head established, you can now draw the cheek line. Start from the intersection of your vertical and horizontal axis lines and pull a line over and down in a smooth arcing motion to the jaw line. This line will help you understand where to place the shading for your cheek bones and the corners of the mouth when the time comes.
Step 8: Draw Your Neck and Center Line
Your Loomis head is almost finished. All that is left is to draw the neck and center lines. Adding a basic neck shape will prevent your head from looking like it is floating in space by itself.
For the back of the neck, start the line following the contour of your initial circle. When you get near the bottom of the circle, pull the line straight down and lift. This will make the cranium bulge out from the back of the neck.
Then, to place the front of the neck (the throat), align your neck line with the edge of the initial circle and pull your line down from the jaw line. This will give you a very accurate proportional look for how the neck plugs into your Loomis head.
Lastly, draw a line to mark the exact center of the face on your Loomis head. Notice how this line is applicable only to the straight and three-quarter angles, not the profile angles.
Project: Time to Practice
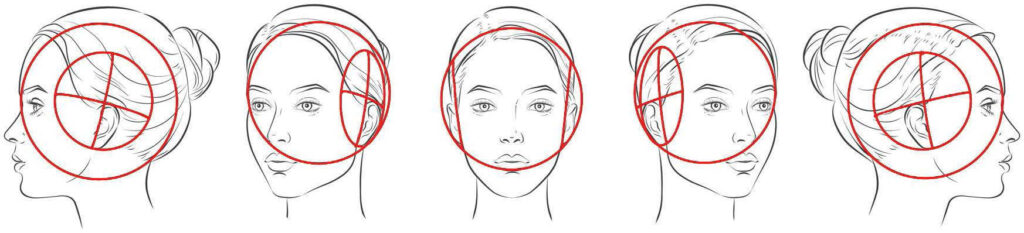
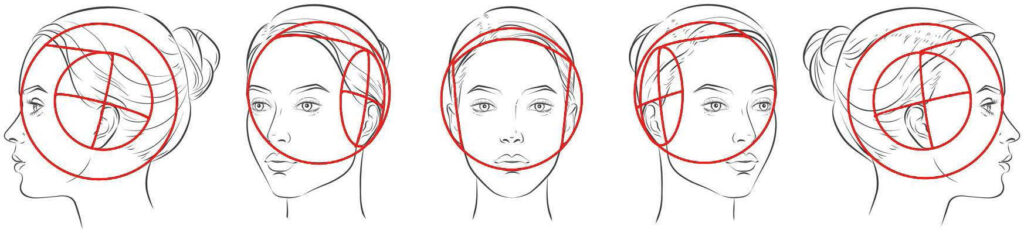
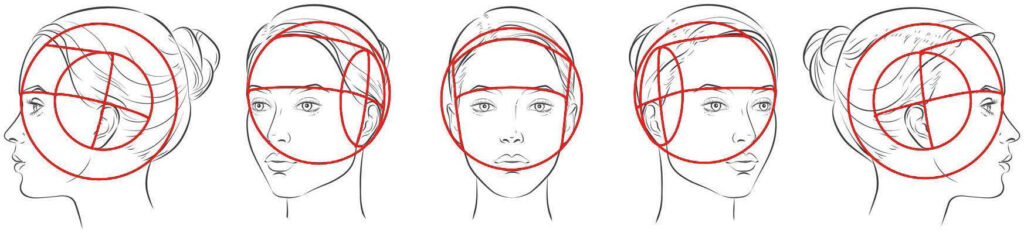
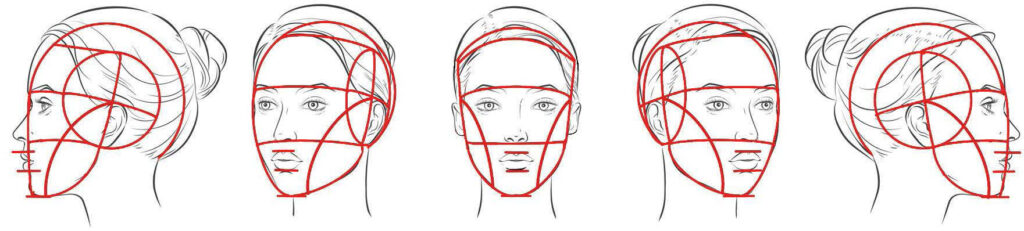
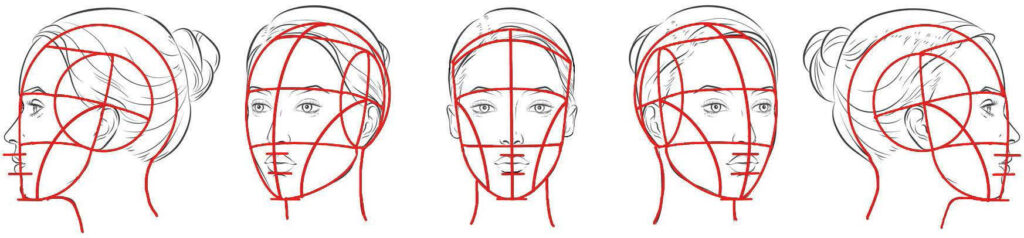
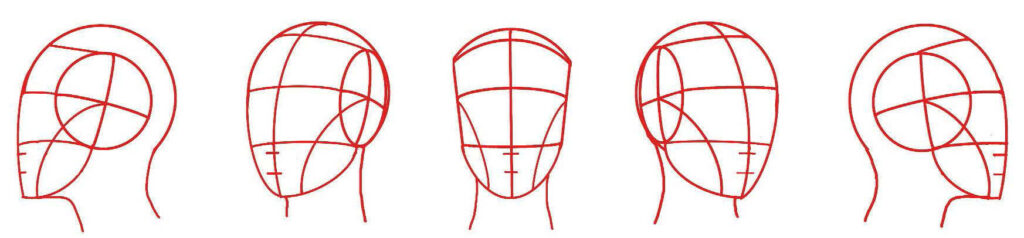
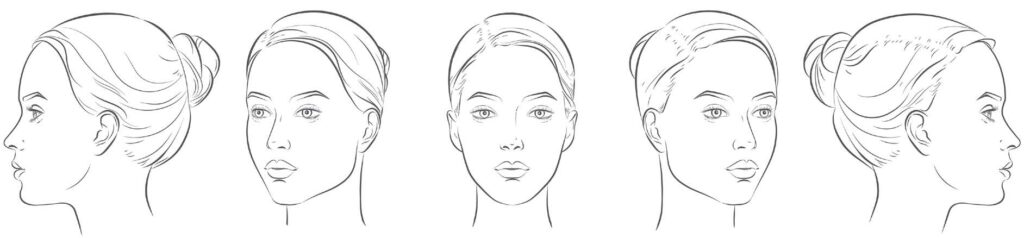
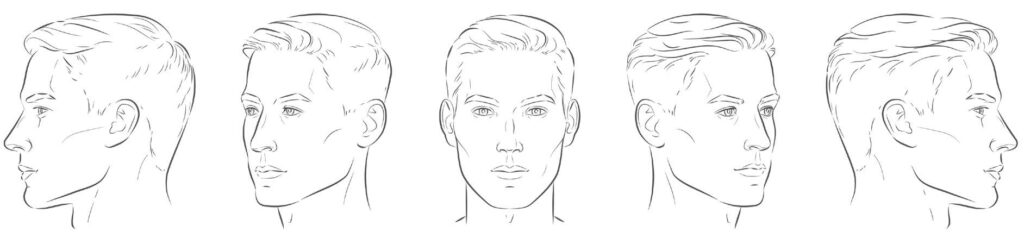
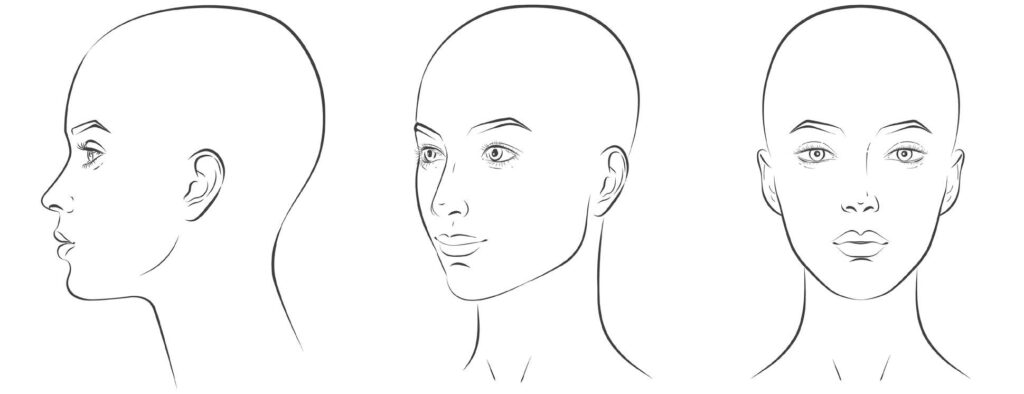
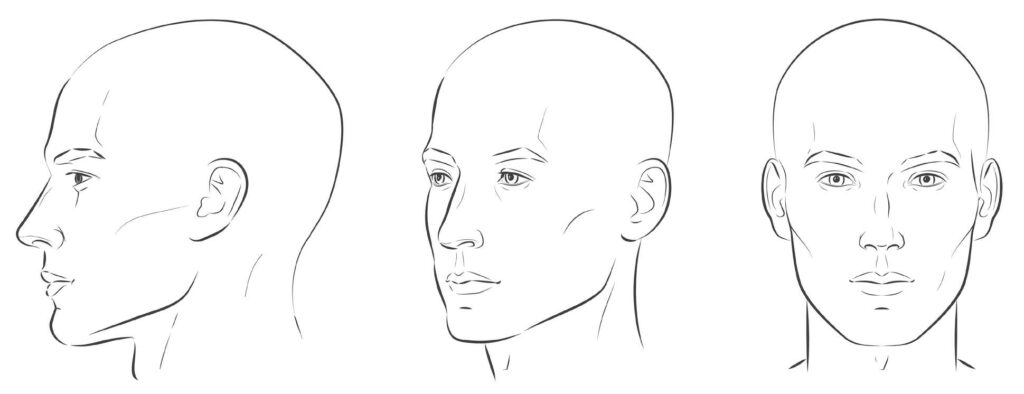
No matter the angle of the portrait you are working on, simply follow the same eight steps to draw your Loomis head. The method works and is a great way to start drawing a portrait. While you’re drawing your Loomis heads, remember to use very light pressure so you can make any necessary adjustments without detriment to your final portrait. Now, for this project, draw at least 15 Loomis heads in your sketchbook (make sure you have enough pages).
Each one should be at a different angle than the previous. Use the reference images below to help you draw your Loomis heads: Draw them over the top of these references to help you develop a solid understanding of exactly how different head angles correlate to the Loomis method and how the Loomis head appears in some of the most common angles that you are likely to draw throughout your art career. Yes, more possible angles exist, but extreme angles aside, this project will give you a solid foundational understanding for how to approach most portrait orientations.
For more guidance, watch the videos below entitled How to Easily Draw Heads: Understanding the Loomis Method and How to Easily Draw the Head from ANY Angle. These videos demonstrate the Loomis method for 15 portrait angles and include step-by-step tutorials.
Conclusion: A Melding of Methods
The Loomis method is a tried-and-true approach to drawing the beginnings of a portrait, but it is meant to be a general guide, not an absolute. Most artists find that the struggle with drawing a portrait comes in the initial phase of the process. The Loomis method allows you to follow very simple principal line work so that you can build a foundation before you start placing the features of your portrait.
The approach that you will learn in this book is a fusion of both the Loomis method and the Asaro method (more on this one in the next chapter). I believe that each method on its own does not give novice artists enough guidance, but in tandem they provide the perfect balance of shape and form so that you can have the best chance at nailing your proportions from the get-go.
This Article is an excerpt from Drawing the Portrait By Braden Messer