From WEDDING STORYTELLER Vol. 2 by ROBERTO VALENZUELA
There are different schools of thought regarding family portraits. Some photographers think of them as an impediment to their photographic style. Other photographers think family portrait sessions should be completed as quickly as possible without much thought because they are the least creative segment of a wedding. I have not met many photographers who love the family portraits’ part of their job.
For many years, I thought that taking family portraits was something I just had to do, but I felt I was keeping the family from mingling with their guests at the cocktail hour. I was very wrong! I now consider the family portraits’ segment to be the second most important part of the wedding coverage—after the ceremony.
It is likely that the people you are photographing, from the youngest to the oldest, traveled long distances to be there together for the couple. Therefore, there is a good chance that the couple may never again have the opportunity to have a beautiful portrait of their entire families together. That is significant! That changes your perspective, doesn’t it?
Since my own wedding, my father passed away, my grandma passed away, many of my family members have moved far away, and my best friend was murdered. The last portrait my family has with my grandma and my best friend Dustin was photographed—you guessed it—at my own wedding.
Furthermore, from a financial standpoint, family photos are by far the most purchased photos of the wedding. Therefore, making a great effort to do a superb job with the family portrait photographs will not only be highly appreciated by your clients, but they will be purchased by many people and treasured as the family heirlooms they are. In this chapter, I will first discuss location considerations, then I will cover the two major styles regarding wedding family portraits.
CHOOSING A LOCATION
Outside with a Wall as a Background
To consider using a wall as a background, the following criteria must be met:
- The entire wall must have even luminosity levels in open shade with no sun spots anywhere on the wall.
- The wall must be a light color, such as cream or beige. Any strong color, such as red, blue, or green, will not only project a terrible color cast on the family, but the results will be very distracting to the eyes.
- There must be a decent amount of reflected natural light illuminating the wall. The reflected natural light could come from the ground or from another wall across from the wall in open shade. Even though I always use flash to help the existing light on all family portraits, I still must have a good starting point. To test the quality of the light bouncing on the chosen wall under open shade, I use the Lighting Benchmark discussed in my book, Picture Perfect Lighting. The only difference between that benchmark and family portraits’ lighting criteria is that I’m more lenient by one f-stop when I’m taking family portraits due to the speed with which they must be taken. The adjusted Lighting Benchmark is as follows: ISO 400, 1/250 or 1/125, f/4.
I set my camera to these settings—beginning with 1/250 for the shutter speed—and ask my second photographer to stand where the family will be positioned. If I obtain a good exposure on my second photographer at these settings, I’m ready to shoot. If my shutter speed must drop to 1/125 to get a good exposure, I’ll accept it, although it is not ideal. However, if my shutter speed has to drop down to 1/60 for a proper exposure, that would be unacceptable lighting for outdoor family photos. Therefore, 1/60 is my usual cutoff point, and I would move on and try to find another place to do the shoot.
Please note that these settings are for testing the light only. By no means should you doggedly adhere to these settings for the family portraits. Once you know that the light passes the Lighting Benchmark test, you can change the settings to whatever you please. For family photos, I usually begin with my aperture at f/5.6 and go up from there, depending on how many rows of people there are. On occasion I have started at f/4, but I have found that f/4 is too risky and has caused some family members to become slightly out of focus.
Once the camera settings are set, I always use an on-camera flash on Manual mode to add some horizontal light onto the subjects’ faces to avoid darkness within their eye sockets and to give them all nice catchlights. Depending on your settings, you might have to set your flash to High Speed Sync (HSS) if your shutter speed is above the maximum flash sync speed. Figure 9.1 is an example of a family portrait taken with all of the requirements listed here. Even though the wall was lit by the perfect Lighting Benchmark quality of light, I still added a small amount of on-camera flash to the photo.
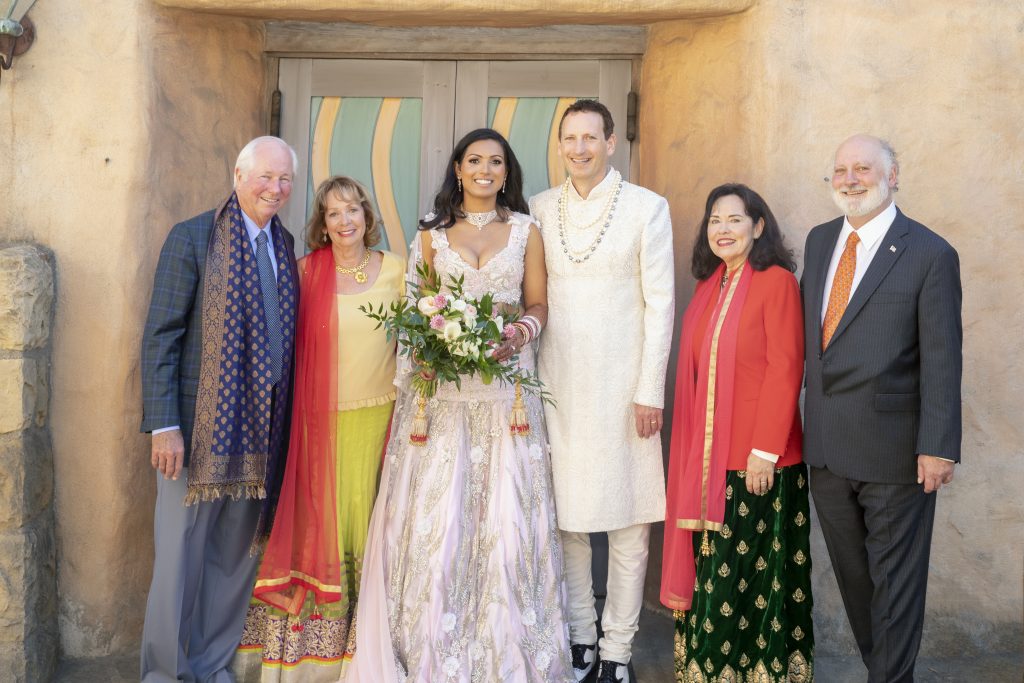
FIGURE 9.1 Settings: ISO 800, 1/250, f/8 (24–70mm f/2.8L lens)
Outside with Depth as a Background
This is the most common scenario. Finding a location with a pleasing background is much easier than finding a wall that is in open shade, is of a light or neutral color, and has great reflected light illuminating it. The most important consideration is to be sure that the sun is directly behind the family, so that their faces are in shade. To do this, simply stand in the direction where their shadows are pointed toward you. You do not need to stand on the shadows; you can stand as close or as far from them as you wish. Just make sure that when you look at the shadows on the ground, they are pointed in your direction. When this is done, you know the sun is exactly behind them. Now all you need is on-camera flash to add some much-needed fill light to the front of their faces. In the event of an overcast day, clearly this would not apply.
Notice the direction of the shadows in Figures 9.2 and 9.3. And to understand how important adding fill light is to a family portrait, take a look at Figure 9.4.
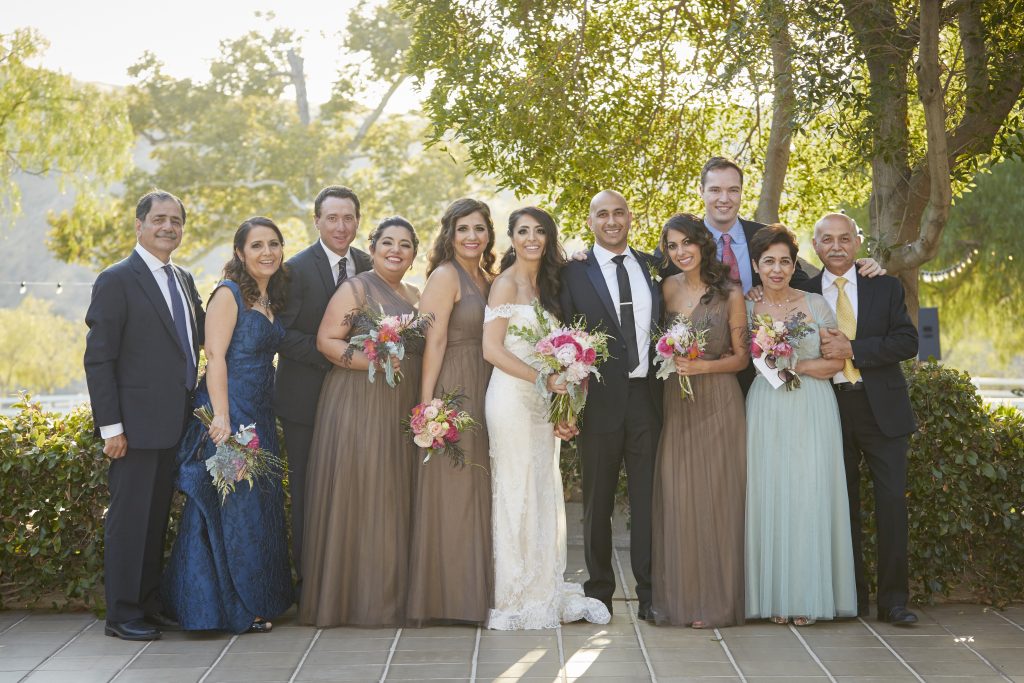
FIGURE 9.2 Settings: ISO 500, 1/350, f/4 (70–200mm f/2.8L lens)
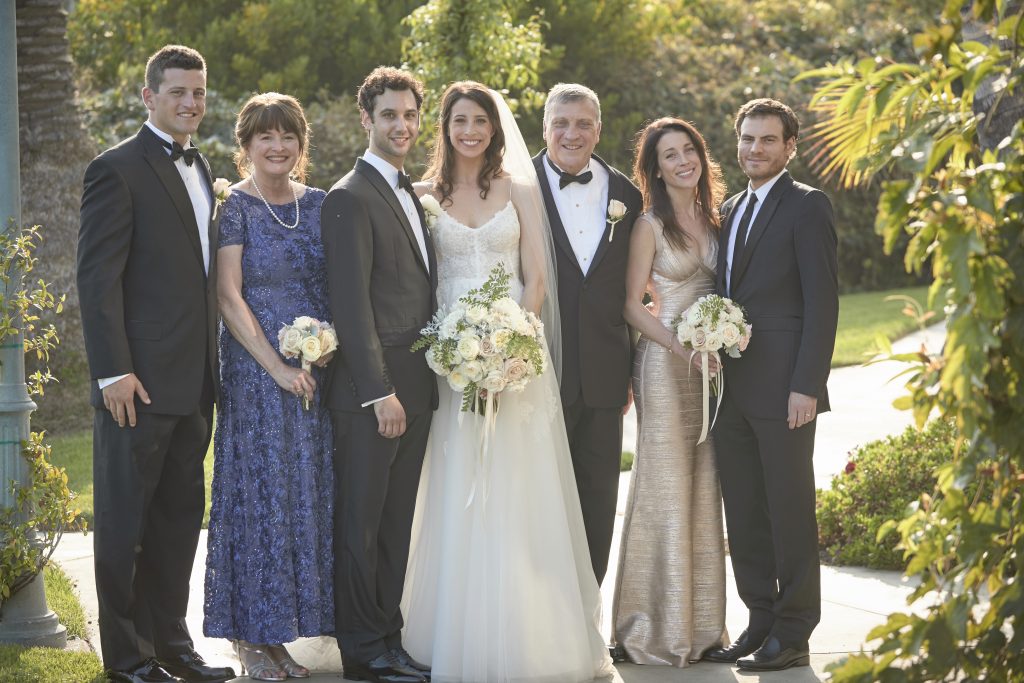
FIGURE 9.3 Settings: ISO 200, 1/250, f/4 (70–200mm f/2.8L lens)
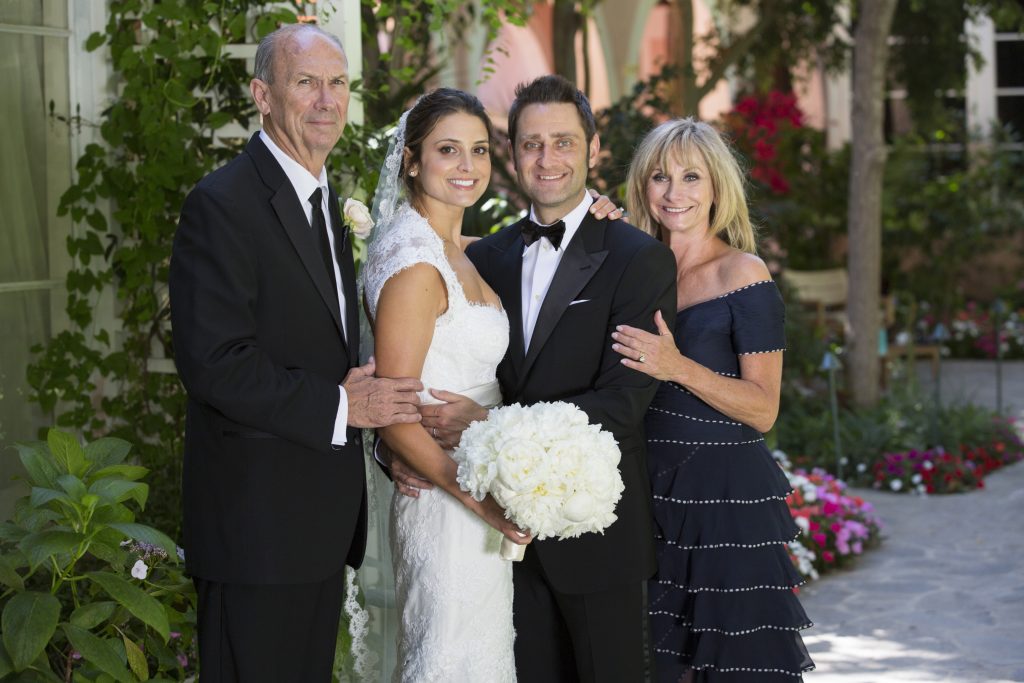
FIGURE 9.4 Settings: ISO 500, 1/350, f/4 (70–200mm f/2.8L lens)
Inside the Church, Mosque, Temple, or Any Building
If the couple wants their family photos taken in the most traditional location, which is inside the place where they were married, the lighting conditions automatically become somewhat more complicated. At a church, usually the altar is as far from the window light as it can be. Most churches are also quite dark and have a wide variety of color casts due to the stained glass, lamps, and natural light coming in from the doorways or windows.
To overcome these lighting challenges, I always ask the church staff to turn on all indoor lights to full power and to open all the doors to allow as much natural light as possible to enter the church. Then I put a flash on my camera’s hot shoe and tilt the flash head behind me. The flash is always on Manual mode. I fire the flash behind me to bounce it against the church walls to create a much larger light source that looks much more natural than aiming the flash directly at the family.
I usually know in advance the length of the church and come prepared for this. I always have some sort of wireless strobe with me, ready to use in case my regular flashes are not strong enough to travel all the way to the rear of the church and then bounce back to illuminate the family. My assistant has a Profoto wireless strobe and trigger remote ready in case I need it. Any wireless strobe that has more than 200 watt seconds of power will be sufficient to illuminate any church or building.
You may be wondering why I don’t just bring two umbrellas and direct them toward the family. There are two reasons. First, it would require extra time and gear to have a twolight umbrella setup, one to the left and one to the right of the family. To do this, I would have to bring light stands, cold shoe adapters for the flashes, maybe a small sand bag to anchor the light stand to the ground for safety, and the umbrellas themselves. The second reason is that to avoid unwanted shadows from the umbrellas, I would have to have very large umbrellas to spread the light evenly across everyone. A smaller, portable umbrella would most likely cause harsh, unwanted shadows on some of the members of the family. By bouncing the light to the back wall, not only do I need just one single flash on camera for most buildings, but the wall will create a very large light source that gives me far more flattering light on the group.
One key advantage of creating photos inside a building, such as a church, is that you can use the altar steps to stagger large groups of people by creating rows on the escalating steps. Without the steps, you would have to photograph a very long, single row of people, which can result in unflattering distortion on the people near the edges of the frame. See Figures 9.5 and 9.6.
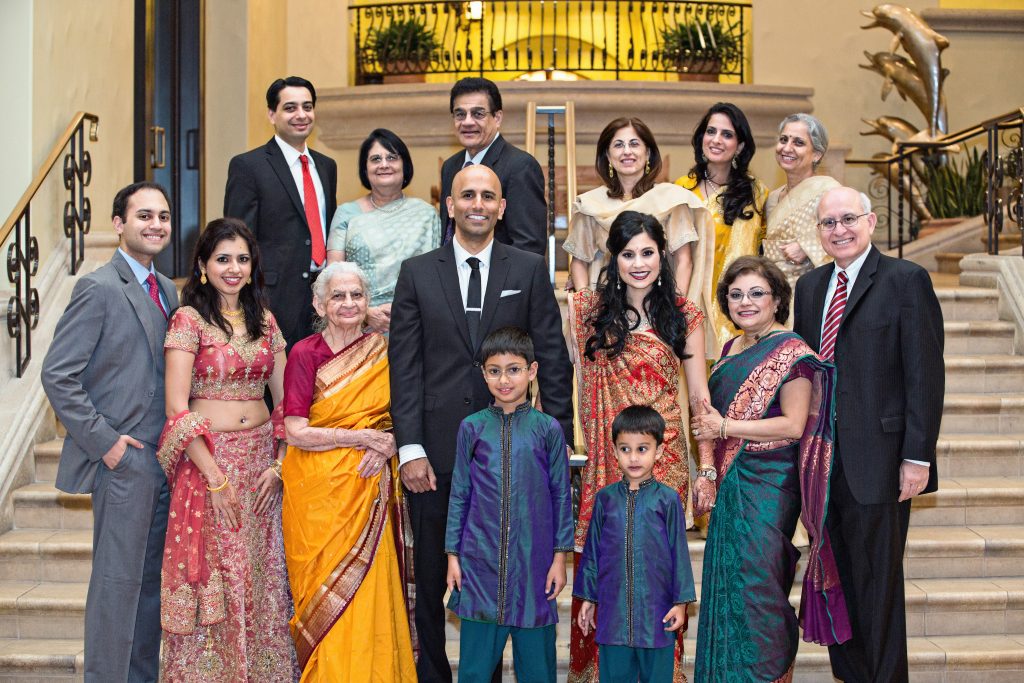
FIGURE 9.5 Settings: ISO 1250, 1/60, f/4.5 (70–200mm f/2.8L lens)
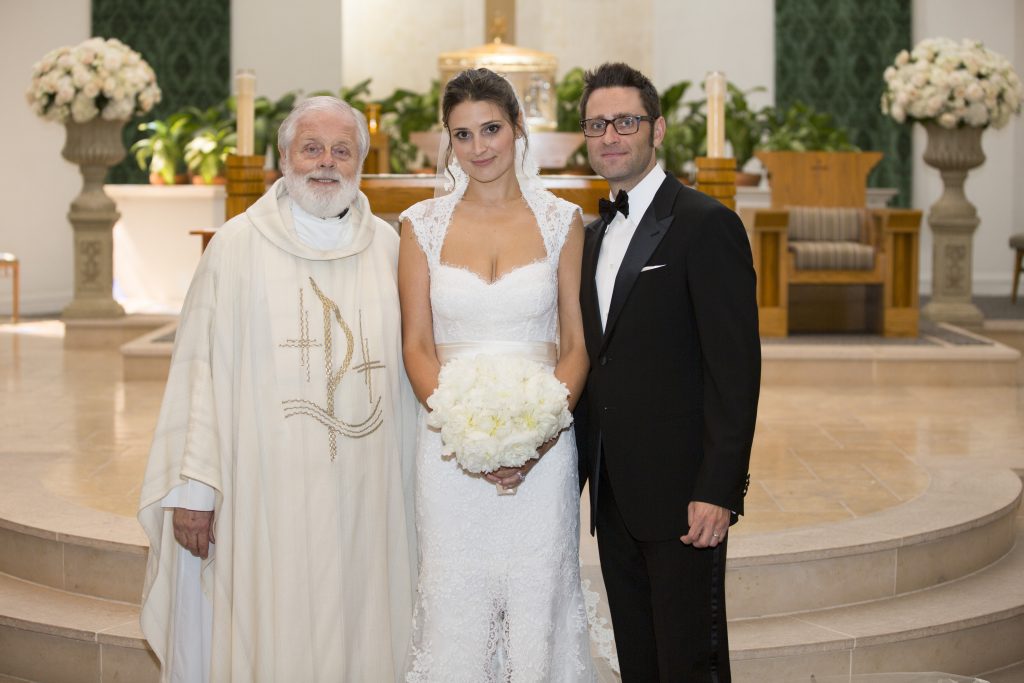
FIGURE 9.6 Settings: ISO 500, 1/125, f/3.5 (70–200mm f/2.8L lens)
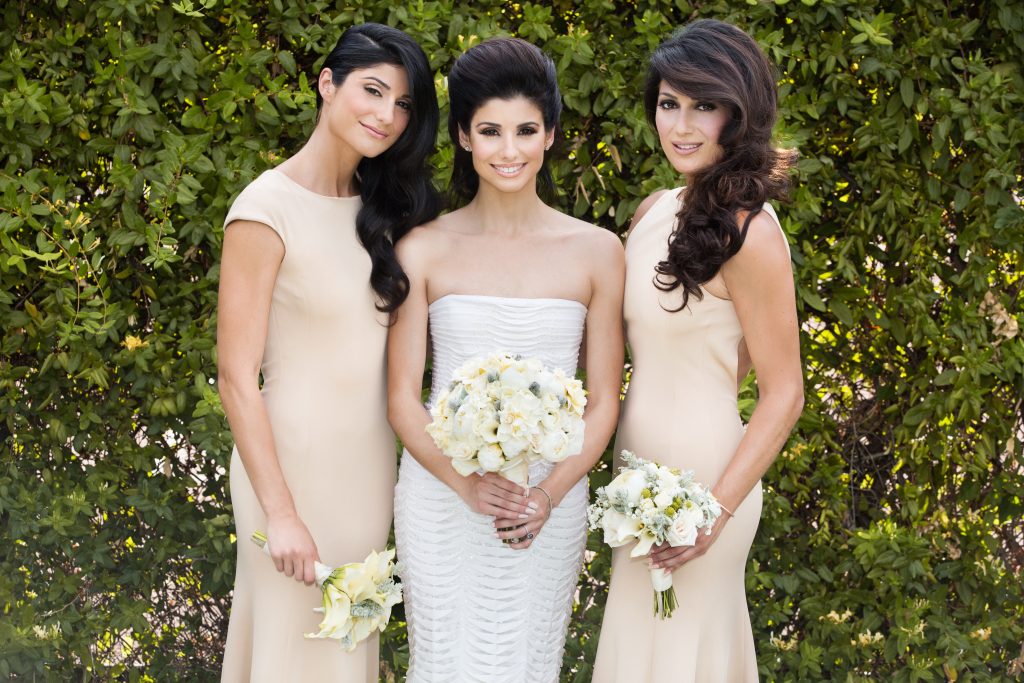
Stylized Aware Posing Family Portraits
Figures 9.8–9.13: This pose is a traditional group portrait with everyone aware of the camera and looking at it, usually smiling. For your clients, these are very important and mandatory photographs. These should be taken first and with all the group combinations. If you chose a place with great light, added a flash for fill, and implemented the most basic posing elements, such as good posture, these should look great!
The difference between Stylized Unaware Posing in other segments of the wedding, such as the bride portraits, and in the family portraits is that, in bride portraits, simply having the bride look away from the camera qualifies as “unaware,” but during the family portraits there must be more than one person, and there must be a loving exchange between most (but not necessarily all) members of the group.
For example, in a group of five people, two of the family members could be looking at the camera while the other three are unaware of the camera and exchanging a loving embrace. This type of more intimate, loving family photo is best reserved for the parents, grandparents, or other direct family members.
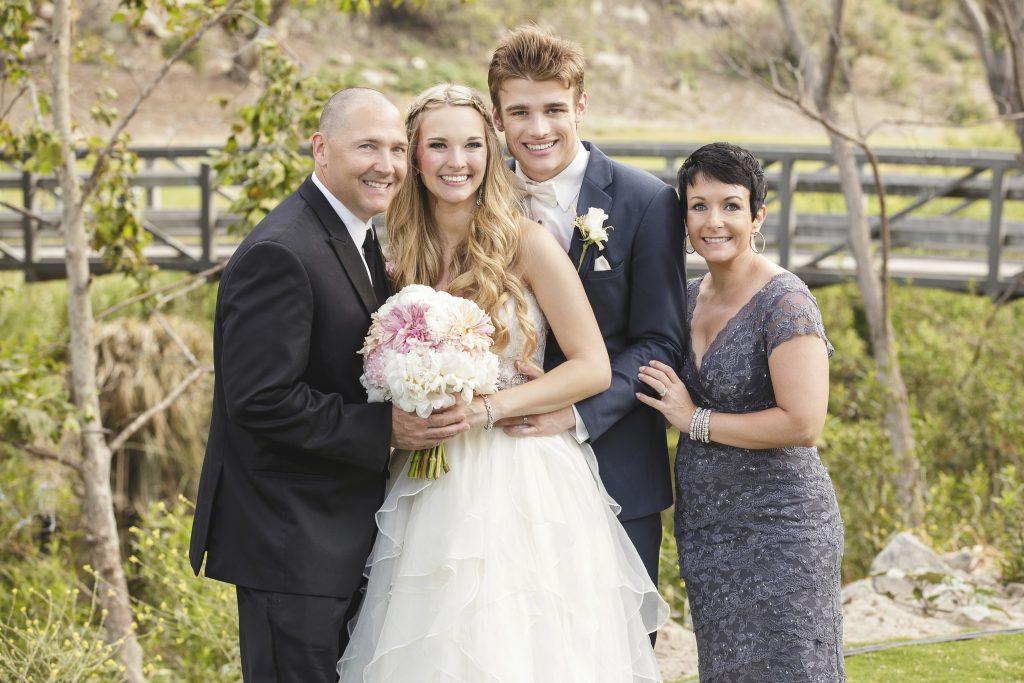
FIGURE 9.8 Settings: ISO 320, 1/180, f/5.6 (70–200mm f/2.8L lens)
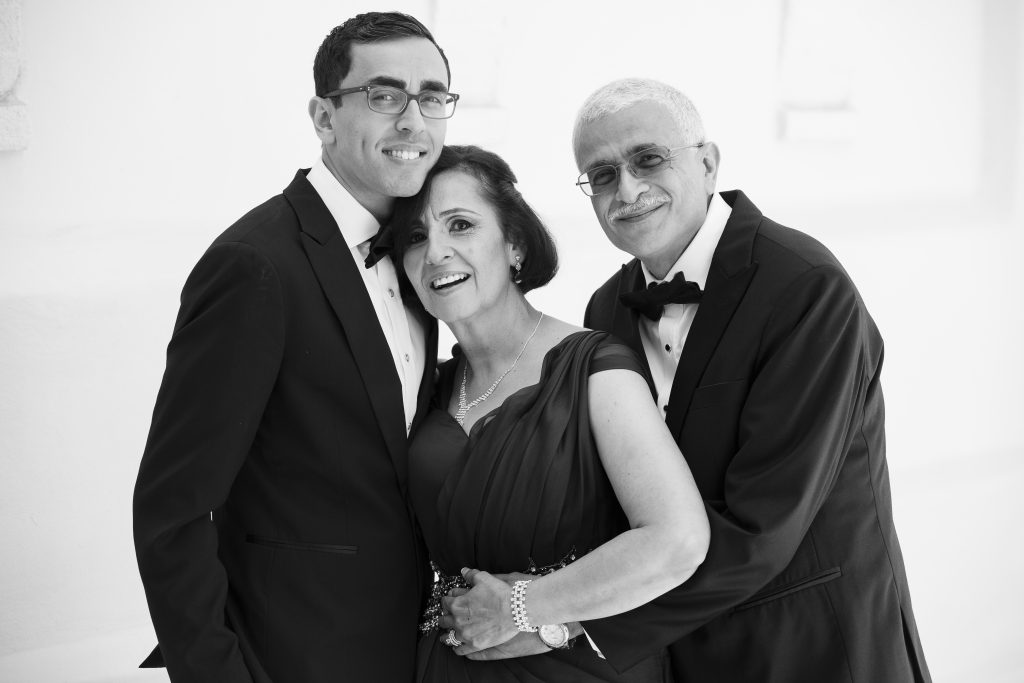
FIGURE 9.9 Settings: ISO 250, 1/350, f/4 (70–200mm f/2.8L lens)
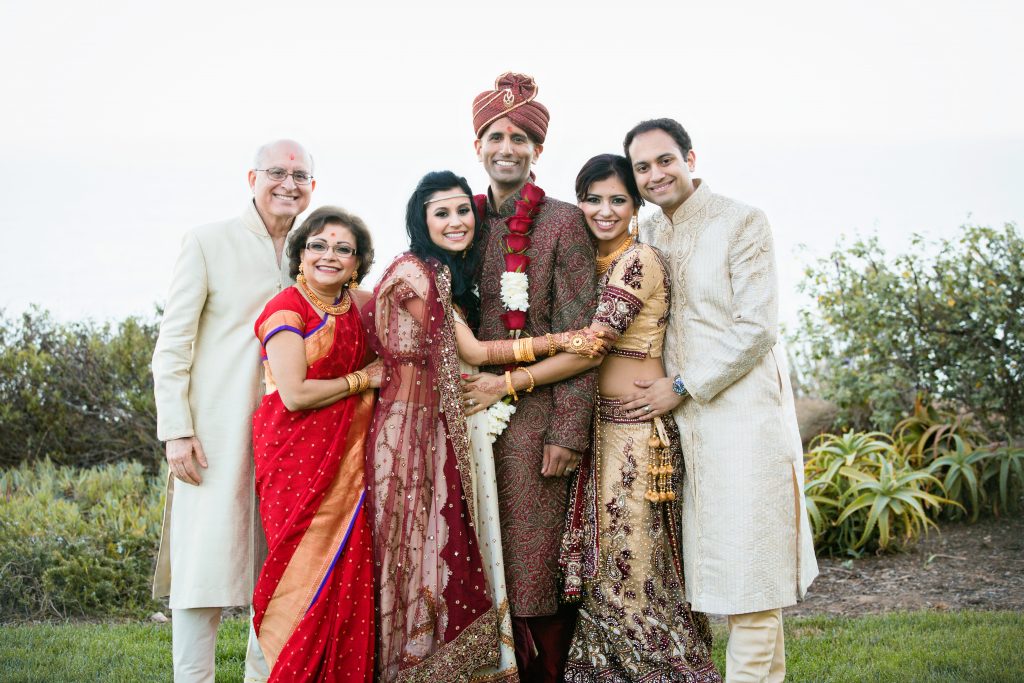
FIGURE 9.10 Settings: ISO 400, 1/350, f/4 (70–200mm f/2.8L lens)

FIGURE 9.11 Settings: ISO 800, 1/100, f/5.6 (24–70mm f/2.8 lens)
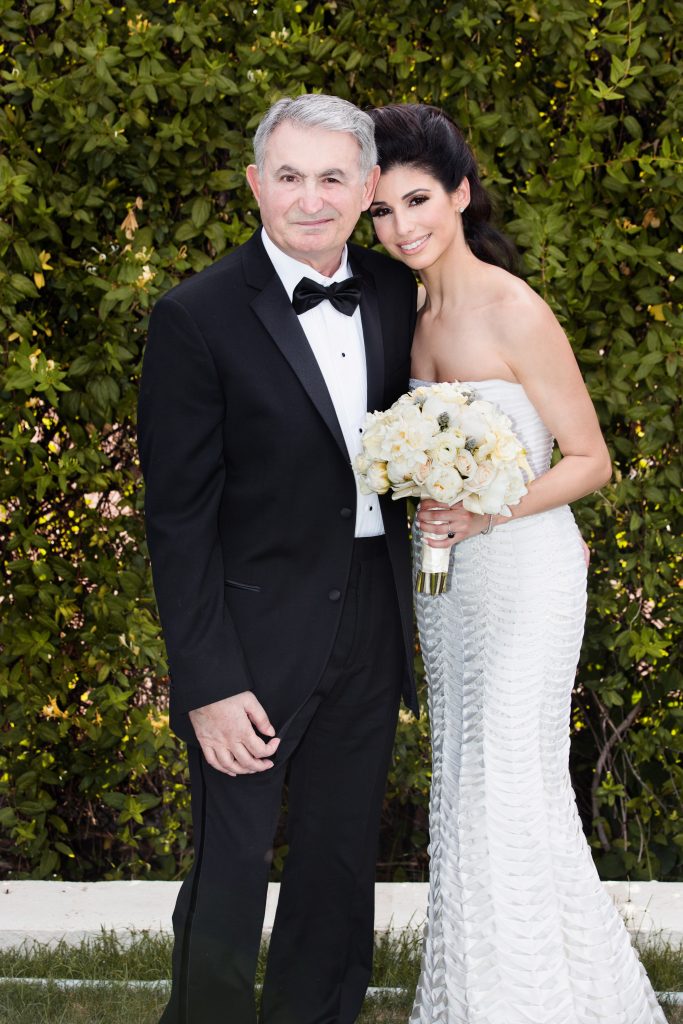
FIGURE 9.12 Settings: ISO 200, 1/180, f/6.7 (70–200mm f/2.8L lens)
FIGURE 9.13 Settings: ISO 200, 1/200, f/6.7 (70–200mm f/2.8L lens)
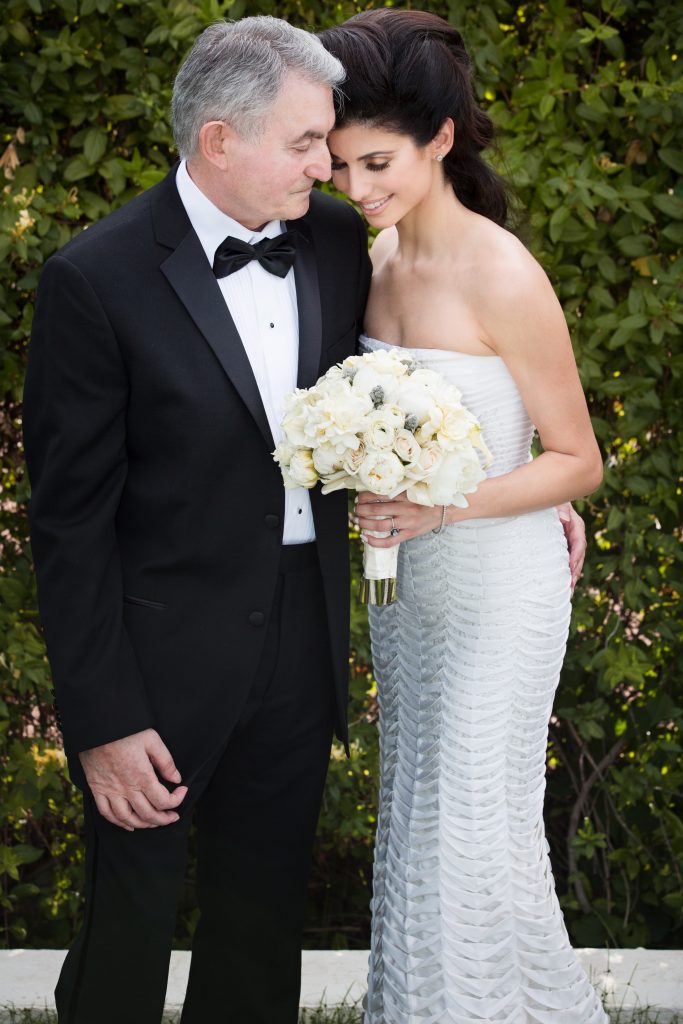
FIGURE 9.14 Settings: ISO 200, 1/200, f/6.7 (70–200mm f/2.8L lens)
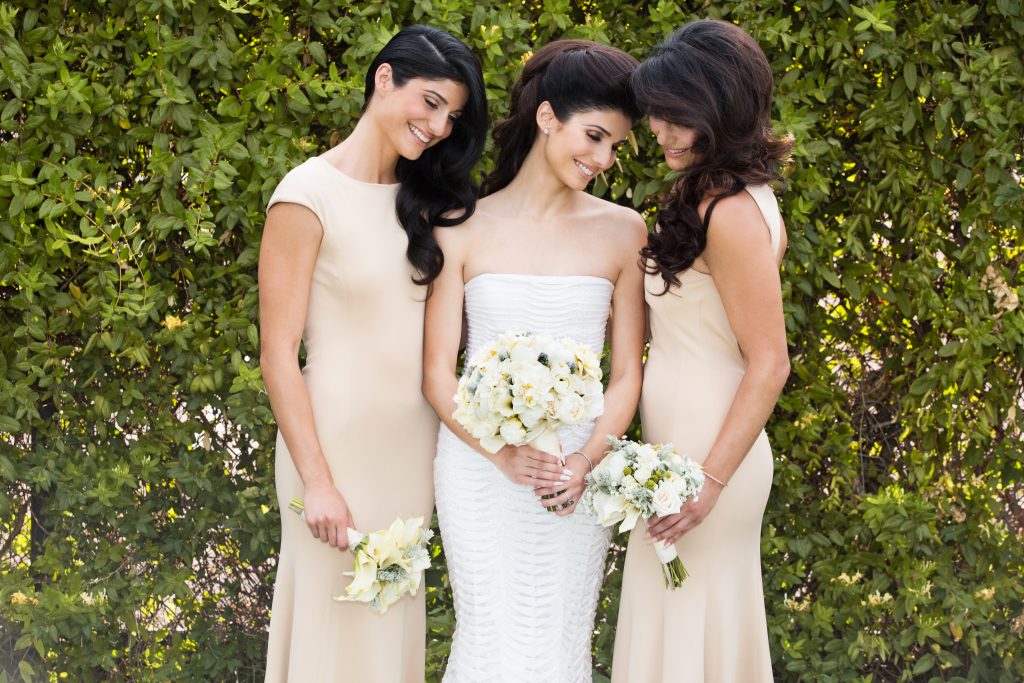
FIGURE 9.15 Settings: ISO 200, 1/200, f/6.7 (70–200mm f/2.8L lens)
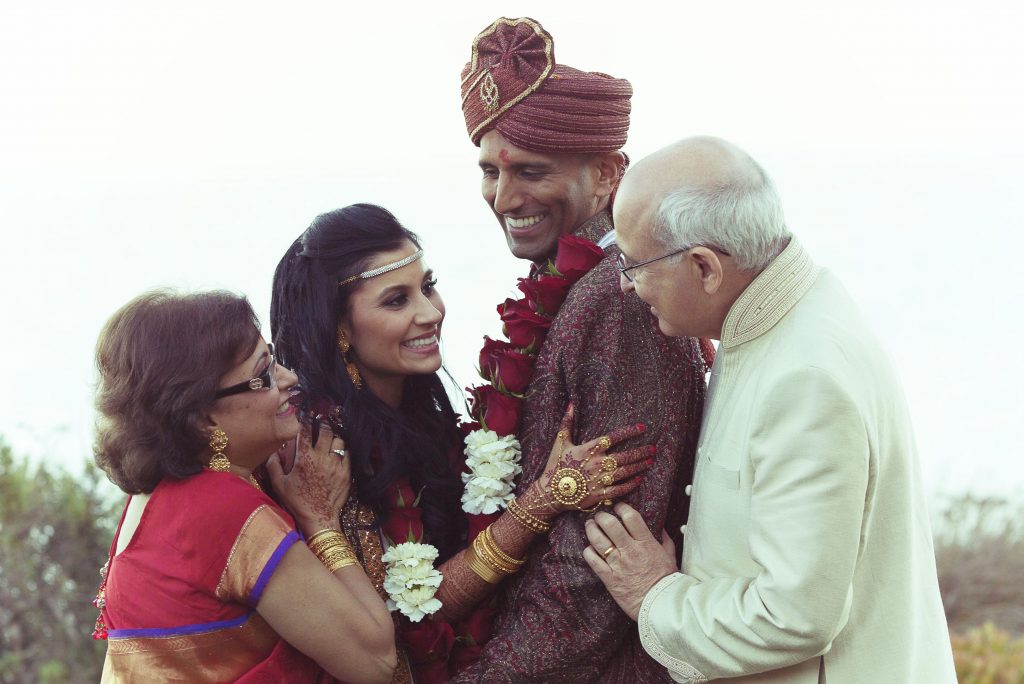
FIGURE 9.16 Settings: ISO 400, 1/350, f/4 (70–200mm f/2.8L lens)
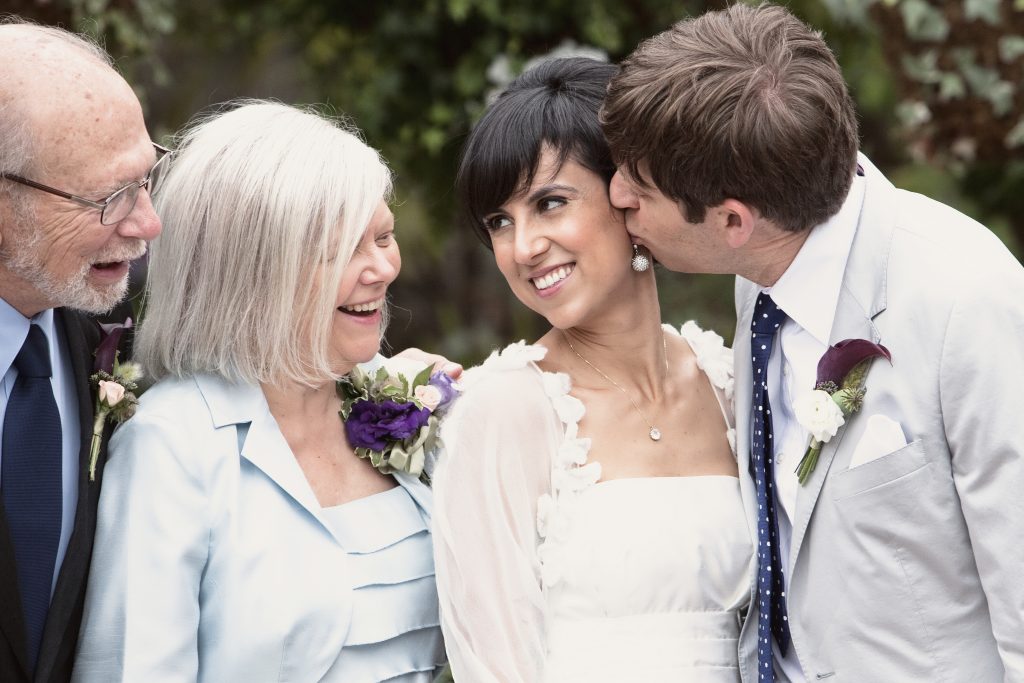
FIGURE 9.17 Settings: ISO 400, 1/500, f/5 (70–200mm f/2.8L lens)
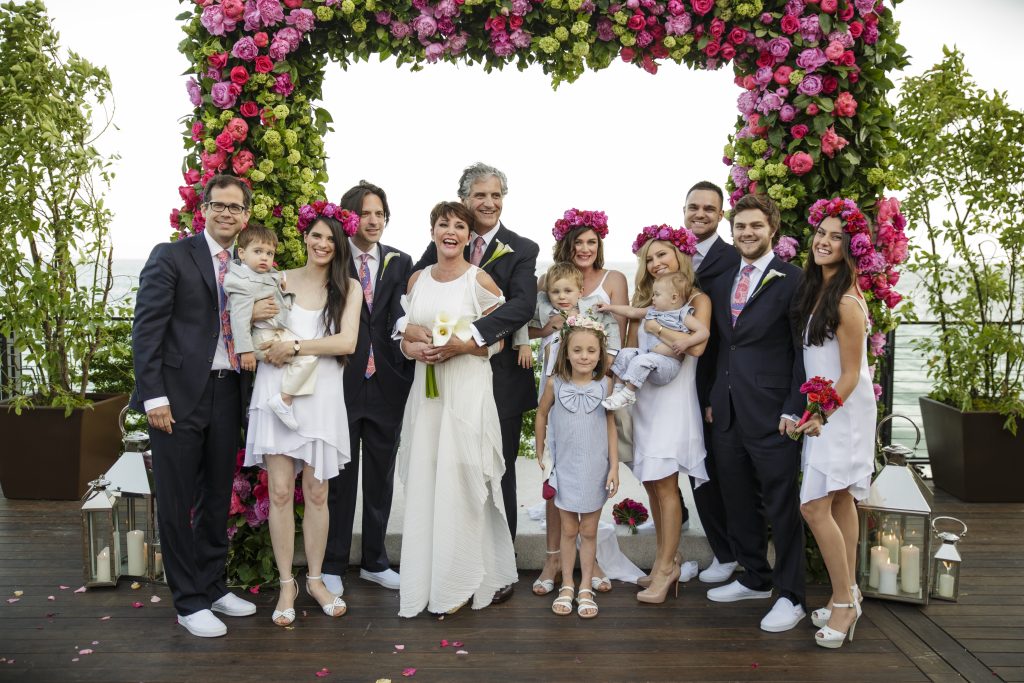
FIGURE 9.18 Settings: ISO 640, 1/750, f/2.8 (24–70mm f/2.8L lens)
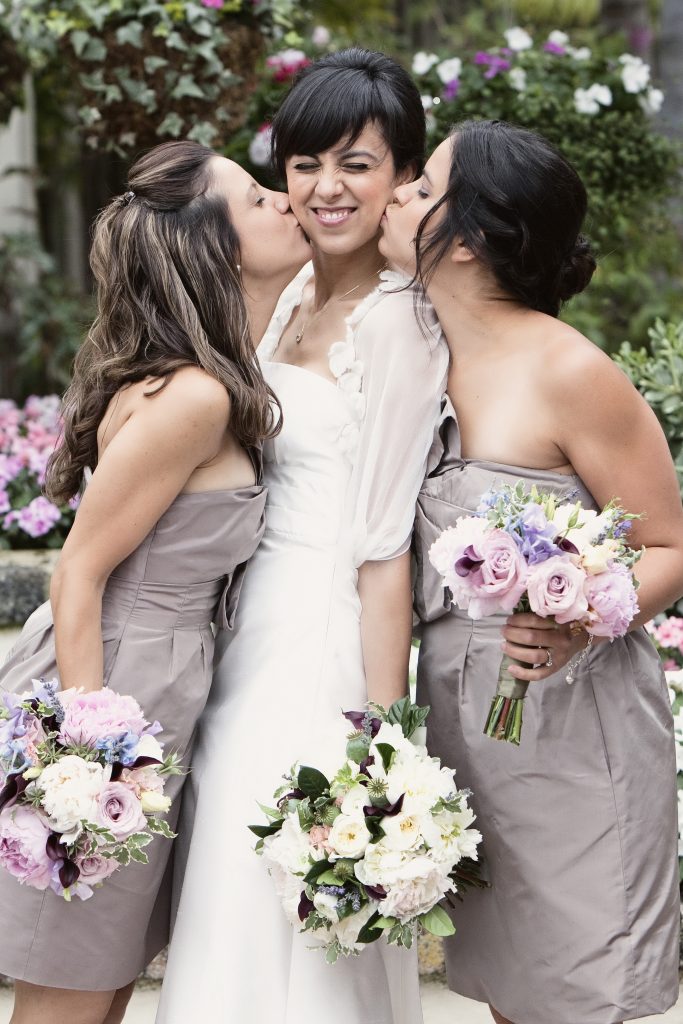
FIGURE 9.19 Settings: ISO 400, 1/500, f/5 (70–200mm f/2.8L lens)
A QUICK STORY ABOUT THE IMPORTANCE OF FAMILY PORTRAITS
Recently, I photographed a wedding in Los Angeles. I was touched by how important it was to the groom that I photograph his grandmother at his wedding since she was in a fragile condition. I took as many photos as I could during the ceremony, but his grandmother wasn’t exactly smiling in the photos. The day was hot and the wedding was outdoors, so I’m sure it was difficult for her to spend so much time outside in the heat sitting in a wheelchair. During the family portraits, I was told the grandma was in no mood to take any photos, and she wanted to be excused. I knew it was very important for the groom to have a portrait of him and his grandma together, so I moved the grandma photos to the top of the list and asked that everyone else wait to be photographed. To my surprise, the grandma refused to have her photo taken. To save the photo, the groom bent down to her level to speak to her lovingly and begged her to take this photo with him. You could tell from her expression that she did not want any part of it, and it became evident that convincing her was unlikely.
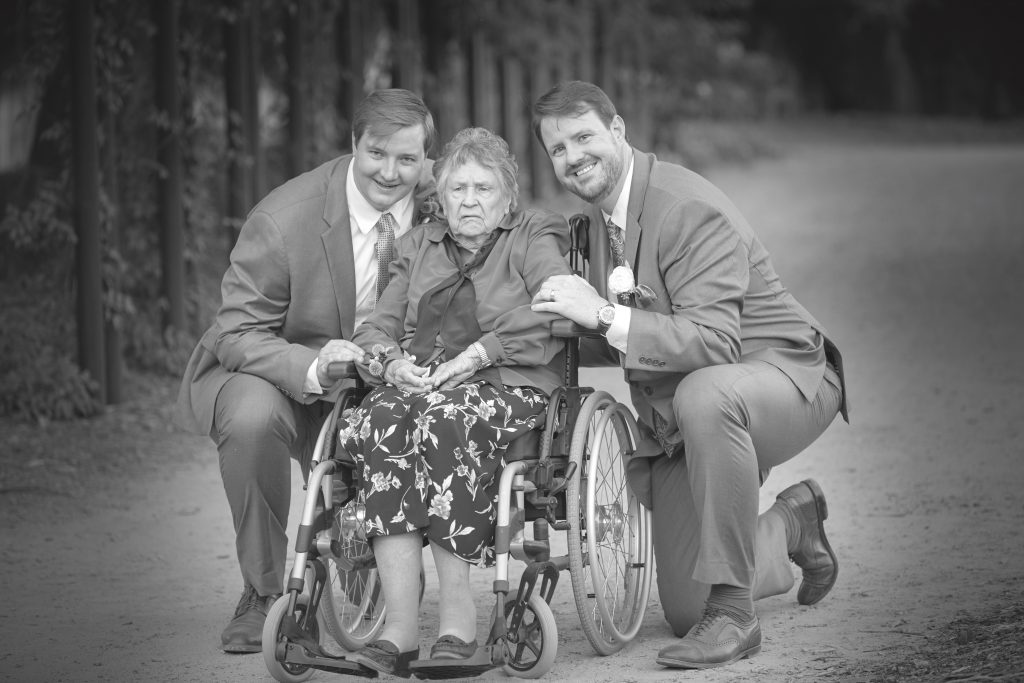
So I asked to speak to the groom and his brother, the best man, in private. I asked them to simply walk up to their grandma together and bend down and kiss her on each cheek at the same time. I told them, “Don’t ask, just do it! Continue kissing her until she can’t help but react.” Together they went up to her and did exactly that. She was so taken by surprise and by their loving energy that she smiled for the first time at the wedding. Her smile was so endearing that it just melted my heart. Right after the kiss, the brothers looked at the camera and the grandma continued smiling and enjoying the moment. Now ask yourself, how much will this family treasure these photos in the future? Priceless!
