The following is an excerpt from Adobe Lightroom: A Course and Compendium of Features by Jeff Carlson.
Lesson E: Convert to Black and White
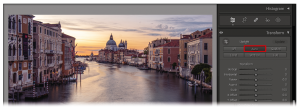
I love the color of the sunrise, but this photo could work well as a black and white image, too. It’s not just a matter of removing all the color saturation—you have many options when working in black and white mode.
Create a Snapshot
We don’t want to abandon our work on the color version, so let’s create a snapshot that we can go back to if we want.
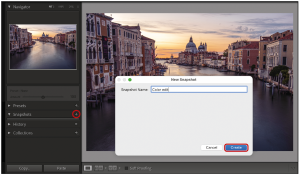
- In the left sidebar, click the plus-sign (+) button at the top of the Snapshots panel.
- Name the snapshot “Color edit” in the dialog that appears, and then click Create.
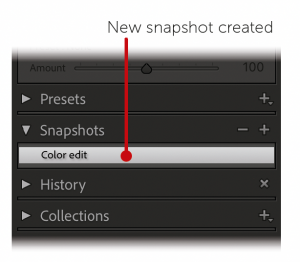
A snapshot stores this version of the edit, saving you the hassle of creating a new image or virtual copy just to experiment with an idea (see “Virtual Copies, Snapshots, and Versions” on page 220).
Convert to Black and White
There are a few ways to switch to black and white mode, such as choosing a monochrome profile, but let’s do it the easy way.
- In the Basic panel, click Black & White next to Treatment.
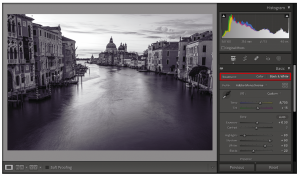
The image becomes monochrome (and, in fact, the profile switches to Adobe Monochrome as the default black and white option). Now let’s re-evaluate the photo. Two things stand out to me: I want the buildings on the left to be even brighter for more contrast, and I feel as if some of the sky detail got lost.
For the first item, we can increase the white values. Since that will also brighten the sky, we’ll drop the highlights all the way down.
- Set the Whites slider to +70.
- Set the Highlights slider to –100.
- Click the Show Highlight Clipping button to reveal where the sky is clipped.
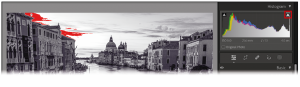
In many cases I’d be worried that those areas in the sky are completely clipped to white, but honestly, with black and white images I can be more forgiving. It’s the sun! The sun is bright! However, we’re not done yet.
- Click the Hide Highlight Clipping button to remove the clipping indicator.
Adjust Black and White Tones
Although we no longer see color in this photo, it’s still there. Lightroom has converted each color’s values to brightness amounts, which means we can still adjust the tones of each color.
- Open the B&W panel (which was formerly the HSL/Color panel when we were working on the color treatment).
- Decrease the Yellow slider to –50.
- Decrease the Orange slider to –20.
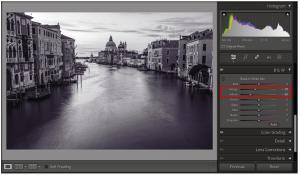
Both of these adjustments bring some of the texture back to the sunrise. If we were to decrease them further, you’d start to see artifacts that make the sky look fake.
- Click the Show Highlight Clipping button again and see that we also knocked down the clipping.
- Click the Hide Highlight Clipping button to turn off the indicator.
Add a Vignette
Why apply a vignette—traditionally a lens aberration—onto a well-exposed photo? In many cases, a subtle vignette brings more attention to the middle of the image by darkening the edges. For this photo, vignetting is common in black and white photos so it’s an accepted, artistic choice. We’re not trying to simulate an old camera, but want to evoke the feel of one.
- Open the Effects panel.
- In the Post-Crop Vignetting controls, reduce the Amount slider to –25.
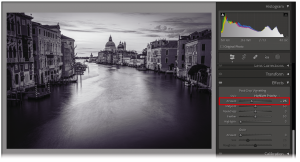
That’s a strong application of a vignette, so I always soften it by feathering the effect.
- Increase the Feather slider to +90.
Add Grain
Another aspect of traditional black and white photography is film grain. Digital photos can often exhibit noise, but that doesn’t have the same character.
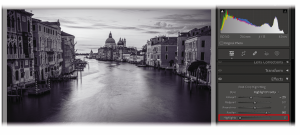
- In the Grain section of the Eff ects panel, increase the Amount slider to +25.

- In the Snapshots panel, click the plus-sign (+) button and create a new snapshot named “Black and White,” which saves this version.
- To get back to the color rendition, click the “Color edit” snapshot you created earlier.
Bonus: Fix the Geometry
Knowing me as you do from the last section, it’s a wonder I lasted this long. The lens distortion pushing the buildings outward at the edges was driving me mad. Fortunately, it’s an easy fix.
- In the Transform panel, under Upright, click the Auto button. Ahh, better.