

Eight Exposure Danger Zones and How to Correct Them July 8, 2016 – Posted in: Photography – Tags: exposure tips, glenn randall, landscape photography, outdoor exposure tips
Exposure danger zones come in two basic categories: situations where the scene is not mid tone, and situations where your sensor can’t record the wide range of brightness levels in the scene. In the examples that follow, Glenn Randall, landscape photographer and author of The Art, Craft, and Science of Great Landscape Photography, explains how to hold detail everywhere in the frame.
Note: all photos in this post are by Glenn Randall.
Exposure Danger Zones
Mostly White | Any scene that is mostly white: snow, waterfalls, white sand. You should increase exposure to compensate.
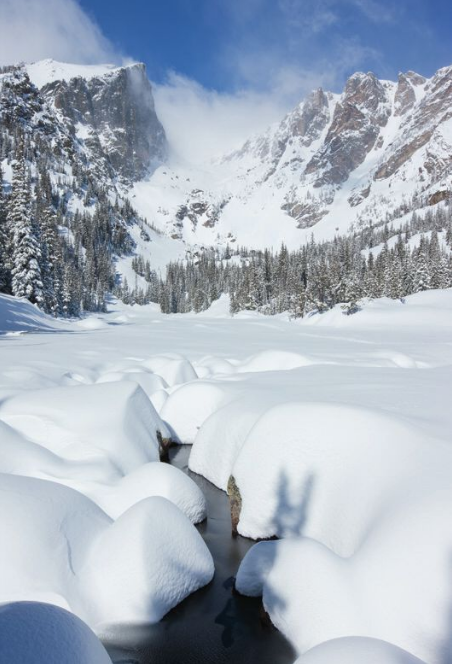
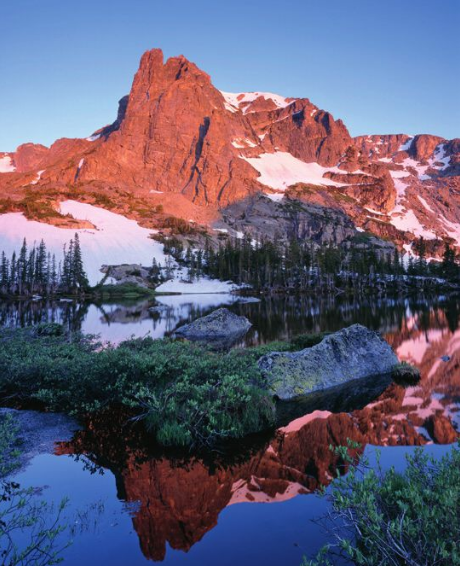
Hallett Peak from Dream Lake after a
44-inch snowfall, Rocky Mountain National Park, Colorado
Predominately Dark | Any scene that is predominately dark: very dark rock, dark-furred animals.You should decrease exposure to compensate
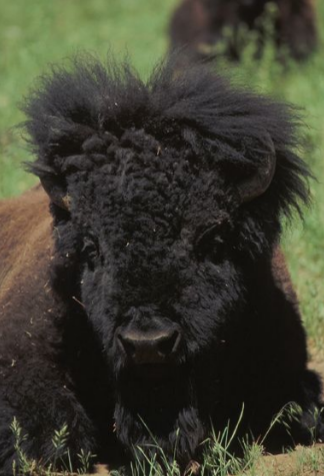
Bison near Lookout Mountain, Colorado
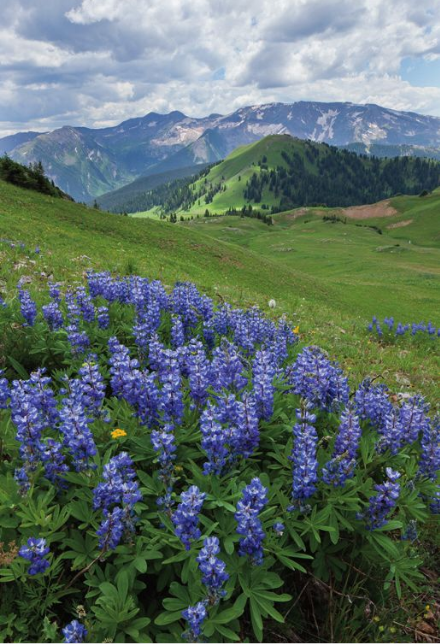
Lupines in Silver Creek Basin and Treasure and Treasury Mountains, Maroon Bells-Snowmass Wilderness, Colorado
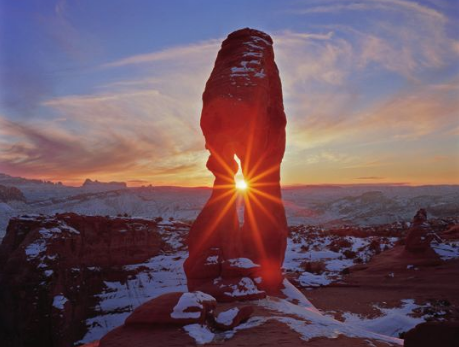
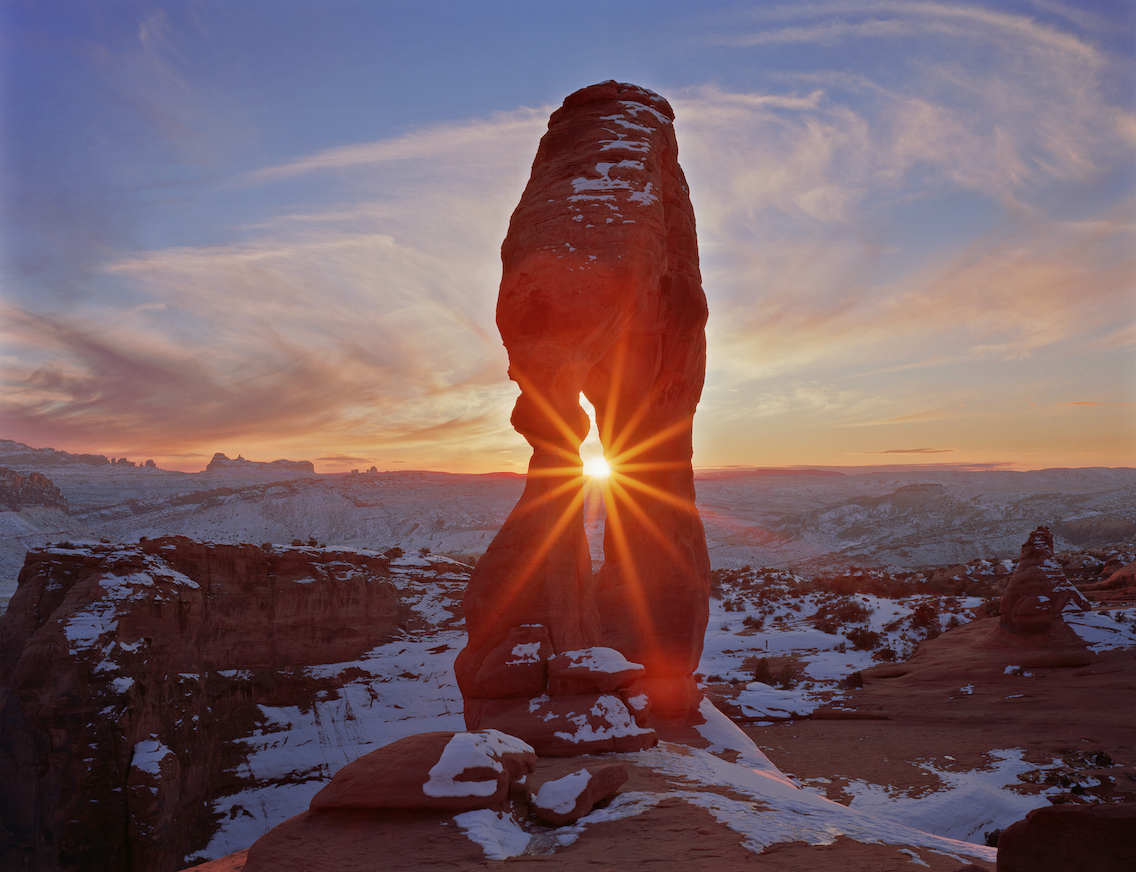
January sunset at Delicate Arch, Arches National Park, Utah
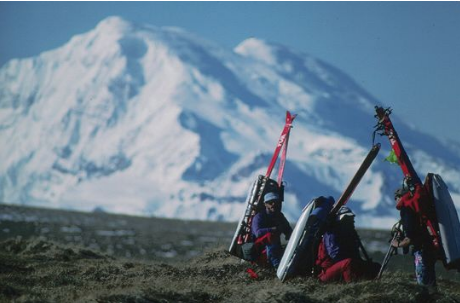
Ski mountaineers approaching Mt. Sanford, Wrangell-St. Elias National Park, Alaska. Notice how the shadowed faces have gone completely black.
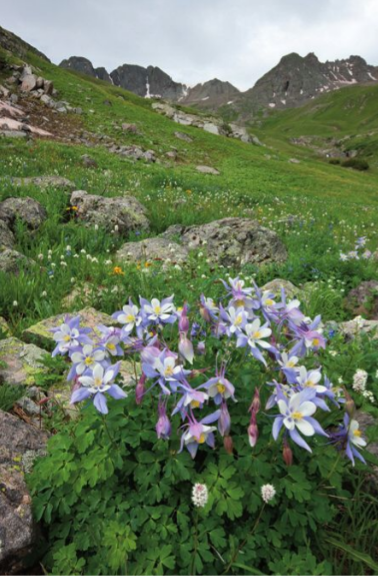
Columbines in American Basin, Handies Peak Wilderness Study Area, Colorado
Subjects and Reflections | Any scene with a pond or lake where you need a wide-angle lens to include both the subject and its reflection. The amount of light reflected from water is dramatically dependent on the angle of incidence of the light. The angle of incidence is the angle between the path of the incoming light and a line perpendicular to the surface of the water. Yes, I know that’s counterintuitive, but that’s the way scientists define it. Light with an angle of incidence of zero plunges straight down into the water; light with an angle of incidence of 90 degrees is traveling parallel to the water’s surface. Light that strikes the water at a high angle of incidence (meaning it just barely grazes the surface) is nearly all reflected. The difference in exposure between the subject and its reflection might be only 1/2 stop— easily within the range of your sensor to capture good detail everywhere. If a 50mm or longer lens (on a full-frame sensor) is wide enough to include both the subject and its reflection, you’re probably safe. If the angle of incidence is low (meaning the light is plunging steeply down into the water), much of the light is transmitted into the water and the difference in exposure between the subject and its reflection can be four or even five stops. That’s too big a difference for your sensor to straddle comfortably. If you need a 24mm or wider lens to encompass both the subject and its reflection, you’re in an exposure danger zone.
Notchtop Mountain
reflected in Lake Helene, Rocky Mountain National Park, Colorado, shot on 4×5 film with the equivalent of a 20mm lens
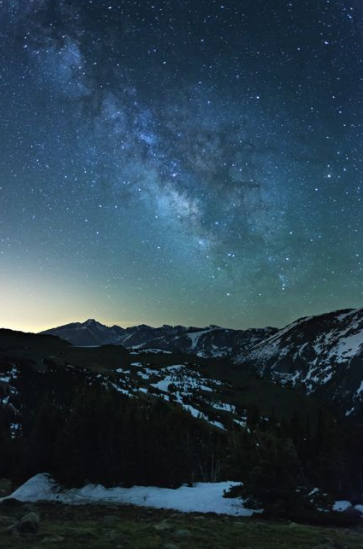
The Milky Way over
Longs Peak from Trail Ridge Road, Rocky Mountain National Park, Colorado