Learn Scott Kelby’s 7-Point System for Creating Stunning Images in Lightroom July 16, 2021 – Posted in: Photography
 Have you ever wondered how Scott Kelby edits his photographs? Or wished you could sit and watch over his shoulder as he works his Lightroom magic? Well, now is your chance. In his latest book, Scott Kelby’s Lightroom 7-Point System, he lets you in on his amazing 7-step process that he uses every time he edits an image in Lightroom. This article gives you a sneak peek into this awesome system, and if you are ready to dive in and master the system yourself, the book offers 21 lessons on how to apply Scott’s techniques to a variety of images.
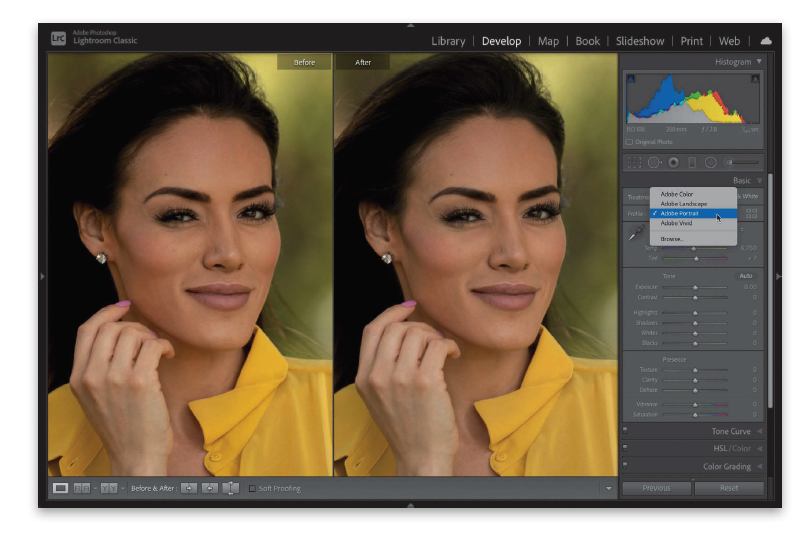
1) Assigning a RAW Profile
If you shoot in RAW, you have a distinct advantage in that you get to decide your image’s “starting place.” You get
to choose which of Adobe’s built-in RAW profiles you should use to give your image an advantage, an edge, over the
original unprocessed image and how it looks before you even begin to tweak it. If you shoot in JPEG or TIFF, you don’t
get the option to apply a RAW profile because…well…you’re not shooting in RAW, and any profile you choose to apply
in-camera (yes, you can apply built-in camera profile “looks” to your image right inside most cameras) will already be
applied when you open your image in Lightroom. So, for you, it’s going to be the Lightroom “6-Point System.”
Note: This system absolutely rocks for JPEG or TIFF images, so don’t let it throw you if you don’t shoot in RAW. However,
if you and I were at a bar, and you asked me, “Scott, should I be shooting in RAW?” I’d be like, “Absolutely!” Okay, why?
Because (without getting technical and nerdy) when you shoot in RAW, your camera captures a wider tonal range, and
later, when you’re processing your images in Lightroom, you get better results, especially in a few key areas (as you’ll
learn as we go), and you get features (like assigning profiles or choosing white balance presets after the fact) that
you can only apply to RAW images. You can push RAW images farther without damaging the images, and because a
RAW photo is kind of like the old negatives we used to get when we shot film (back when dinosaurs ruled the Earth),
your original is always protected. There are all sorts of advantages to shooting in RAW, especially in this post-processing
stage, but again—you do not have to shoot in RAW to take advantage of “the system.”
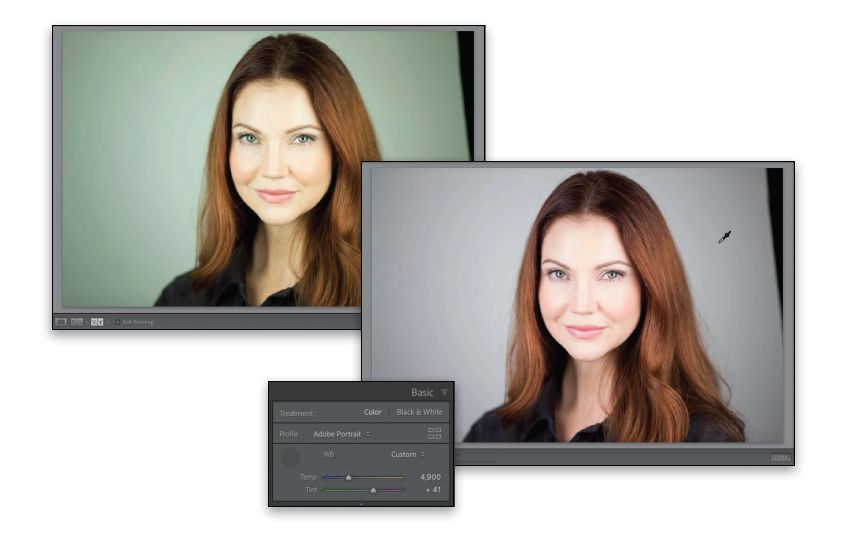
2) Getting Your Color Right
If your color’s not right…it’s wrong, so the next thing we do is get our white balance right on the money. You’ll learn a
few different ways to do this (including my favorite), and you’ll also learn when getting the proper white balance is not
the goal, but for the most part, being able to get a proper white balance in “post” is really important. By the way, “post” is
what we call everything that we do on our computers (or mobile devices) to tweak an image after we take it—it’s short
for the “post-production” stage. We just call it “post” because (a) it sounds way cooler, and (b) we can’t be bothered to
actually say two words. Anyway, that’s the second point, and it’s more important than you might think (and there’s a
reason we do it early in the process, as you’ll learn in just a few minutes).
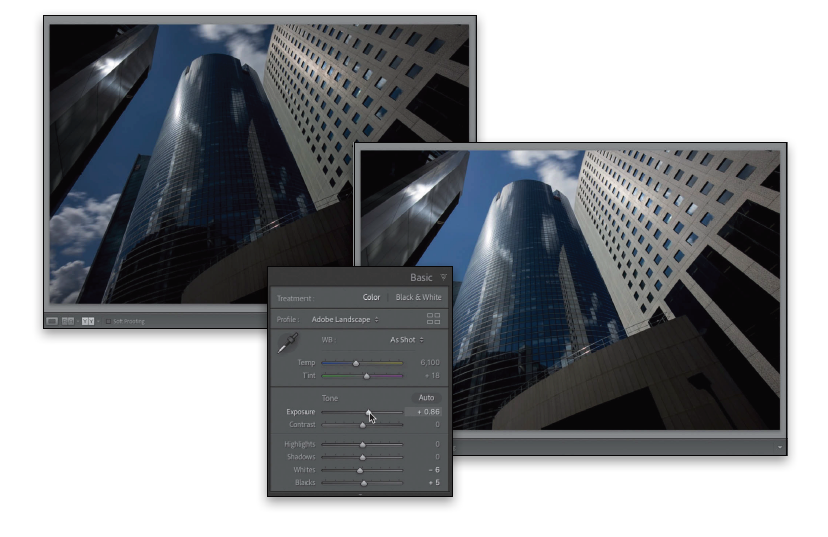
3) Expanding Your Image’s Tonal Range
This is another one of those key things we do up front—we push the brightest parts of a photo as far as we can
without actually “clipping” our highlights (letting parts of our image get so bright that the pixels in our highlight areas
are destroyed), and then we expand the darkest parts of our image as far as we can. But, if we get a little clipping in
the shadow areas (and they turn solid black), we can often look the other way and let that go. Back in the traditional
film days (when we shot from the top of Conestoga wagons), we were careful to expose for the shadow areas of our
images, and we’d let the highlights take care of themselves. Since digital photography came along, we now expose for
the highlights (to make sure they’re perfectly intact), and we let the shadows take care of themselves (if that sounds
confusing, it won’t a little later, and you’ll casually toss that phrase out at your next camera club meeting and people
will break into that slow clap at first, but then it will grow to a roar, until you’re in a full standing ovation. At least, that’s
the way I always pictured it, but then again, my character was played by George Clooney, so there’s that). Anyway, this
process of expanding your tonal range is kind of hidden, but once you learn it (it’s super-easy), you’ll use it on every
photo. I do, anyway, and it has worked so well for me that I’m portrayed by George Clooney in my dream.
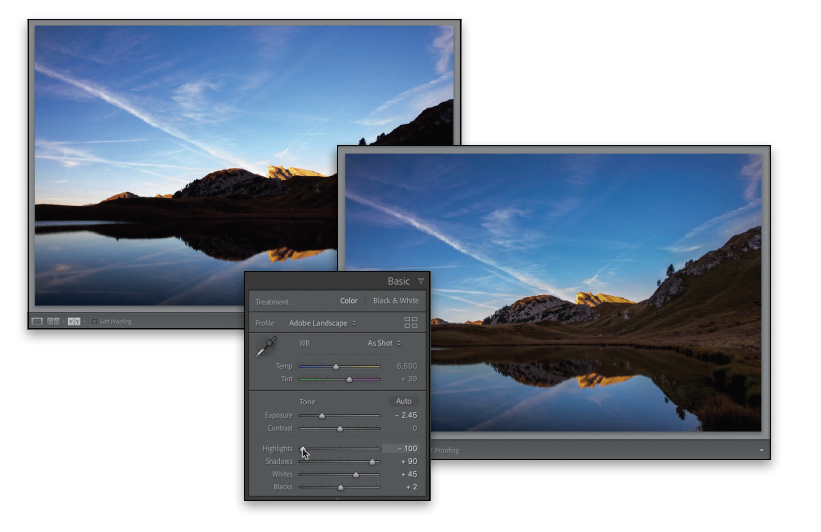
4) Dealing with Limitations Caused by the Sensor
Our eyes can see an absolutely amazing range of tones, but our camera sensors, as good as they are today, have not
nearly caught up with our eyes, which is why we often shoot backlit images (as one example). We’re standing there
looking at the backlit scene in front of us, but it doesn’t look backlit—with our subject being a dark silhouette—because
our eyes automatically adjust for the scene and everything looks fine to us. Then, we take a picture and since our sensors
don’t have that amazing range, the image that looked fine to our naked eye has our subject looking like a dark silhouette.
Sometimes we can adjust for this in-camera, but if we didn’t catch it, we fix it here in post (see how I just threw “post” out
there and it sounds pretty cool? This is the stuff I’m talking about. Take note). Anyway, another typical situation is: when
we took the shot, we let the brightest areas of our photo blow out to where there’s no detail—there are no pixels visible;
we’ve clipped the highlights. This is stuff we can usually (not always, so we still need to keep our highlight warning on
in our camera) deal with in post and recover those lost highlights. So, the fourth point of the system only kicks in if we
have problems caused by our sensor, or by not catching the problem in-camera, or whatever. It’s not about blame, it’s
about getting the problems fixed if we need to.

5) Painting with Light and Retouching
Back in the traditional darkroom days (when we used to listen to 8-track tapes and think, “Man, this is high-tech!”), this was
called “dodging and burning,” which is simply making certain areas of your image lighter or darker, but what we can do
now in Lightroom goes way beyond that. We can literally “paint with light,” and we can paint with color, and we can paint
sharpness on parts of our image, and bring out details in certain parts while we leave other parts untouched. The power
here is pretty incredible, and there are a number of different tools you’re going to learn in this fifth point that let you do
everything from fixing problems, to retouching portraits, to creating special effects.
This is one of the easiest, yet most powerful, ways to get your photos looking like you wish they did, and once you do it a
few times (applying light right where you want it, but in a much better way than simply dodging and burning), the light
bulb is going to come on for you in a big way. This alone will change the way you edit your images from here on out.
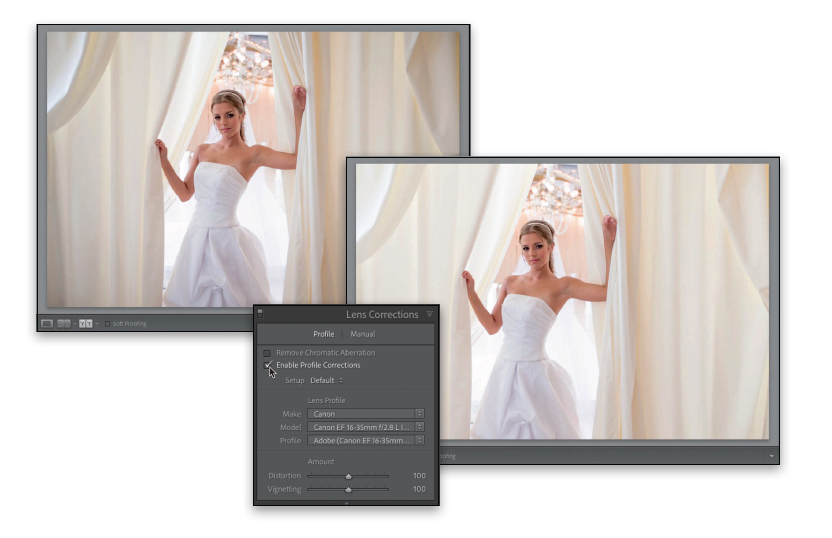
6) Fixing Lens Issues
Just like we have image issues that are caused by our camera’s sensors, we also have some often pretty severe issues
that are caused by lenses, and fixing these issues is not only super-easy, but it has a bigger impact on your final image
than you probably would have ever imagined. It’s one of those things where once you start fixing these common
lens issues, and you realize what a difference it makes in your images, you’ll not only start doing it from here on out, you’ll
go back to images you edited years ago and fix their lens issues, too. This is, in most cases, literally just the act of turning
this feature on, and maybe moving a slider or two, but man what a difference that makes. By the way, using the term
“man” is a surefire way to know that I’m a child of the ’70s, which doesn’t mean I’m in my 70s, because I certainly am
not. I’m very young and youthful in a young, youthful way. Besides, if I’m a child of the ’70s, does that mean I was
(a) born in 1979, like a glorious Pontiac Firebird rising up from the factory floor, or (b) born in 1971, making me more
of a Chrysler New Yorker (the best-selling car of ’71), in which case I actually am old, because everyone who bought
a Chrysler New Yorker back then was probably already in their 70s because that car was for “old fogies,” and cool kids
like me wanted a Dodge Challenger, or a Plymouth Barracuda, or (that’s right) a Conestoga wagon? I’m not sure where
I was going with all this, but suffice it to say, for now, lens issues are something we’re going to be dealing with because
it makes that big a difference.

7) Finishing Moves
The final point of the 7-Point System involves some finishing moves we apply at the very end of the editing process to
finish off our image. Some of it is production-type stuff (like sharpening, for example, which is something we do to
every single image) and some things are special effect–type stuff that give our image a specific look, or feel, or address
some other piece of our puzzle that makes our image look finished and ready to deliver to the client, or add to our
portfolios, or just post on Instagram. Believe it or not, we didn’t have Instagram when I grew up (back in the 1840s).
Everything was all about the telegram, and the California Gold Rush, and stuff like that, so we hardly had time to get
on the Internet back then. We spent a lot of time churning butter (I have no idea why). Perhaps I’ve gotten a bit off
track here. Anyway, those are your seven points, and the rest of the book launches into the 21 lessons where we work
through the 7-Point system for each image.