Understanding Luminar AI Templates November 12, 2021 – Posted in: Photography
The following is an excerpt from The Photographer’s Guide to Luminar AI by Jeff Carlson.
Here’s one of my editing biases: I don’t gravitate to presets, or in this application’s parlance, templates.
Luminar includes many pre-made templates that apply specific appearances simply by clicking one button. And unlike similar implementations in other apps, templates in Luminar AI are given a boost by the AI engine. When you open a photo in the Templates interface, Luminar examines the image and makes suggestions based on what it finds, such as sunset landscapes or portraits of people.
Still, why would I want to make my photos look like someone else’s? I’ve always been more comfortable editing each photo based on what the image needs. I’m not interested in what Well-Known Photographer X thinks is an awesome color treatment.
But then it clicked. I was looking at templates the wrong way. Think of them as automation, not gimmicks. (Well, some are definitely gimmicks, but stay with me here.) The power of templates is to make a complex series of edits that you know you’ll want to replicate on many other photos.
That’s different from syncing adjustments between shots (see Chapter 8). Let’s say you shoot night skies or portraits on a regular basis, two situations where you apply many of the same edits as a baseline (adjusting blacks, whites, and color temperature for the former, and face lighting, smart contrast, and skin smoothing for the latter). Syncing is great when you have 100 images from the same photo shoot, but templates are better if you capture 100 photos every few weeks.
You can certainly apply the built-in templates and install new ones, even from Well-Known Photographer X, but the real power lies in easily creating and applying your own. Or, at the very least, you can use a template as a starting point and then modify its adjustments to your liking.
I haven’t suddenly become a hardcore templates fan, but I can appreciate how they can be a useful tool in your editing arsenal.
Apply a Template
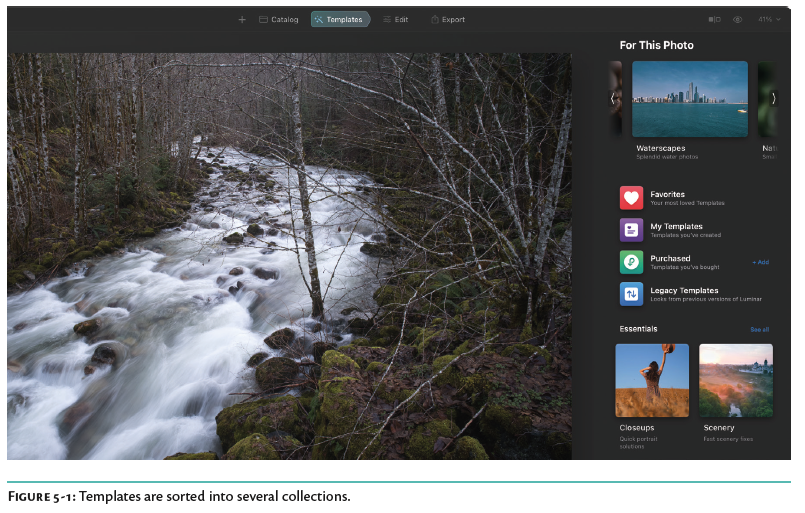
Select an image and click the Templates button (or press the T key) at the top of the screen to view the Templates options in the sidebar. Based on the content of the photo, Luminar will suggest a few template collections in the For This Photo section (Figure 5-1). (Sometimes the AI is spot-on, and sometimes the results seem random.) To apply a Look, follow these steps:
1. Scroll the sidebar to browse the categories and collections, and then click one of the collections to reveal its templates.
2. Click a template to apply it to the image. If you want to try another template, select it in the sidebar. Only one template can be applied at a time, so the next one you choose replaces the current one.
3. Once a template is active, you can adjust its opacity by dragging the slider that appears at the bottom of the panel (Figure 5-2).
 If you decide a template isn’t the right approach for the photo, use Undo (Edit > Undo); click the Item
![]() button at the bottom of the sidebar and choose Reset Adjustments (or choose Image > Adjustments > Revert to Original); or go to the History panel and step back to the point before you applied the template.
button at the bottom of the sidebar and choose Reset Adjustments (or choose Image > Adjustments > Revert to Original); or go to the History panel and step back to the point before you applied the template.
 Favorite Templates
It’s likely you’ll return to a handful of templates, which you can stash in one convenient place. Click the Favorite ![]() button at the bottom of the sidebar to add it to the Favorites collection. You can then select the Favorites collection in the sidebar and reveal only the ones you like most.
button at the bottom of the sidebar to add it to the Favorites collection. You can then select the Favorites collection in the sidebar and reveal only the ones you like most.
Create Your Own Templates
Here’s what convinced me that templates can be more than just one-click presets. When you’ve made a lot of edits and want the same look for other photos captured at the same time, or you want to use consistent looks in a project or as a personal style, creating a new template saves a lot of time.
Using the Edit tools, apply your adjustments. At the bottom of the sidebar, you’ll see “My Template (edited).” Next, do the following:
 1. Click the Item
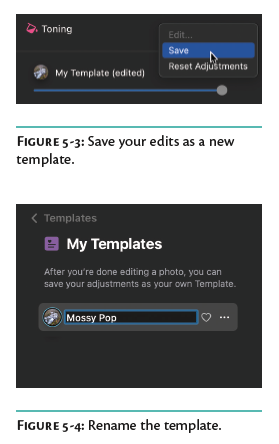
 ![]() button at the bottom of the sidebar and choose Save (Figure 5-3). The name becomes “My Template edit.”
button at the bottom of the sidebar and choose Save (Figure 5-3). The name becomes “My Template edit.”
2. Click the Templates button at the top of the screen and click the My Templates category.
3. Click the Item ![]() button next to the new saved template and choose Rename. Type a new name and press Return/Enter (Figure 5-4).
button next to the new saved template and choose Rename. Type a new name and press Return/Enter (Figure 5-4).
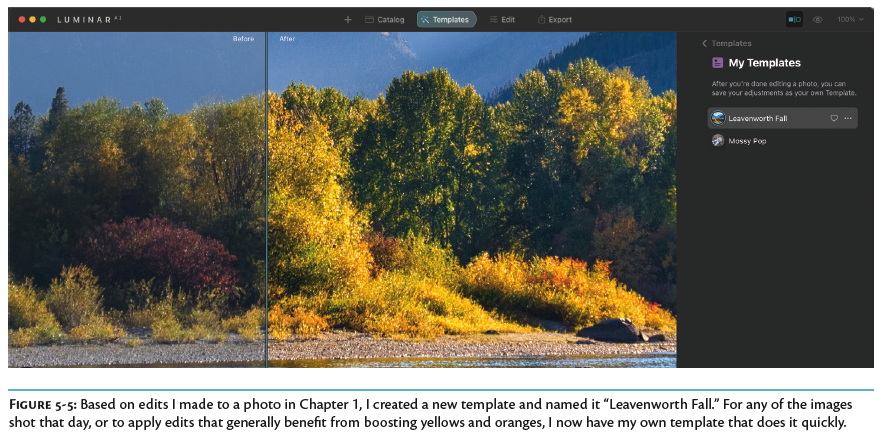
4. Open another image that would benefit from the same template, go to the My Templates list, and select the one you just made (Figure 5-5).
A few important notes about templates:
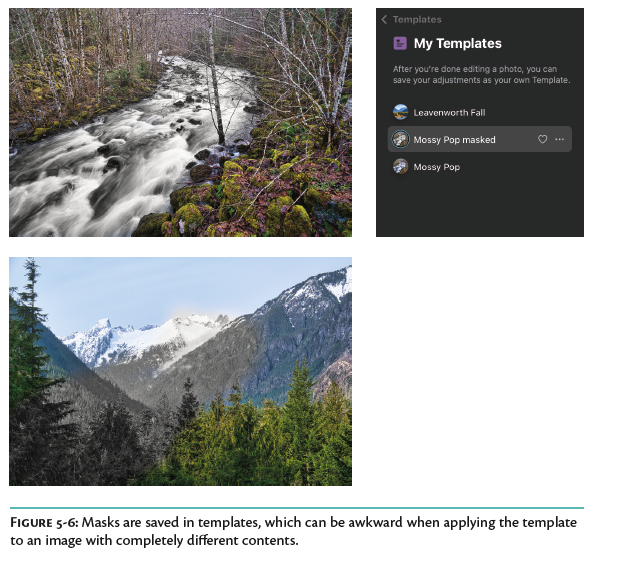
• During the course of editing, you may have applied a mask to a tool (see Chapter 7) to limit the tool’s effect to portions of the image. When you create a new template, the mask is also included. If you added a mask and set the Saturation value to –100 to make an area black and white, applying that saved template on another image makes the same area of the photo black and white (Figure 5-6). Unless you were shooting on a tripod, the area you masked may be in a different spot in another shot, so the mask won’t line up. However, you can use the Paint Mask tool to define the correct area.
• If you apply a template and then decide to change some of the adjustments using the Edit tools, you can save a new version of the template, but you can’t update the previous saved template. For example, let’s say you save the new Mossy Pop template shown in Figure 5-4, then add a Vignette to the image you’re editing. The template name at the bottom of the sidebar reads “Mossy Pop (edited).” If you choose Save from the Item menu, a new “Mossy Pop edit” template appears in the My Templates category.
• Use the same Item ![]() button in the My Templates list to delete the template. There’s also an Edit button in that pop-up menu, but it just takes you to the Edit tools; it’s not a way to edit the saved template.
button in the My Templates list to delete the template. There’s also an Edit button in that pop-up menu, but it just takes you to the Edit tools; it’s not a way to edit the saved template.
 Export and Import Custom Templates
Behind the scenes, a Luminar template is essentially a text file that specifies which tools are in use and what their settings are. If you use Luminar on another computer (a separate laptop while traveling, for instance), you can export your custom templates and import them into another copy of the software. Or, you can send a template to a friend. Here’s how:
 1. In the My Templates list, click the Item
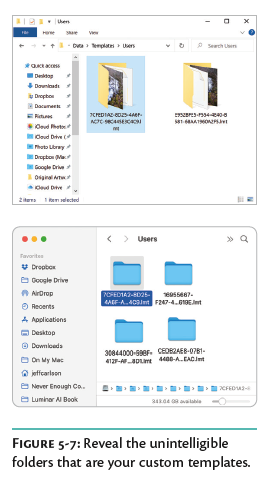
 ![]() button next to one and choose Show in Finder/Explorer. You’ll see a folder with an incomprehensible title—that’s the template. (In Windows, you’re taken to the folder; in macOS, you’re put inside that folder.)
button next to one and choose Show in Finder/Explorer. You’ll see a folder with an incomprehensible title—that’s the template. (In Windows, you’re taken to the folder; in macOS, you’re put inside that folder.)
2. Copy that folder (which includes a text file, resource file, and icon thumbnail image) and send it to the other computer or your friend’s computer (Figure 5-7).
3. On the other machine, reveal the My Templates location on disk by clicking the Item![]() button next to one and choose Show in Finder/ Explorer.
button next to one and choose Show in Finder/ Explorer.
4. Put the new template folder you copied into the same location as other custom templates (they will be in a Users folder).
5. Restart Luminar AI and view the My Templates list to access the added template.
Skylum and others also offer template collections (free or for sale), which are wrapped in a special file package. Here’s how to import those:
1. In the Templates sidebar, click +Add next to the Purchased category, which opens the Luminar Marketplace on the web.
2. Download the .ltc (Luminar Template Collection) file.
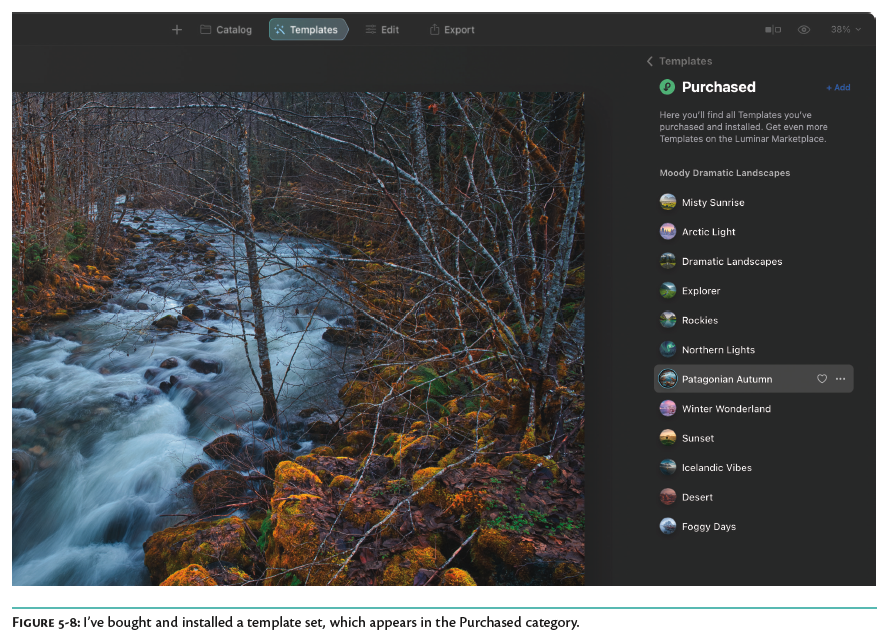
3. In Luminar, choose File > Add Luminar AI Template Collection, locate the file, and click Open. The templates appear in their own named collection in the Purchased panel (Figure 5-8).