Portraits – Make Great Photos Excerpt February 6, 2019 – Posted in: Photography – Tags: alan hess, Group Photos, Make Great Photos, portraits
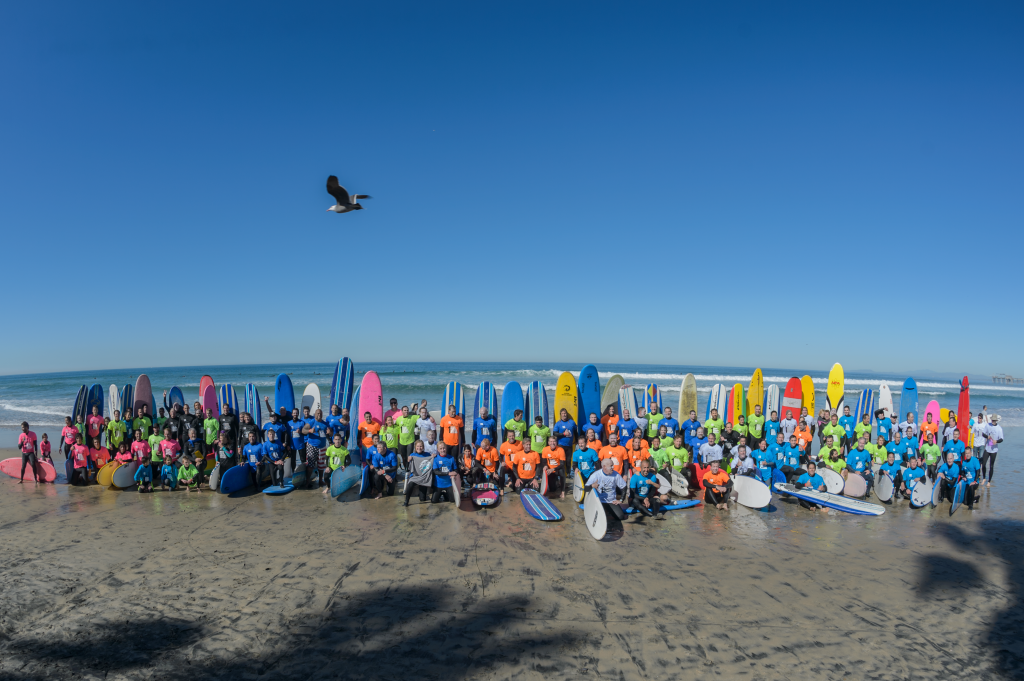
Figure 7 In this huge group, some people are not looking at me (or even anywhere close to my direction). I made sure my focus was in the middle of the group and used a very deep depth of field to make sure everyone was in focus. The seagull flying overhead was just luck.
1/250 second; F/11; ISO 400
This blog post is excerpted from the book Make Great Photos by Alan Hess.
Indoor Portraits
The challenge with photographing people inside is the potential lack of (or poor quality of) light. You either need to have natural light coming in through a door or window, enough available light from lamps or overhead lights, or you need to bring your own light. Many times an indoor portrait can use a combination of available light and some flash.
Lens: When shooting inside and using a flash, remember that the flash has limited power and won’t reach the subject if you are not shooting from too far away. Also, the flash is on the camera, so when using a long lens, the farther away you are, the smaller the light source of the flash becomes; thus, the harder the quality of that light. Many of the indoor portraits I take are shot using a 24–70mm lens, and I try to stay closer to 70mm (Figure 1). Exposure mode: I use aperture priority mode with a deep-enough aperture to get the person in focus. I will increase the ISO so that the flash doesn’t have to work so hard. Here are some other tips to help with indoor portraits:
- Flash on camera: If you want to take photos of people inside, at some point you are going to have to use a flash. I suggest buying one and practicing with it at home so you are familiar with the controls and how it works. The most important thing your flash head needs to be able to do is tilt and rotate so you can aim the flash independently of where the lens is pointing.
- Bounce light off the ceiling: Look for large surfaces above and to the sides of your subject when photographing a person (Figure 2). These can be used to bounce the light. If there aren’t any surfaces and the ceilings are very high, that’s when I use my secret weapon: the Rogue FlashBender.
- Look for windows: Window light is great, if you can find it. Look for light coming in through the window, then place your subject just in the edge of the light (you don’t want everything to be blasted with diffused sunlight!).
- White balance is key: When you shoot inside, chances are there will be a mixture of lighting types that might yield weird colors (Figure 3). Check the manual for directions on how to set a custom white balance for your camera. One quick way to see the best white balance for your scene is to turn on the live view, look at the monitor on the back of the camera, then start to cycle through the white balance settings and see which one looks the best. Check your camera manual for instructions on how to adjust white balance, but usually you press the White Balance button and rotate the main dial. The camera will show the current scene on the back of the camera with the different white balance settings applied, so you can easily make a choice as to which one you like.
Figure 1 This photo of actor Mark Christopher Lawrence was taken with the camera flash. While the light isn’t very hard, it isn’t very soft, either. This is due to the small size of the flash and how close I was to Mark when I took the photo. 1/180 second; F/5.6; ISO 400

Figure 2 It’s always great to photograph someone who has just won an award. For this photo, taken during a large conference, I looked for a backdrop that would give some meaning to the photo. I aimed the flash over the subjects’ heads and bounced the light from the ceiling. 1/125 second; F/5.6; ISO 1600
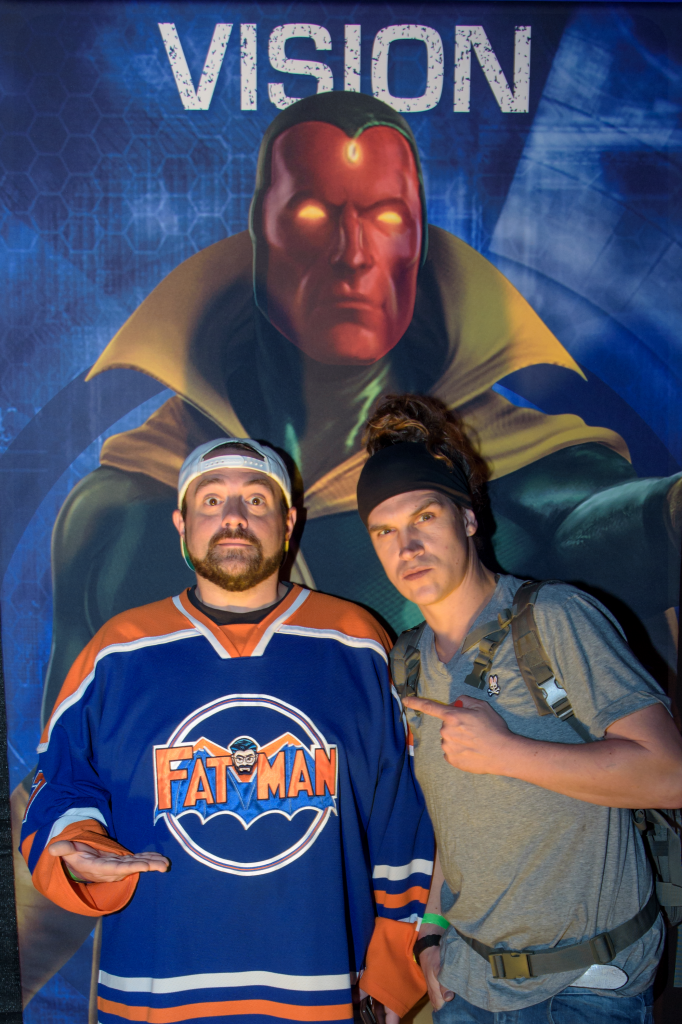
Figure 3 This portrait of Kevin and Jason was taken during their appearance at a comic-based event. This photo is lit with a combination of the different types of lighting in the room, including the lighting used to illuminate the poster they are standing in front of and some fill flash from the speedlight on my camera. I had to be careful to only use partial power on the flash so the photo wouldn’t be overexposed. I used spot metering on their faces combined with aperture priority and reduced the power from the flash to 1/4. 1/80 second; F/6.3; ISO 800
Outdoor Portraits
Photographing outside can be a lot easier than photographing inside because of the availability of light.
The issue outside, however, is that there can be too little or too much light. The best time to shoot portraits outside is when there is cloud cover that diffuses the sunlight. But if you plan to shoot outside under clear, bright skies, make sure your subjects are in the shade (Figures 4–6).
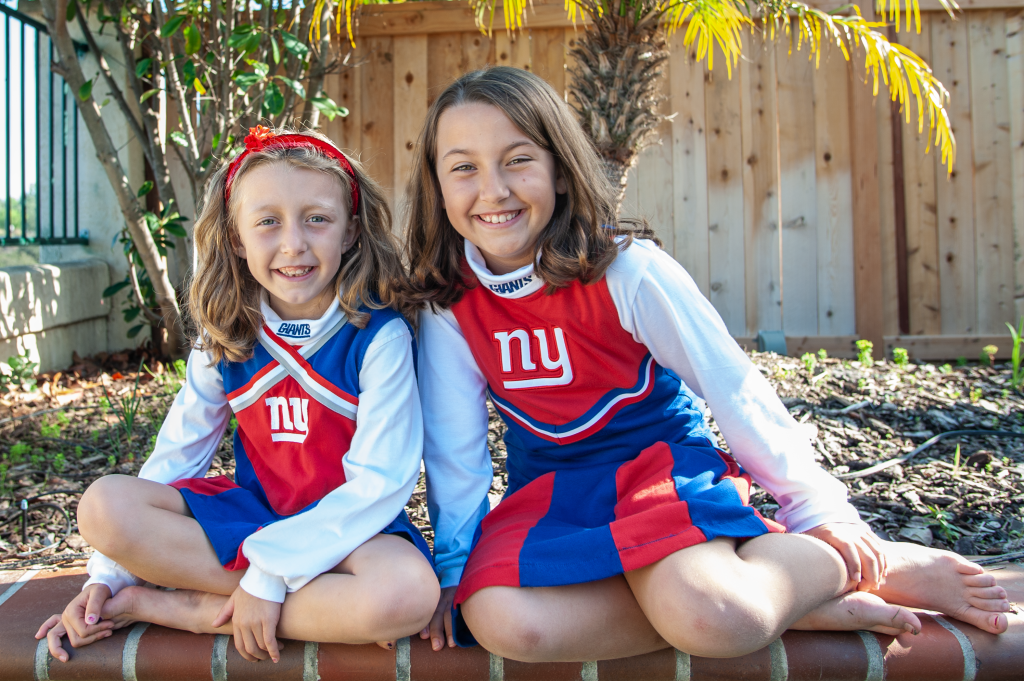
Figure 4 I photographed these sisters in the shade of a tree in their backyard. To help with the light, I had an assistant hold a diffuser so there were no bright spots from the sun. I used matrix metering and put the focus spot right on the eye of the sister on the left. 1/125 second; F/4.5; ISO 200
Figure 5 Photographing Mia in the local park was tough because it was the middle of the day and there were no clouds in the sky. I placed her as close to the hedge as possible and used a shallow depth of field to get this portrait.
You can see the setup in Figure 6
1/200 second; F/3.2; ISO 200
Figure 6 Here, you can see how bright the day was and where I placed Mia to get the best results.
Group Portraits
A group portrait might be the most difficult type of portrait to take due to human nature. It is very difficult to get everyone looking at the right place with the right expression at the same time. The more people in the group, the more difficult it becomes.
- Get their attention: This might be the hardest skill to accomplish in this whole book. It is nearly impossible to get everyone’s attention at the same time. I usually have to shout to get (and hold) their attention while I take the photo.
- Take a series of photos: Don’t take just one photo and hope you got the best shot. A better bet is to take a series of photos in quick succession and hope that everybody is looking at you in at least one of the shots (Figure 7).
- Stairs are a gift: One of the issues with group photos is that it’s difficult to layer and stagger people in lines and still see everyone, especially people in the back. Stairs are a great way to give the people in the back rows a bit more height. As you can see in Figure 8, I shot this group on stairs. It works great; just make sure the depth of field is deep enough to get everyone in focus.
- Use fill flash outside: One of the more difficult photos to take is when the group is backlit and their faces are in in deep shadow. One way to solve the issue is to move the people, but if that isn’t possible, a little touch of fill flash can really make the photo look more natural and open up the shadows. The secret is to set the flash to manual power and only use a little power. In Figure 9, I used a touch of fill flash to lighten up the riders because we wanted to keep the water at their back.
Figure 7 In this huge group, some people are not looking at me (or even anywhere close to my direction). I made sure my focus was in the middle of the group and used a very deep depth of field to make sure everyone was in focus. The seagull flying overhead was just luck.
1/250 second; F/11; ISO 400
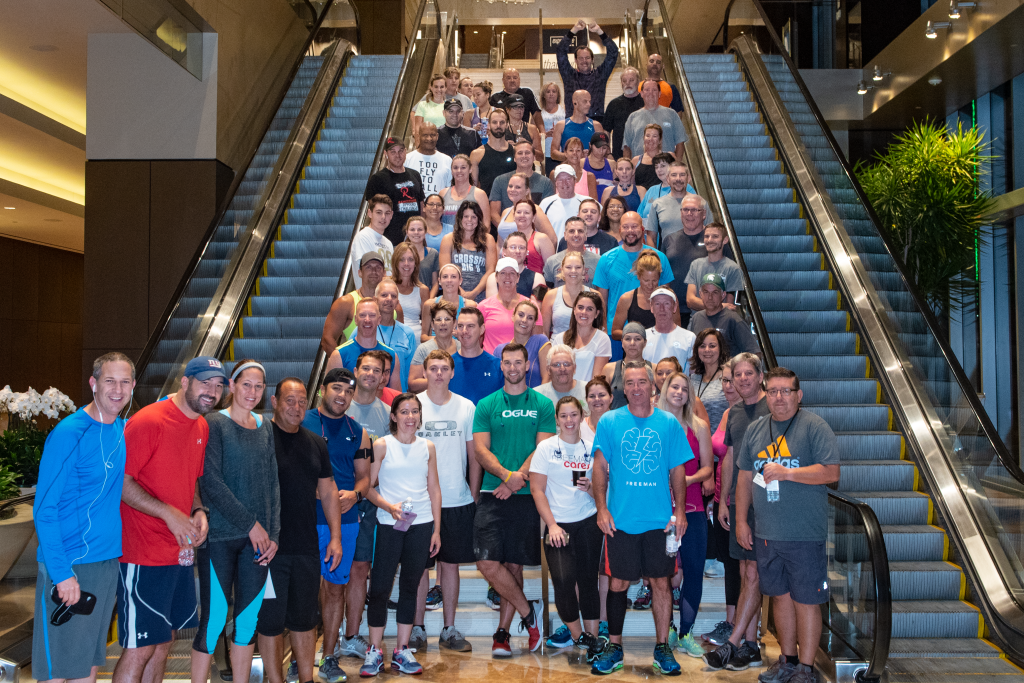
Figure 8 A staircase can be very helpful in making everyone visible in a big group shot. 1/25 second; F/11; ISO 1600

Figure 9 A smaller group shot outside after a ride. I had to make sure that they were all in focus and that the bright sky didn’t cause the shot to be underexposed. When you have an area of very bright sky, the camera will try to compensate by making it darker, and in doing so, will make the subject darker as well. I added a touch of flash to create a more balanced exposure.
1/200 second; F/10; ISO 640